Nine Raspberry Pi Projects for Learning Linux, Python and Networking
- Published
- Author
- Usman Qamar
- Reads
- 447
Nine Raspberry Pi builds, from a Samba NAS to a Docker host and a sensor-driven robot, with difficulty ratings and time estimates for each.
The fastest way to get comfortable with Linux, Python and networking is rarely a command reference. It's a small project that breaks in interesting ways when you touch the wrong file. The Raspberry Pi suits that approach: it runs a full Linux distribution, sits on your home network, and exposes GPIO pins when you want to move into hardware. The nine projects below are grouped by the kind of skill they build. The finished system matters less than what you pick up while getting it running.
Storage and Web Services
NAS With Automated Backups
Store, share and automatically back up your files.
Difficulty: Medium · Time required: 2-3 hrs
What you'll learn: network file sharing, Linux storage and permissions, automated backups.
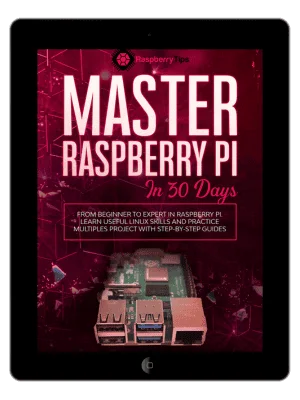
A network-attached storage box is essentially a set of drives on your LAN that every device in the house can reach. Commercial NAS units usually protect data with RAID, so a single drive failure doesn't take your files with it. A Raspberry Pi can't match that out of the box, but it can get close on a budget if you pair it with a backup script and a disciplined schedule.
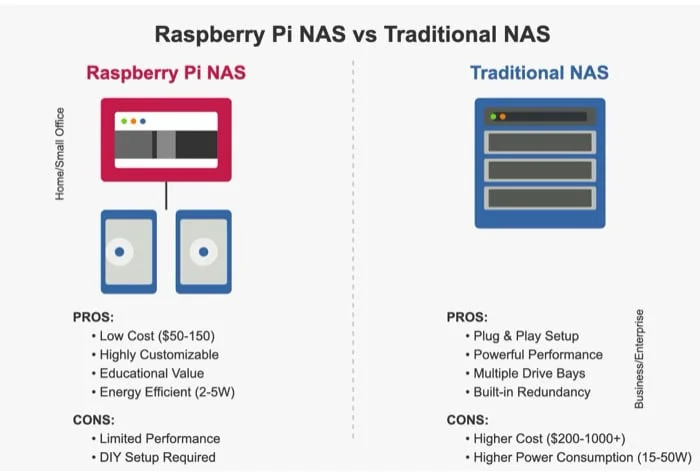
You have two broad routes. The first is a ready-made appliance layer. OpenMediaVault and Nextcloud do most of the heavy lifting and let you stand up a NAS without deep Linux knowledge. The second is manual. Samba gives you a file-sharing service, but you'll need to be comfortable with the Linux file system, user permissions and the command line. That's more work, and it's also where most of the learning happens.
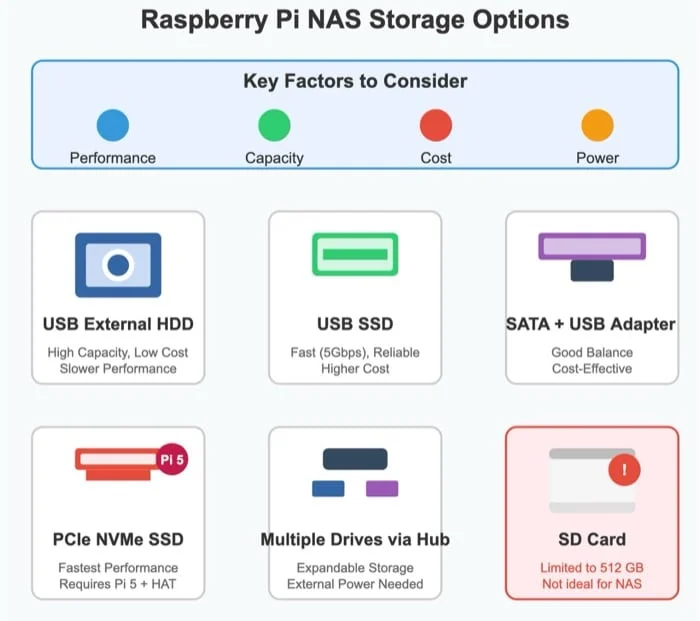
Storage capacity is the other decision. A Pi is usually paired with either a portable hard disk or an NVMe SSD, and the connection method and power draw of each will shape how reliable the setup feels under sustained writes.
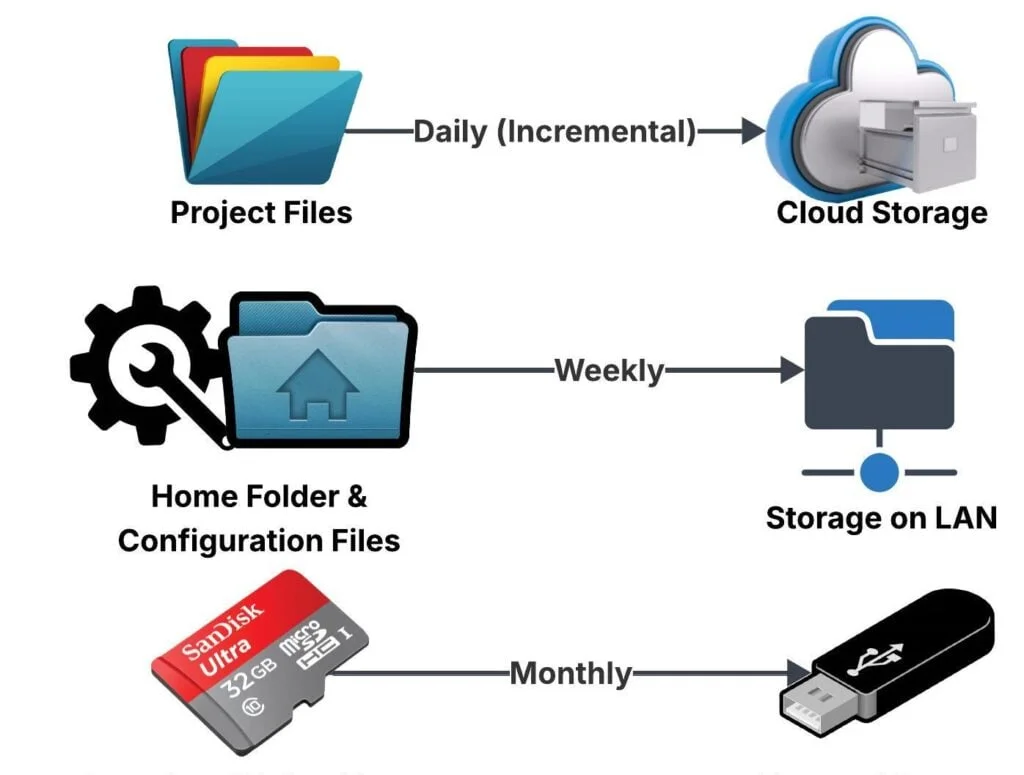
For backups, the tool set is well established. rclone handles cloud destinations, rsnapshot provides incremental snapshots on local or network storage, and rsync is the simple option for building your own scheme. Building the backup layer yourself lets you set priorities and schedules per file type, which a generic appliance may not let you do. Treat that flexibility as a responsibility: a backup you've never restored from is an untested assumption.
Hosting Your Own Website
Host a website and learn how the web works.
Difficulty: Hard · Time required: 5-11 hrs
What you'll learn: web servers and HTTP, DNS and domain names, HTTPS and internet networking.
Because the Pi runs Raspberry Pi OS, a Linux server is already in place. That makes it a practical host for a personal site, and it forces you to deal with every layer between a browser and your code.
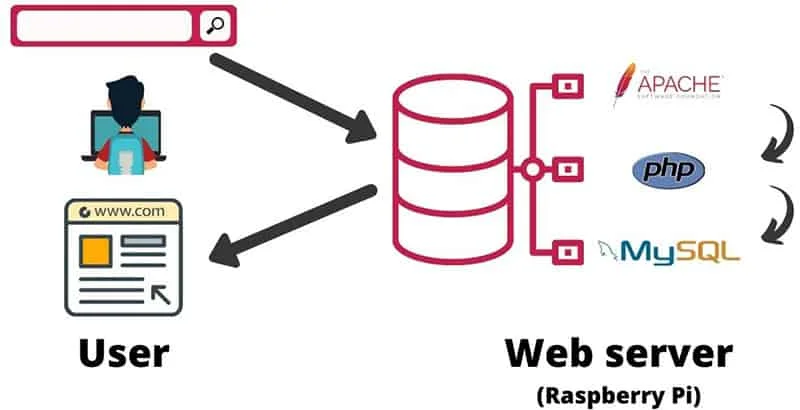
The first decision is the web server. Nginx and Apache are the two common choices. A database such as MySQL and a backend language such as PHP are often added alongside. But the server is only one part of what's usually called a stack, and the stack is where the design choices sit. The source material breaks it into four elements:
- Web server: the software that handles HTTP requests, such as Nginx or Apache.
- Frontend: the user-facing layer that defines layout, images and buttons, typically built with HTML, CSS and JavaScript, sometimes with React, Vue or Angular.
- Backend: the code that determines behaviour and what happens when a user clicks something. Node.js, Python, PHP and C# are all common here.
- Database: where application data lives. PostgreSQL, MySQL, MongoDB and SQLite are typical options.
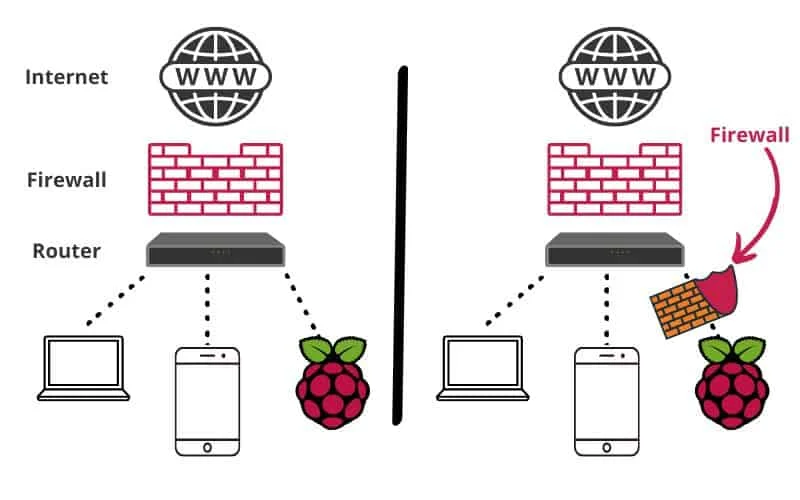
Once the site runs, it's reachable at the Pi's IP address from any browser on your home network. Reaching it from outside is a separate job. You'll need to forward HTTP traffic from the Pi's address through your router, open the matching rule in the router's firewall, and register a domain name so visitors don't need to type an IP address. This is the stretch where DNS and port forwarding stop being abstract, and it's why this project tends to absorb a lot of free time.
Local Git Server
Host your own code and learn Git and SSH.
Difficulty: Easy · Time required: 1-2 hrs
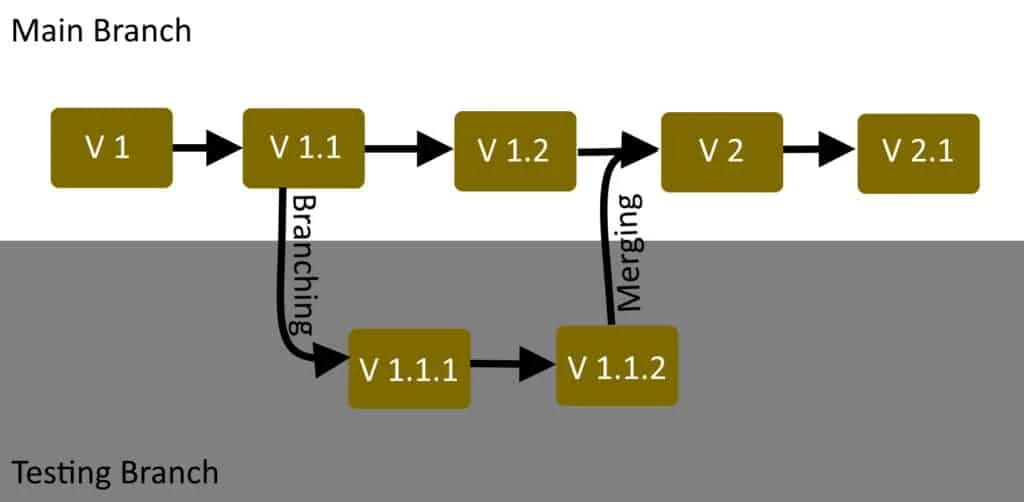
What you'll learn: Git and version control, SSH authentication, repository management.
Version control is one of those skills that takes a day to adopt and years to appreciate. Git removes the habit of renaming files to final_v3_real.py and makes it possible to roll back a bad change. GitHub is the best-known Git host, but it's a public service. A Pi can act as a private remote for your own projects, which gives you a second copy of your work on hardware you control.
There are two ways to go. GitLab installs as a complete package with a web interface for managing projects, which suits most users. The leaner option is to install Git alone, which means you set up the server side yourself. The second path is the one that teaches more about how Git's transport and authentication actually work. Configuring SSH keys lets you push and pull from any PC on your network without passwords, and it's the same mechanism you'll meet on production servers later.
For a first project, this one has a useful side effect. Once your code has a constant remote backup, trying the other projects in this list carries less risk.
Networking and Connectivity
Raspberry Pi VPN Gateway
Securely connect to your home network from anywhere.
Difficulty: Hard · Time required: 1-2 hrs
What you'll learn: VPNs and encrypted tunnels, IP routing and NAT, network security.
A VPN routes your traffic through a remote server, which then makes requests on your behalf and returns the responses. Installing VPN client software on every device is tedious. A more instructive approach is to make the Pi the single point where traffic enters the VPN, so every device that joins its network is covered automatically.
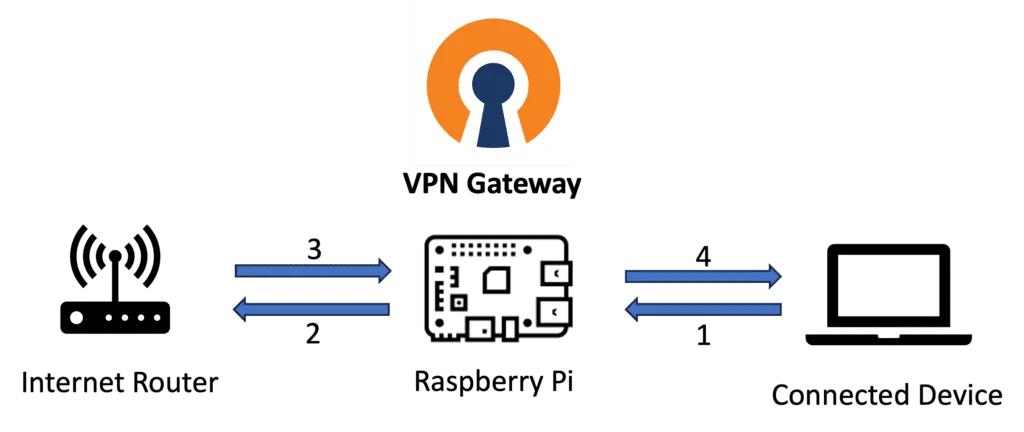
The setup starts with choosing a provider. SurfsharkVPN, ExpressVPN, NordVPN and ProtonVPN are among those named in the source. OpenVPN then gives the Pi command-line access to the service once you've authenticated. From there, the Pi's Wi-Fi interface can be switched into access point mode, so it acts as a hotspot. Any device that connects through it has its internet traffic routed through the VPN service. The routing and NAT configuration is where the networking concepts get real.
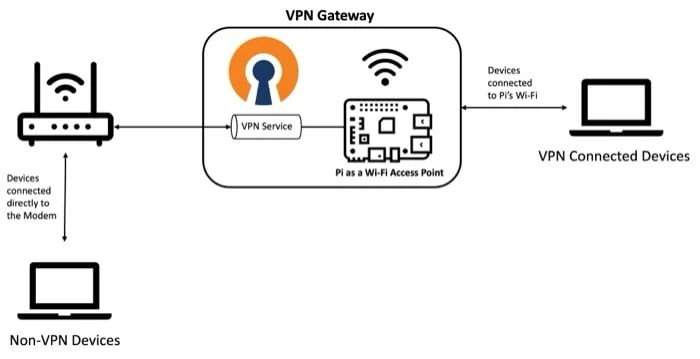
A different use case goes the other way. Mesh VPN services such as Tailscale, or a self-built WireGuard tunnel, let you reach devices on your home network while you're away. That's often the more practical option if your goal is remote access rather than routing outbound traffic. Either way, you're building something that stays on 24/7, so the Pi's own update and access hygiene matter as much as the tunnel itself.
Send Notifications From Your Raspberry Pi
Get alerts whenever something important happens.
Difficulty: Easy · Time required: 1-2 hrs
What you'll learn: APIs and webhooks, Linux event monitoring, Python scripting.
This is a small project with a wide reach. A monitoring script that can tell you when something changes turns a Pi from a box you check into a box that reports to you. Nagios is one option for network monitoring that alerts you when a device behaves out of pattern.
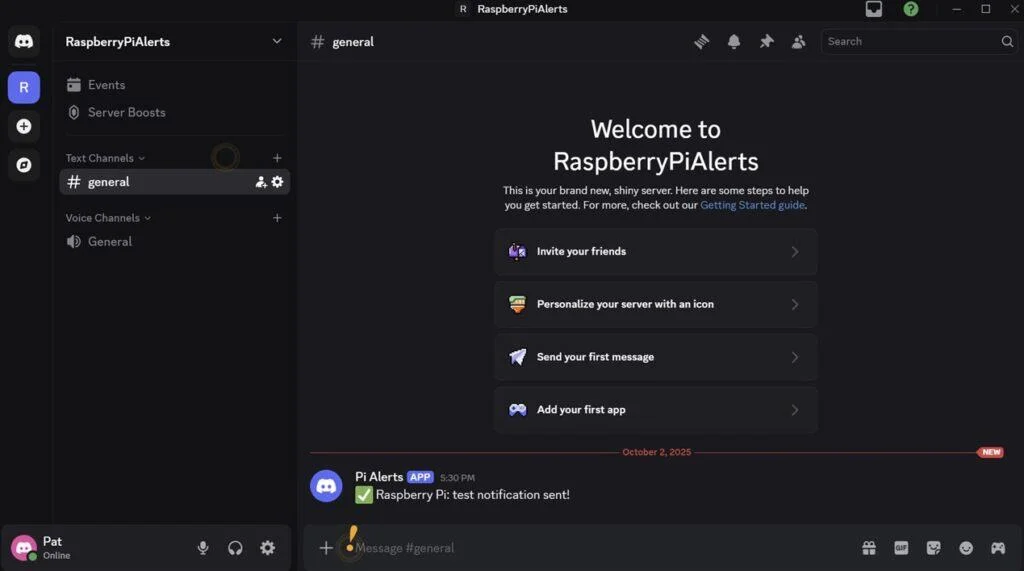
The most common approach is to send messages through a chat service. Telegram and Discord both work. You create a Discord channel, then write a Python program that posts to it. The key concept is the webhook or API call, which is the same pattern used by a large share of modern tooling.
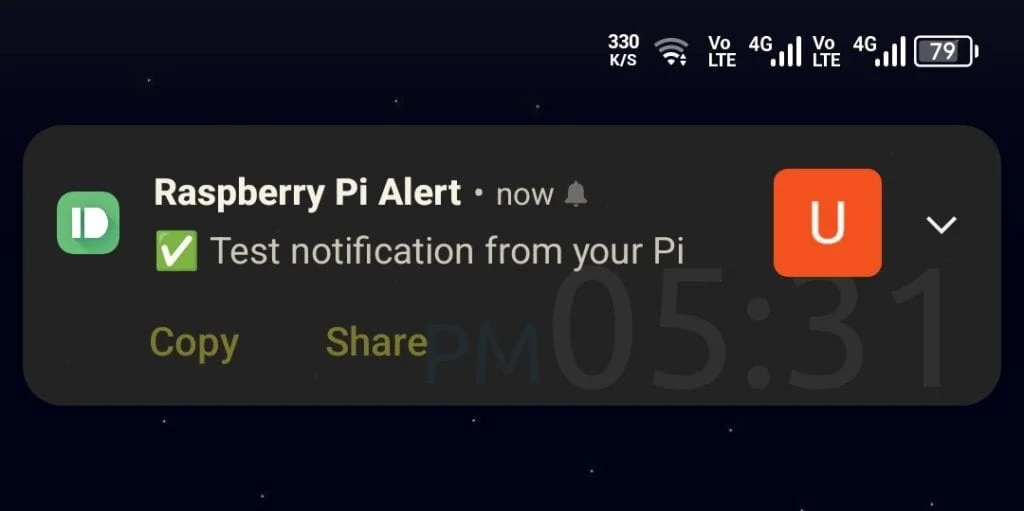
Pushbullet takes a different angle. It's designed for moving data between devices, and one of its features forwards notifications from one device to another. Its Python libraries let a script on the Pi push alerts to every device you've linked, which gives you a combined notification feed.
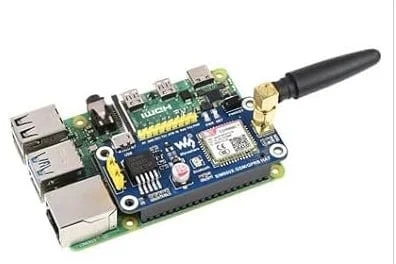
Most of these methods depend on an internet connection, and that's the limitation worth designing around. For remote outdoor installations such as a weather station or a wildlife monitoring setup, a GSM HAT is the more sensible choice. It can carry data over the cellular network or send SMS messages directly to a phone, so the alert path doesn't rely on a home broadband link.
Automation and Containers
Home Automation Server
Connect sensors and devices to create smart automations.
Difficulty: Medium · Time required: 5-10 hrs
What you'll learn: MQTT and IoT communication, sensors and GPIO, automation and event-driven programming.
In this project the Pi becomes the central controller for smart devices. It takes input from sensors such as light, temperature, proximity or cameras, then decides what to switch on or off: lights, air conditioning, curtains and similar. The pattern is event-driven. A sensor reports a state, a rule evaluates it, and an actuator responds.
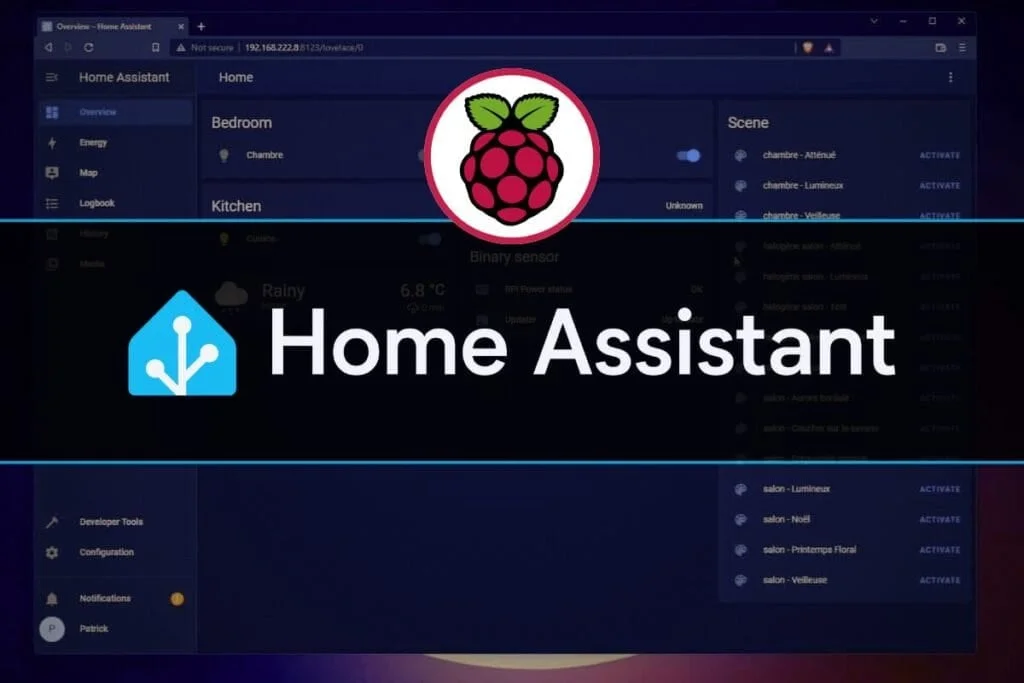
The software side is more settled than the hardware side. Home Assistant and openHAB are both ready-made platforms that you install on the Pi, then configure around the sensors and devices you own. Writing your own controller from scratch is possible, but the platforms already handle device integrations, and the learning shifts to rule design and integration.
Connectivity is where protocol knowledge pays off. The Pi can talk to devices over Bluetooth or Wi-Fi, and MQTT is a lightweight messaging protocol commonly used for IoT. Running an MQTT broker on the Pi, such as Mosquitto, gives your sensors and controllers a shared message bus. Zigbee-based devices add another layer, typically through a coordinator that bridges into the same system.

Installing the software is usually quick. Configuring it to match your home takes longer, and that's where most of the effort goes. The upside is a large online community. Searching for a specific device problem often turns up someone who has already solved it, which is a learning resource in its own right.
Local Docker Server
Run multiple applications in isolated containers.
Difficulty: Medium · Time required: 1-2 hrs
What you'll learn: containers and images, Docker networking, Docker Compose.
Docker packages an application with its dependencies and runs it in its own container. The main benefit is isolation: two services that need conflicting library versions can run side by side on the same machine without interfering. For anyone working toward DevOps or Linux engineering, the container model shows up everywhere, so understanding images, containers and networking is a worthwhile investment.
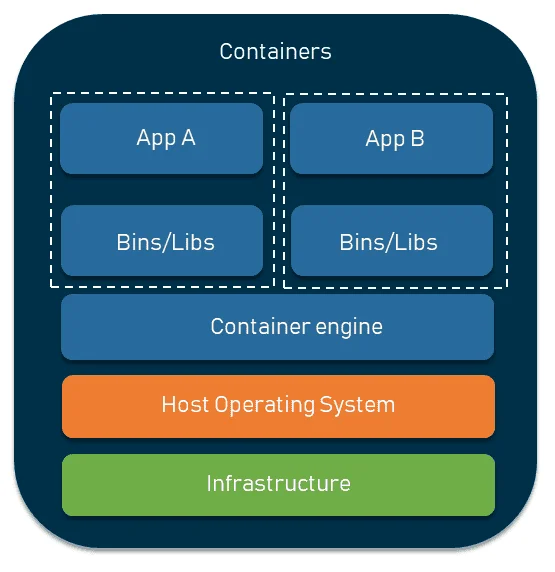
You can build your own images, but much of Docker's practical value comes from pulling existing ones from a public repository. The basic command is:
docker pull [application name]On a Pi, popular choices include Pi-hole for network-wide ad blocking and Jellyfin or Plex for a media server. Several containers can run on the same board, though each one draws on the Pi's limited RAM and CPU, so it's worth watching resource use as you add services.
Managing containers from the terminal is educational, but a web interface such as Portainer makes it easier to see what's running and what it's consuming. For stacks with several services, Docker Compose lets you describe the whole set in one file and bring it up together, which is how most real deployments are organised.
Vision and Robotics
AI Vision System
Use AI to recognize objects through a camera.
Difficulty: Hard · Time required: 3-5 hrs
What you'll learn: computer vision, AI model inference, camera processing.
Running machine learning models on a Pi used to be a stunt. The processing power of newer Raspberry Pi models has made it a reasonable thing to do, especially for inference rather than training. Object recognition is a good first project because the results are immediately visible.
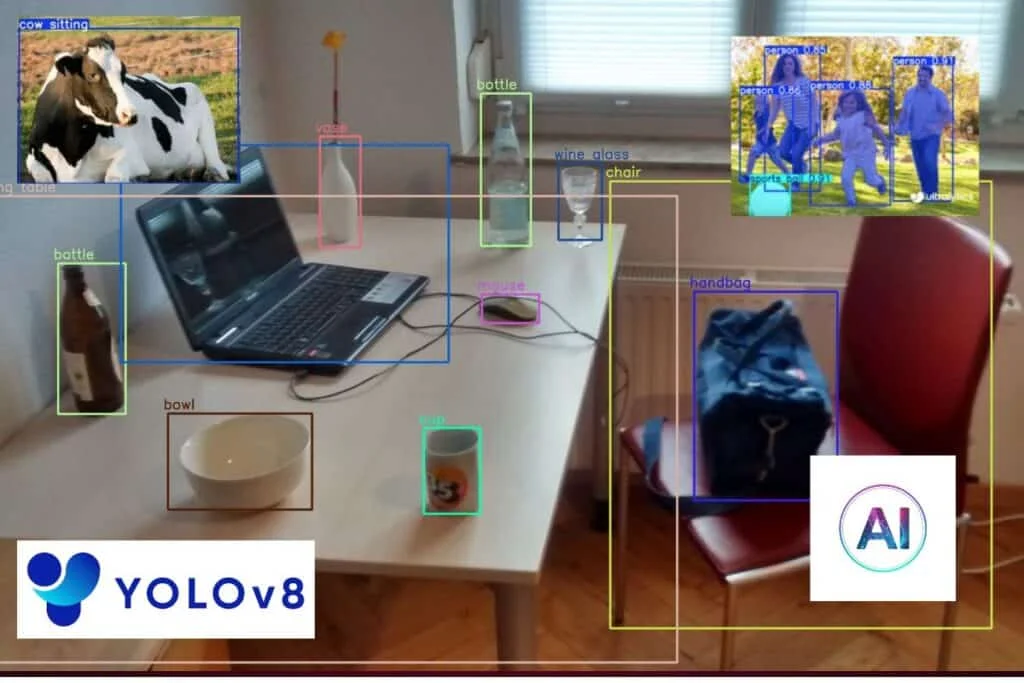
The basic kit is a Pi with a camera module, the relevant Python libraries, and a pre-trained detection model such as YOLOv8. From there, the same pipeline supports facial recognition, pose estimation or intrusion detection on a perimeter camera.

The limit is model size. A Pi on its own handles relatively small models, so running language models in the LLaMA family locally is possible but constrained. Accessories change that picture. The AI HAT+ and the AI Camera are described as letting the Pi run larger, more complex models efficiently. If you already own a Pi and a camera module, this is one of the cheapest ways to get hands-on experience with on-device inference.
Raspberry Pi-Based Robot
Combine coding, electronics and Linux to build a robot.
Difficulty: Hard · Time required: 24-48 hrs
What you'll learn: GPIO and motor control, autonomous programming.
A robot is the project where software meets physical hardware, and it's the longest build on this list. The Pi acts as the main processor, sending signals through its GPIO pins to drive motors and reading input from sensors that tell it what's around it. GPIO is what makes this possible: the same pins that send a control signal can also receive data from a sensor.
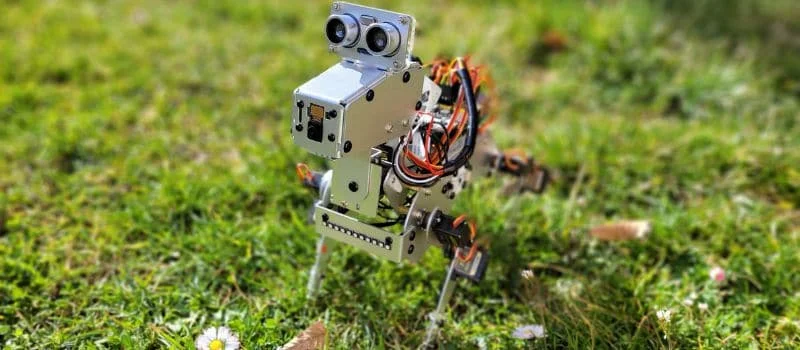
Between the Pi and a motor sits electronics that the Pi can't drive alone. Motor drivers, separate power supplies and careful wiring are standard in robotics builds. Keep the logic side and the motor power side separated in your planning, and check your driver's ratings before connecting anything.
Many builders start with a remote-controlled car before moving to autonomous behaviour. Robotics kits with full assembly guides lower the barrier, and the step from a kit to a custom design is where the real engineering begins. Sensors are the next layer: adding them is what turns a remote-controlled platform into something that can respond to its surroundings.
Robotics also pulls in the rest of the list. Motor control needs Python or C code, sensor data needs a sensible logging and networking setup, and a reliable build benefits from version control. A large enthusiast community is active around GPIO, sensors and small-scale electronics, which helps when a wiring fault or a sensor reading doesn't make sense.
Taken together, these projects map a practical learning path. Start with the NAS or Git server to get comfortable with Linux and file systems. Move into networking with a VPN or notification service, then into containers and automation. Vision and robotics bring hardware and inference into the picture. None of them require you to master everything first. Each one teaches enough to make the next project less intimidating, and that compounding effect is what most readers will get from the Pi.