Parrot OS on Raspberry Pi: Where It Fits Next to Kali
- Published
- Author
- Usman Qamar
- Reads
- 708
Parrot OS is a Debian-based distro with a privacy-leaning toolset that runs on Raspberry Pi 3B, 4B, 400 and 5. Here's how it differs from Kali and what to check before you flash it.
Kali Linux is the default many people reach for when a Pi needs to run security tooling, and it's easy to see why. It has the largest install base in training and certification courses, and its tool catalogue is hard to match. But Kali isn't the only Debian-derived option for a security-focused Pi, and for some workflows it's not the best fit. Parrot OS is the alternative I'd look at first if privacy and digital forensics matter as much as penetration testing.
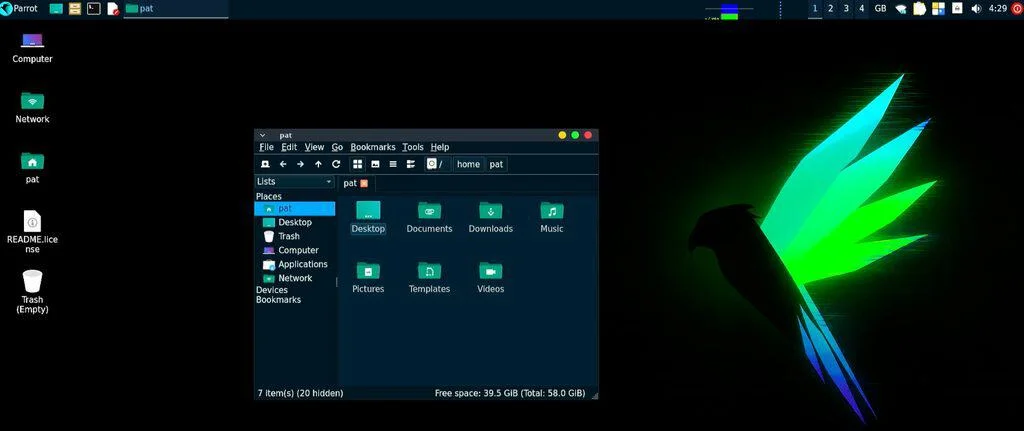
Parrot OS is an open-source, Debian-based distribution aimed at security specialists, penetration testers and digital forensics work. Its tooling leans further into privacy and anonymity than Kali's does, and it ships a range of applications for network auditing and traffic analysis. It can run on a Raspberry Pi, and the process is more involved than flashing a standard Raspberry Pi OS image, mainly because the image isn't offered in the Raspberry Pi Imager's default list.
What Parrot OS is built for
The distribution's identity is split between offensive security and privacy. The privacy side includes AnonSurf, a tool that routes traffic through the Tor network, and the offensive side includes NMap, Wireshark and Aircrack-NG. That combination is the main thing that separates it from Kali, which is almost entirely oriented toward testing and leaves privacy tools for the user to add.
Here's the practical way I'd frame it: if your work is finding vulnerabilities in systems you're authorised to test, Kali's narrower focus and larger community will probably serve you better. If you're doing forensic work, want anonymity tools available out of the box, or prefer a more conventional desktop to get going on, Parrot starts to look more attractive.
Choosing an edition
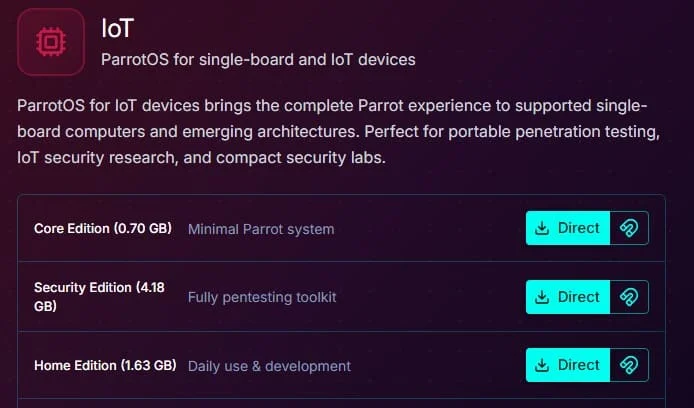
Parrot OS comes in three editions for the Raspberry Pi, and the choice matters more than it might seem, because it determines how much you'll be downloading and configuring afterward.
- Core Edition contains only the base packages. You install the tools you want individually, either during setup or later. This is the leanest option and the one to pick if you already know what you need.
- Home Edition is a lighter build aimed at everyday use. It includes privacy and anonymity tools but leaves out the security and penetration-testing suite.
- Security Edition is the full build, with the security, penetration-testing, privacy and anonymity tooling all included.
I'd go with Security Edition if you want to evaluate the whole toolset, as the walkthrough here does. Be aware that it's the heaviest of the three, so a storage-constrained card will fill up quickly once the updates land. Core Edition is the sensible pick if you're going to be selective.
Parrot OS versus Kali Linux
A side-by-side comparison of the two distributions highlights where their priorities diverge. On penetration testing, Kali offers a large, specialised toolkit out of the box, while Parrot includes similar testing tools with extra features for privacy and forensics. On privacy, Kali supports tools like Tor but doesn't include them by default. Parrot ships Tor, I2P and AnonSurf as built-in options.
The comparison also argues that Parrot is more resource-intensive because of the added privacy and forensic tooling, whereas Kali is described as lightweight and specialised with a smaller installation footprint and a lightweight XFCE desktop. That's a fair general trade-off to expect from a distribution that carries more software, though you'll want to measure it on your own hardware rather than take a table's word for it.

On community, Kali has the larger user base and is used widely in certifications and formal training. Parrot's community is smaller and more privacy-focused, and it has a following among forensic users. For beginners, the comparison rates Parrot as slightly more approachable, thanks to a broader toolset and a traditional desktop. Kali, by contrast, is pitched at experienced testers who already know their way around penetration testing.
My read: the two are close enough in capability that the decision comes down to workflow and what you already know. If your team's training material and certifications assume Kali, switching to Parrot adds friction for little gain. If you're starting from scratch and forensics or anonymity tooling is central to the job, Parrot's bundling is a real advantage.
Hardware you'll need
Parrot OS supports the Raspberry Pi 3B, 4B, 400 and 5. The Pi 5 gives the smoothest experience, and it's the model I'd recommend if you have the choice. The heavier toolset and graphical desktop are noticeably more demanding than a stock Raspberry Pi OS install, so older boards will feel slower, especially during updates and when running several tools at once.
Beyond the board, the requirements are modest:
- microSD card, 16GB or larger. Given the size of the Security Edition, I'd go bigger if you can. A fast, reliable card makes a real difference to boot and update times.
- A card reader, if your computer doesn't have an SD slot.
- Raspberry Pi Imager, which you can download from raspberrypi.com/software. It's used to write the image to the card.
- A display, keyboard and mouse for the first boot. After that, you can enable SSH and VNC and run the device headless.
One hardware caveat matters for the Wi-Fi tooling. Monitor mode, which some of the wireless tools need, depends on the Wi-Fi chipset. During testing, one Raspberry Pi 400 didn't offer monitor mode at all. If your board is in the same position, you'll need a USB Wi-Fi adapter that supports monitor mode. Check that before you spend time on configuration.
Downloading and writing the image
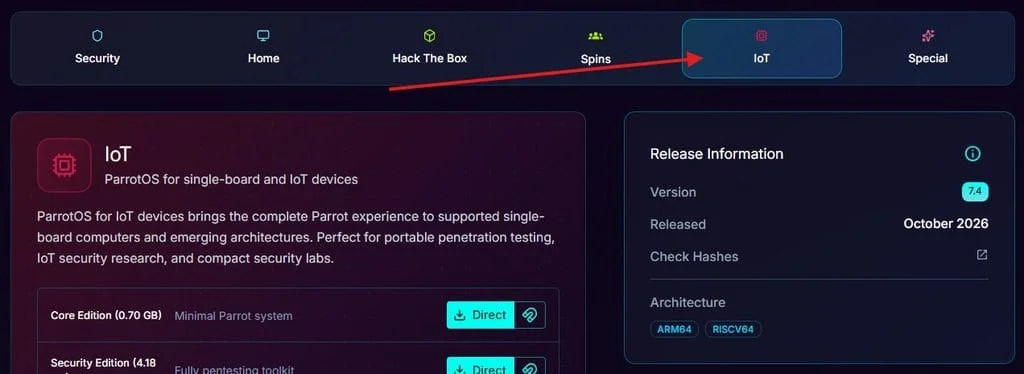
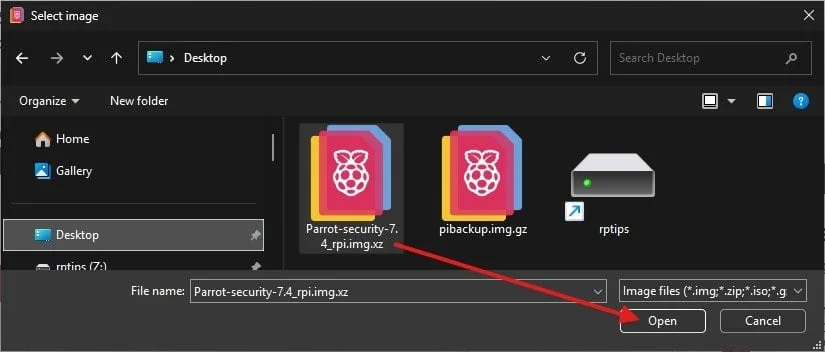
Because Parrot OS isn't listed in Raspberry Pi Imager's default operating systems, the process starts outside the Imager. Go to the Parrot OS download page at parrotsec.org/download, select the IoT category, pick the edition you want and use the direct download button. The file you get is the image you'll point the Imager at.

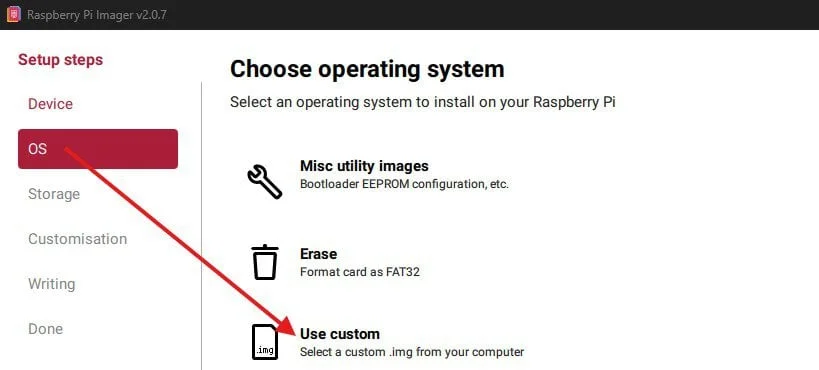
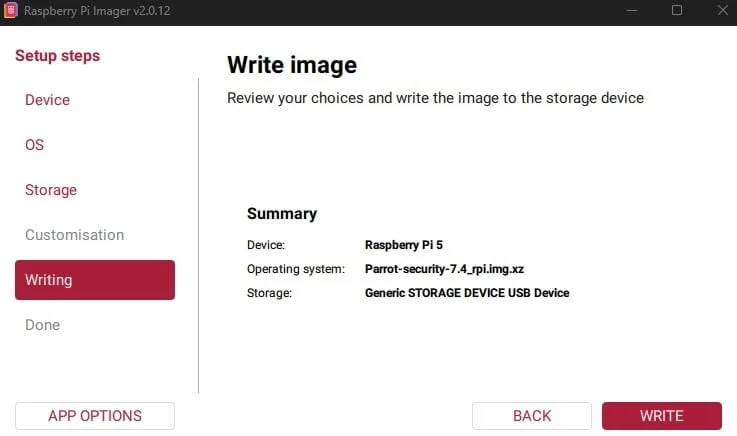
In Raspberry Pi Imager, select your Raspberry Pi model under Device, then choose Use custom under the OS menu and select the image file you downloaded. Under Storage, pick the card, and double-check it before you continue. The write step erases everything on the selected card, and a wrong selection is an easy way to lose data on the wrong drive. Once the write finishes, move the card to the Pi and power it up.
First boot and the first things to change
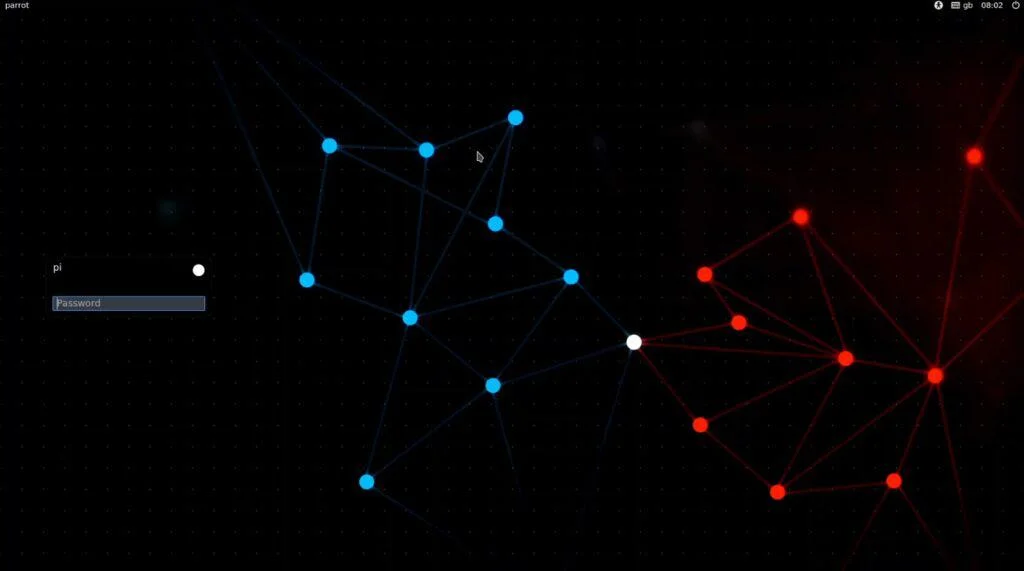
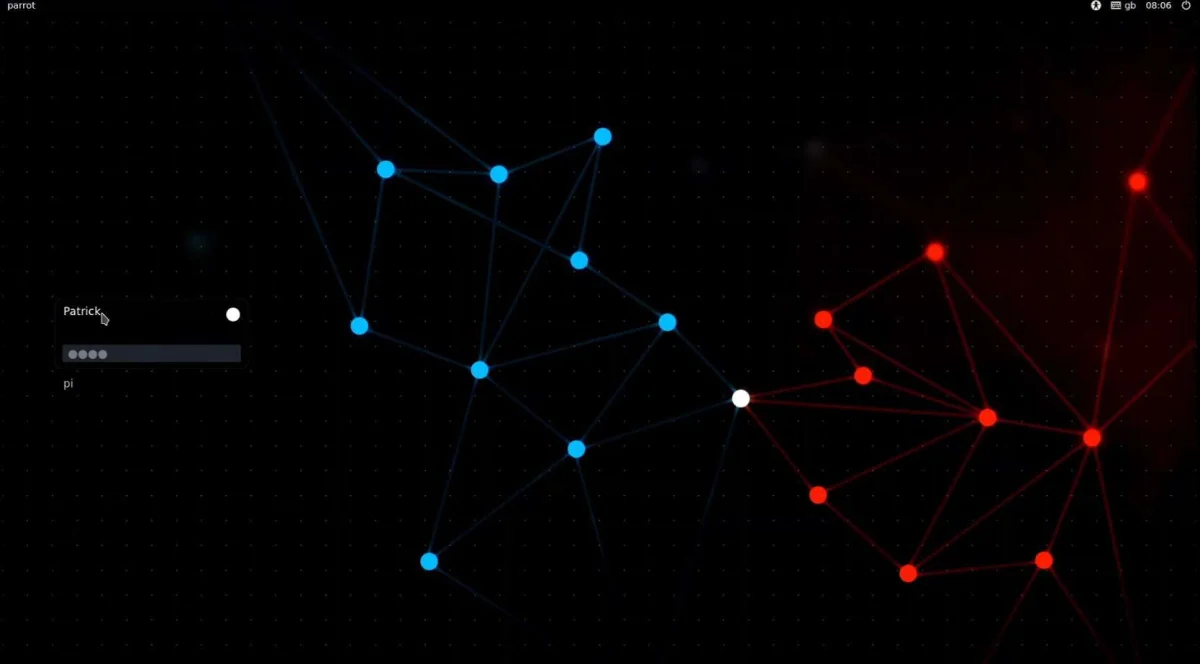
On first boot you'll land on a login screen. The default credentials are documented in the Parrot OS guide, and the first priority after logging in is to replace them. Shipping a device with a known default login is a common weak point, and it's the first thing to fix on any security-focused machine.
Two other early settings are worth attention:
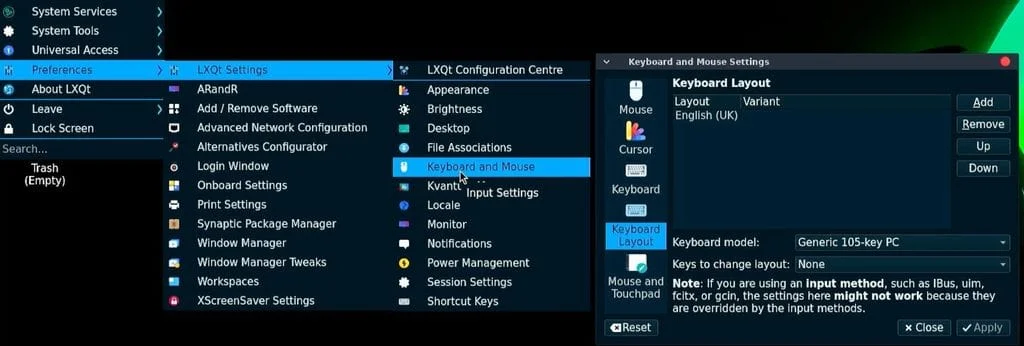
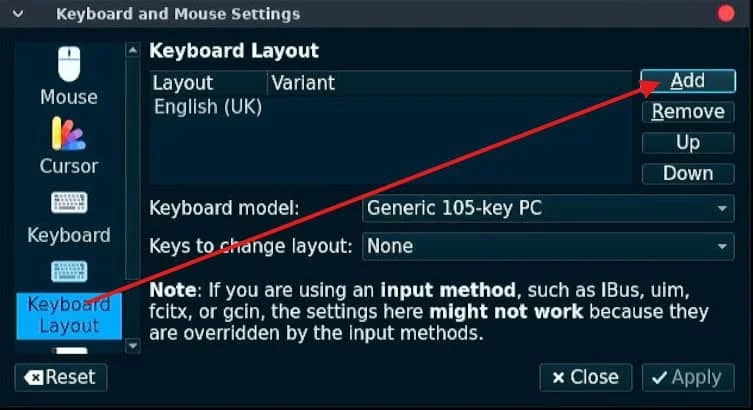
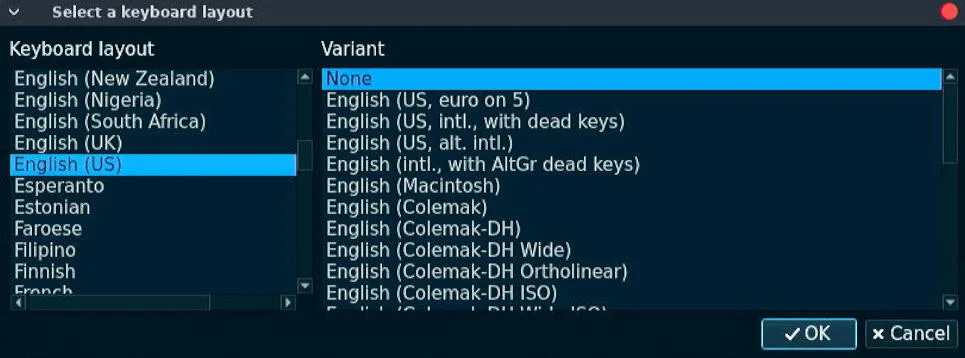
- Keyboard layout. The default layout is UK. If you use a different keyboard, open the Parrot menu, go to Preferences, then LXQt Settings, then Keyboard and Mouse. On the Keyboard Layout tab, add your layout and variant, then save. It's a short fix, but typing with the wrong layout is maddening.
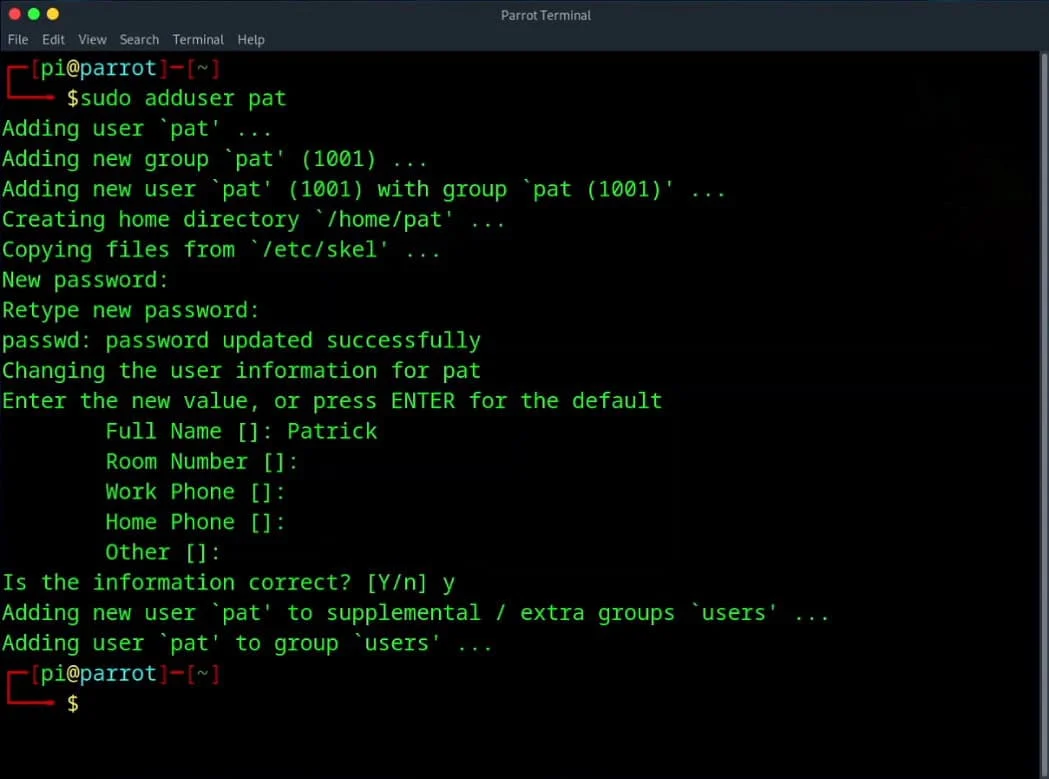
- A new user account. Create a user with the standard adduser command, add it to the sudo group so it can run privileged commands, then sign out and log in as the new account. After you've confirmed the new account works, you can remove the default user or change its password. Keeping your administrative work under a named account is good hygiene and makes audit trails clearer.
Connecting to the network
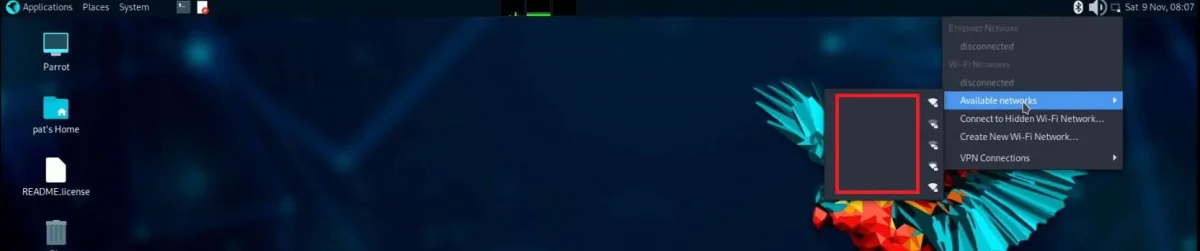
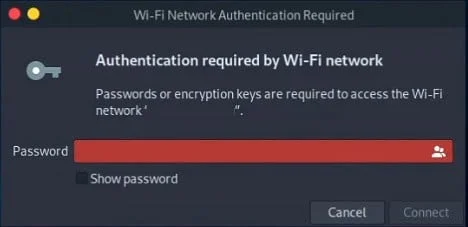
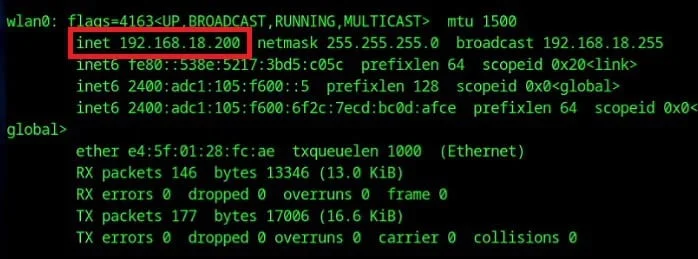
The simplest route is DHCP. Click the networking icon at the top right, choose your Wi-Fi network from the list and enter the password. Once connected, the system's dynamically assigned IP address is visible through the network tools in a terminal.
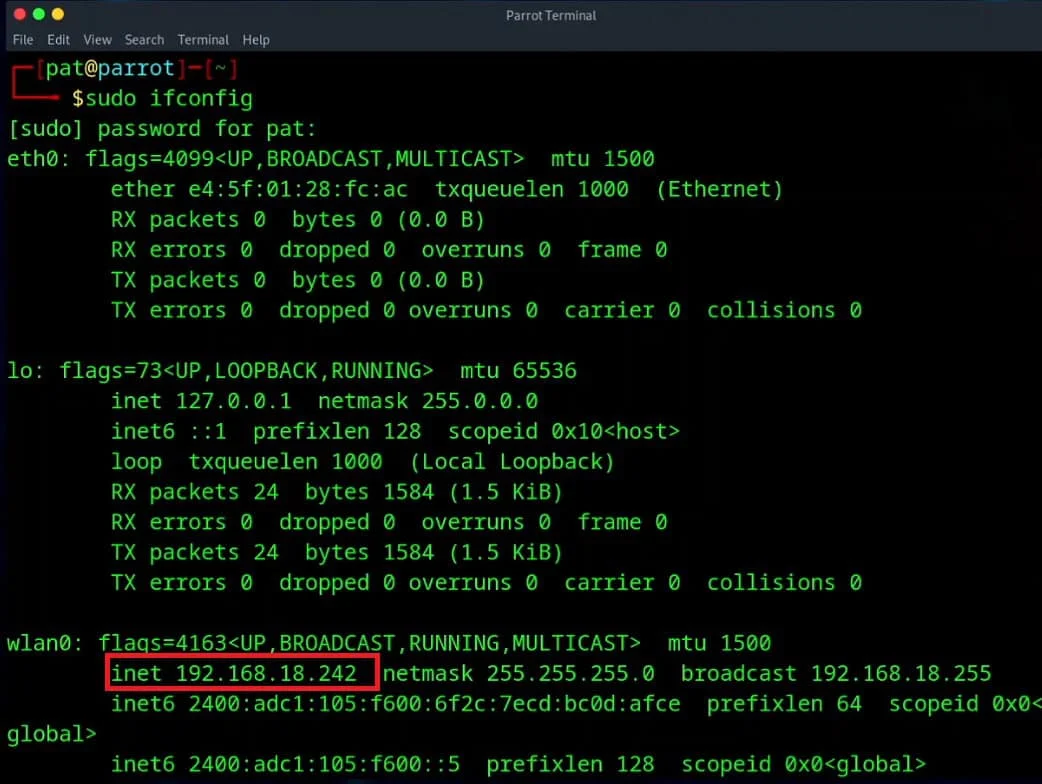
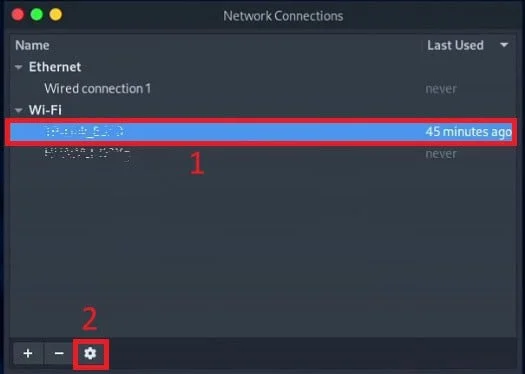
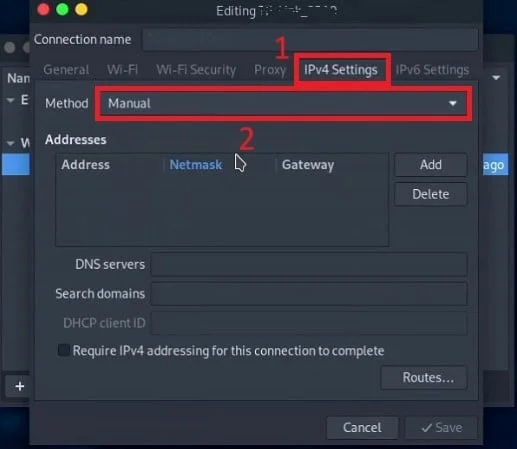
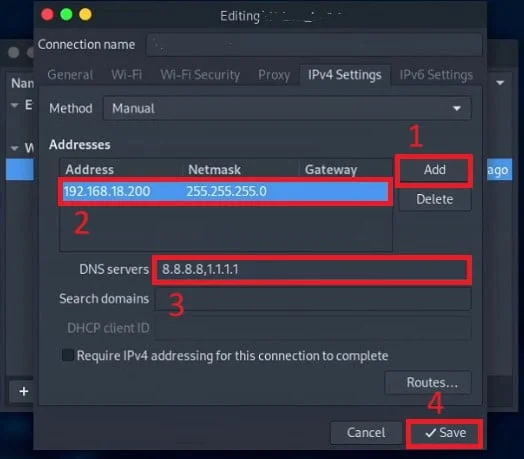
If the device needs a fixed address, which is common for a machine you'll reach over SSH or VNC, switch to a static configuration. In Advanced Network Configuration, edit the connection, change the IPv4 method from Automatic (DHCP) to Manual, add your address settings and save. You'll then need to restart NetworkManager for the change to take effect, and confirm the new address before you rely on it. If you're setting this up on a shared network, coordinate the address with whoever manages it so you don't create a conflict.
Updating before anything else
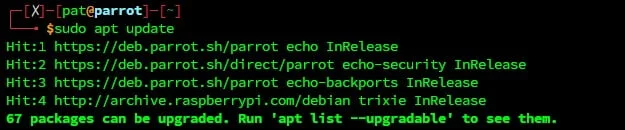
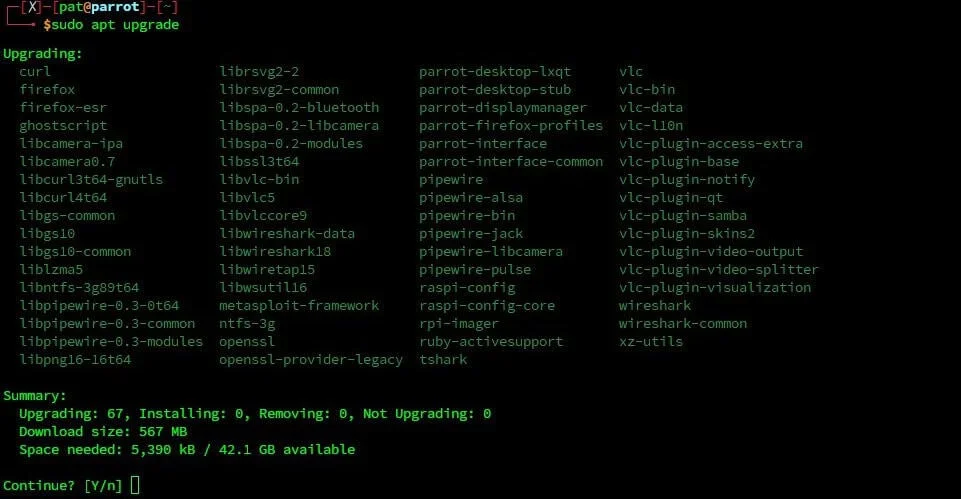
Once the device is online, update the package lists and upgrade the installed software before you install anything else. This is ordinary good practice on any Debian-based system, and it's especially important on an image that may have been built some time before you download it. Expect the first upgrade to take a while on a larger edition.
Remote access: SSH and VNC
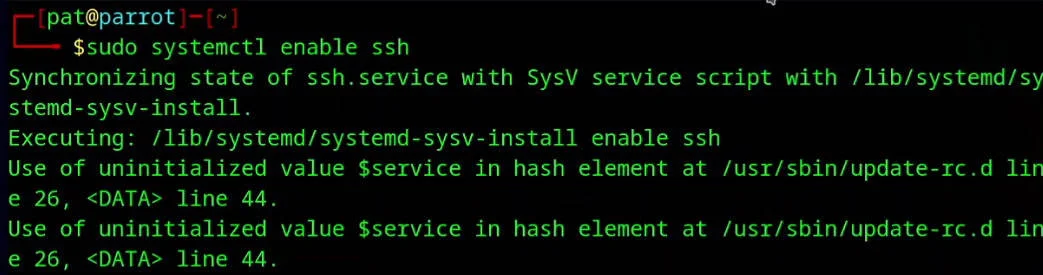
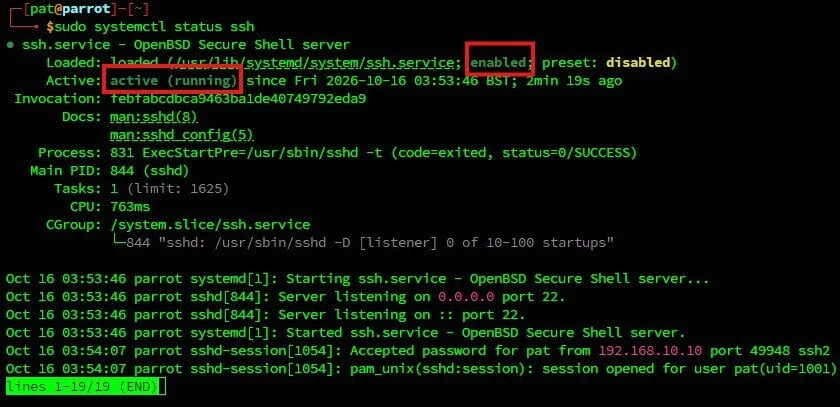
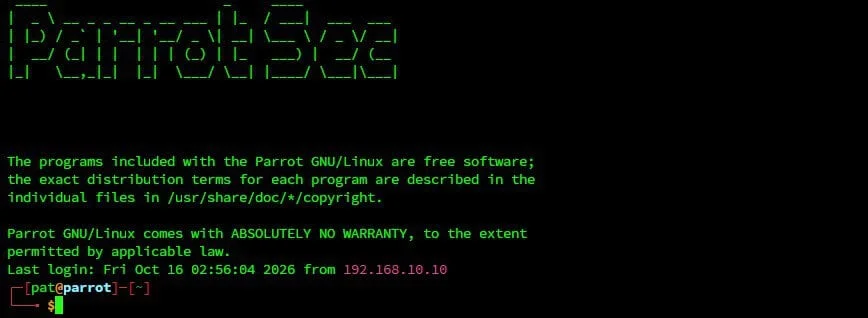
If you plan to run the Pi headless, you'll need SSH for command-line access and VNC for the graphical desktop. Enabling SSH is a single systemctl command, and you can either reboot or start the service directly. Its status can be checked the same way. Once it's running, you can connect from another machine using the standard ssh syntax with your username and the device's address. The Raspberry Pi SSH guide on this site covers most of the same steps for Raspberry Pi OS.
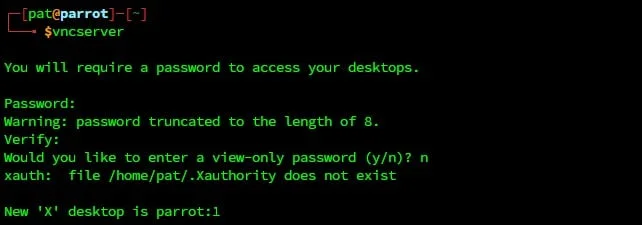
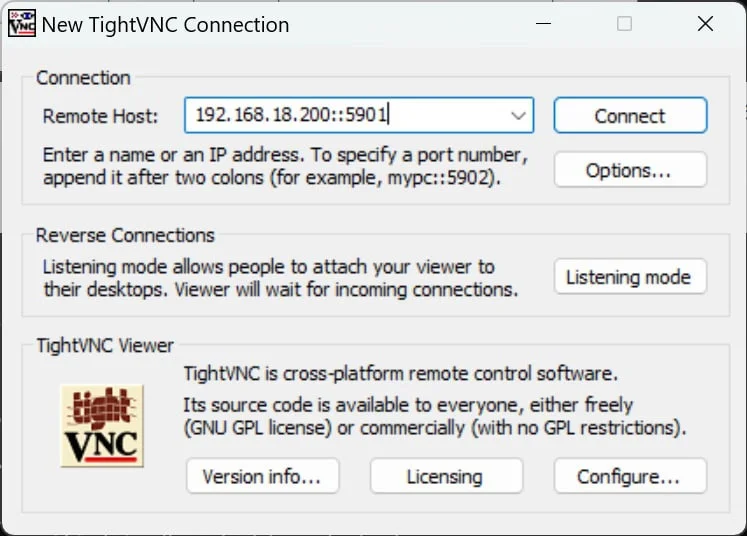
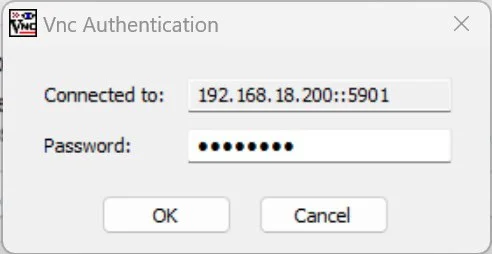
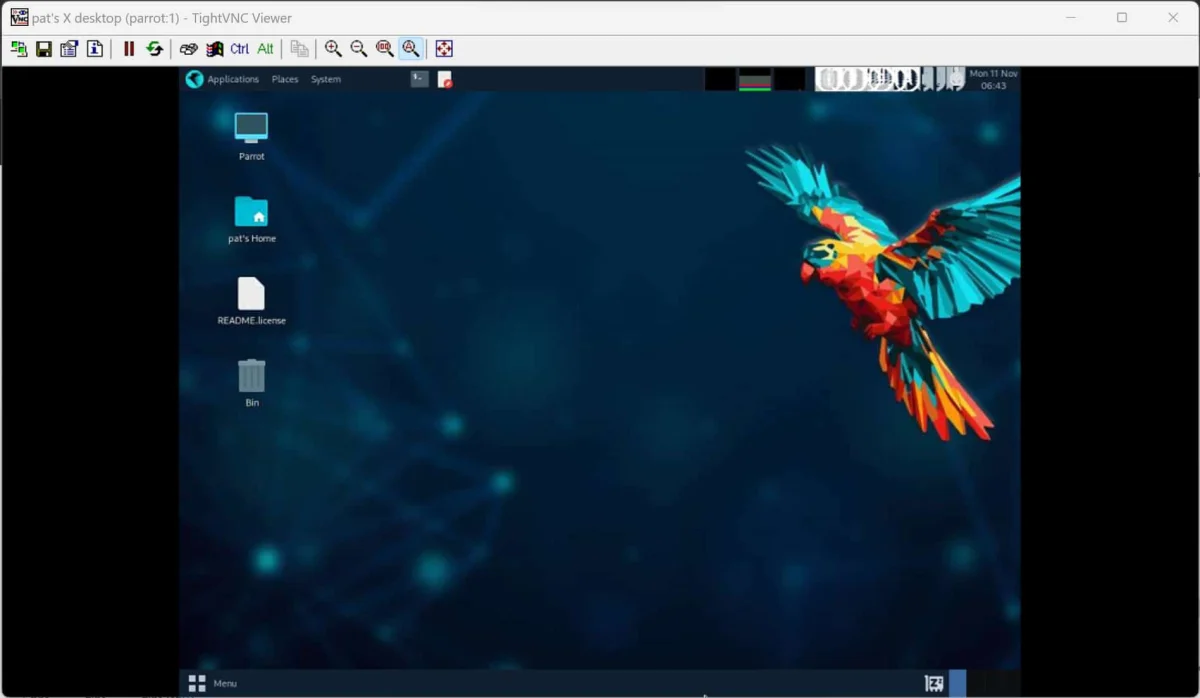
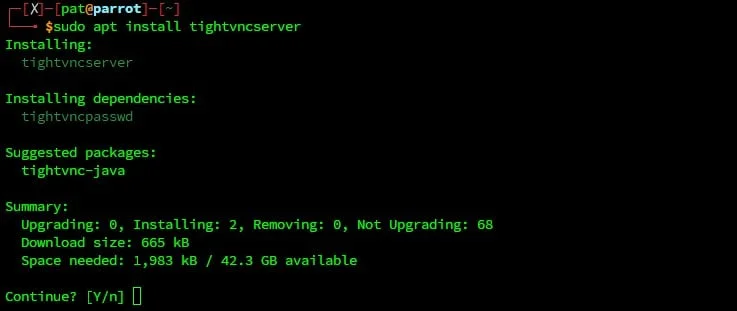
VNC takes a few more steps. The guide uses TightVNC Server on the Pi and TightVNC Client on the controlling machine. The server asks you to set a password on first run. From the client, connect to the Pi's IP address with the port number, which is 5900 plus the display number. For the first desktop, that's 5901, and the client will prompt for the password you set. Two practical notes: a VNC session that isn't tunnelled over SSH or a VPN passes the desktop across the network with whatever protection the server provides, so keep it on networks you trust. And if you don't need graphical access, SSH alone covers most work.
The bundled tools and where to be careful
The toolset is the reason to choose Parrot over a clean Debian install, and it's worth understanding each tool's purpose and its limits. I'll describe what each one does rather than walk through how to run it against any particular network, because the right use depends entirely on authorisation.
AnonSurf
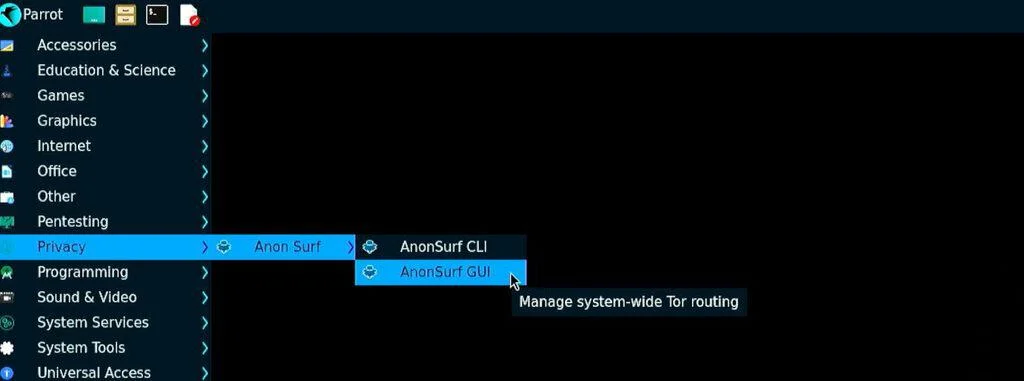
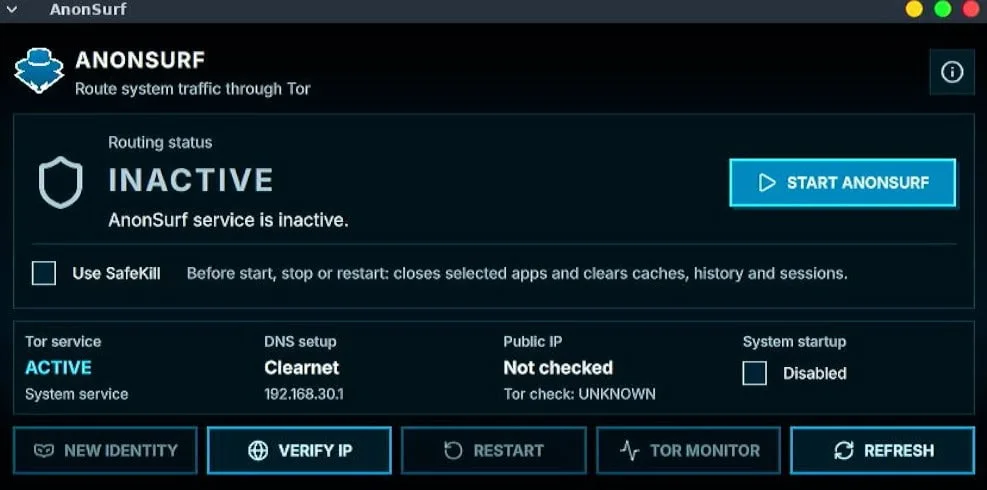
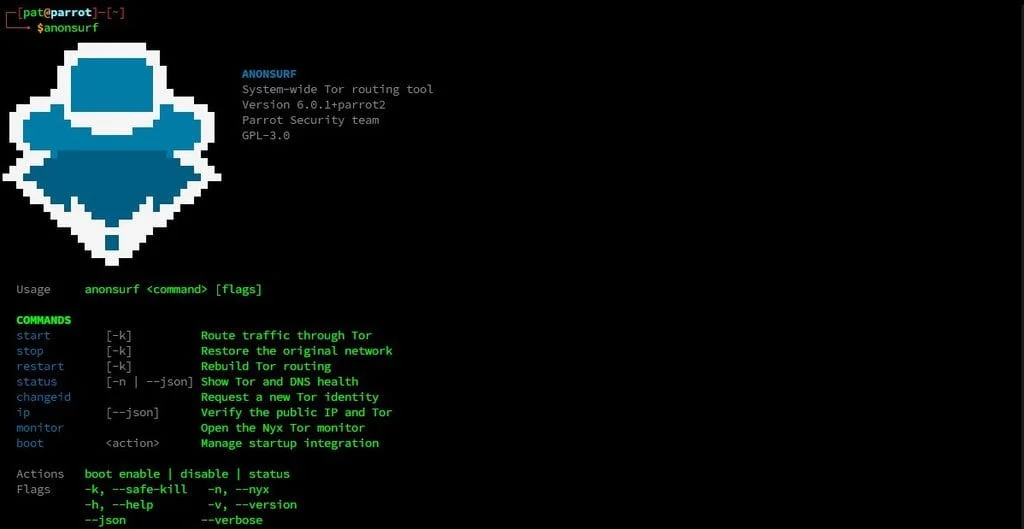
AnonSurf is Parrot's system-wide routing tool for the Tor network. The distinction matters: a Tor-enabled browser only anonymises the traffic that goes through that browser, while AnonSurf routes all of the system's traffic through Tor. It can be operated from a graphical front end under the Privacy menu or from the command line. The Security Edition image used in this walkthrough didn't include AnonSurf out of the box, so it has to be installed separately. Expect a performance cost, since traffic through Tor is slower than a direct connection. Many people pair it with a VPN for a layered setup, and that's a reasonable pattern, though the two solve different problems and the combination needs to be set up deliberately.
NMap
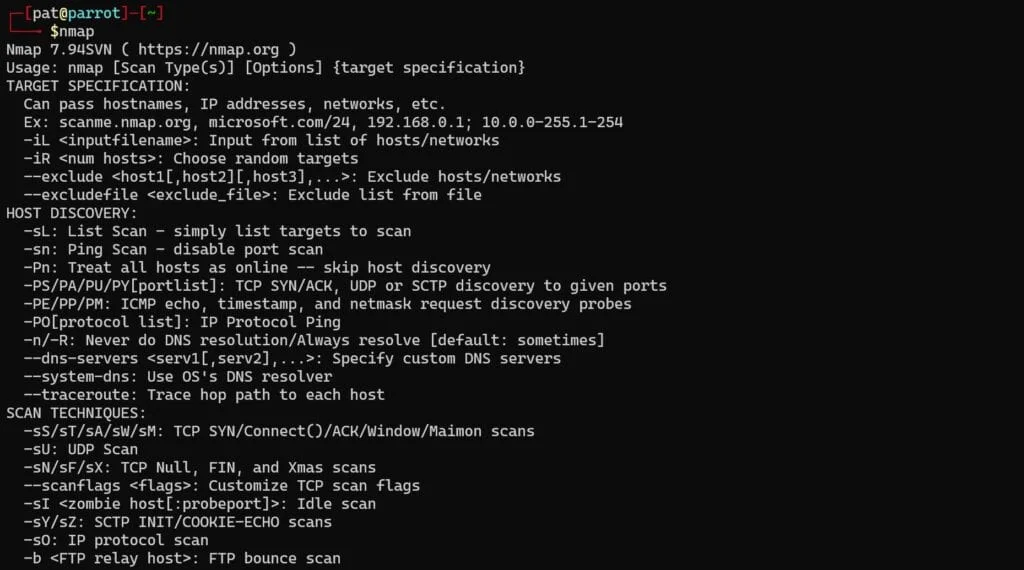
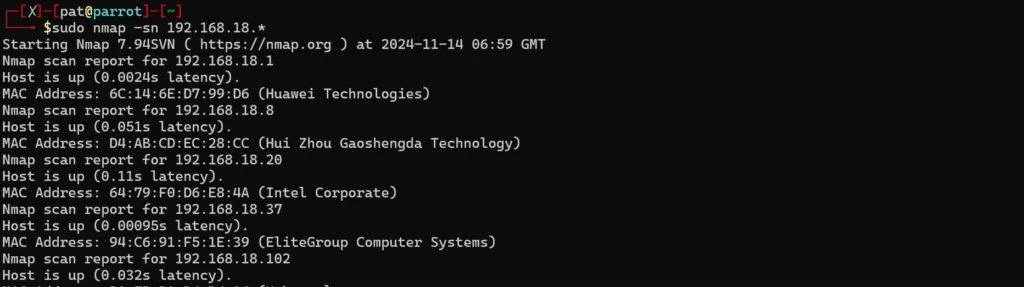
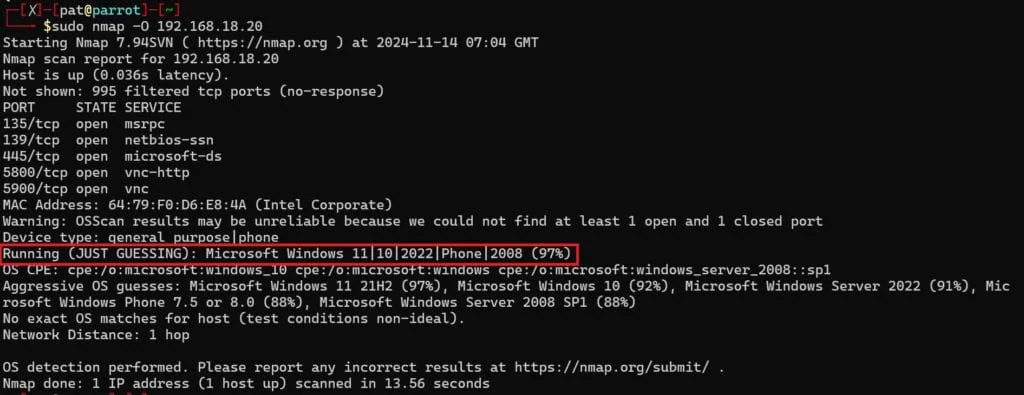
NMap, short for Network Mapper, is the standard network discovery and auditing utility. It can identify which hosts are responding on a network, which ports are open on them, and which services and operating systems they appear to be running. In the walkthrough, an OS detection scan correctly identified a Windows 11 laptop on the same network, which shows how much the tool can infer from its probes. That's the reason network administrators and security teams use it, and it's also why you should only point it at networks and hosts you own or have written permission to test. Scanning someone else's network can be unauthorised and is likely to set off alarms.
Wireshark
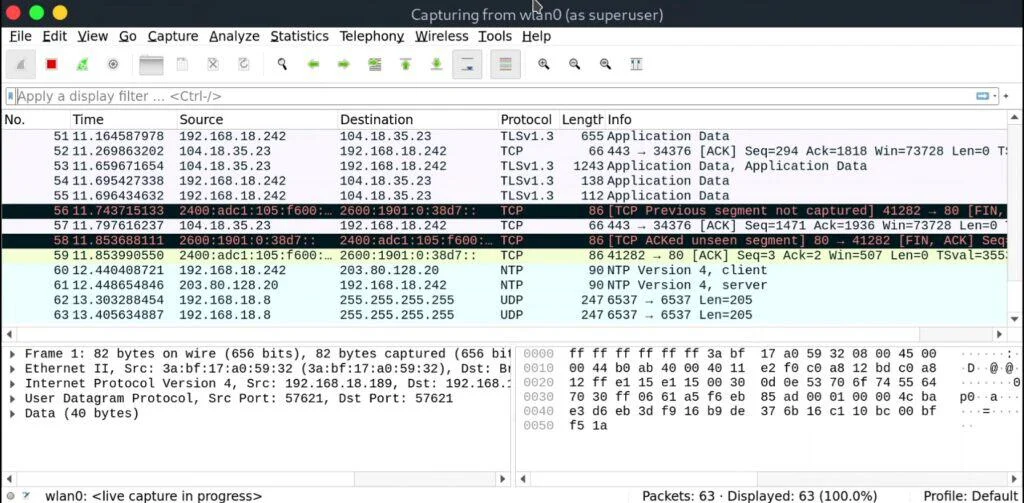
Wireshark is a packet analyser that captures and displays network traffic in detail. It's the usual tool for debugging a misbehaving network configuration, because you can see exactly what's being sent and received. By default it only shows traffic addressed to your own machine. Capturing traffic that isn't addressed to you requires a Wi-Fi adapter that supports monitor mode, and even then you should only capture on networks you're authorised to monitor. Packet captures can contain sensitive data, so handle the output with the same care you'd give any other data from a production system.
Aircrack-NG and the Wi-Fi suite
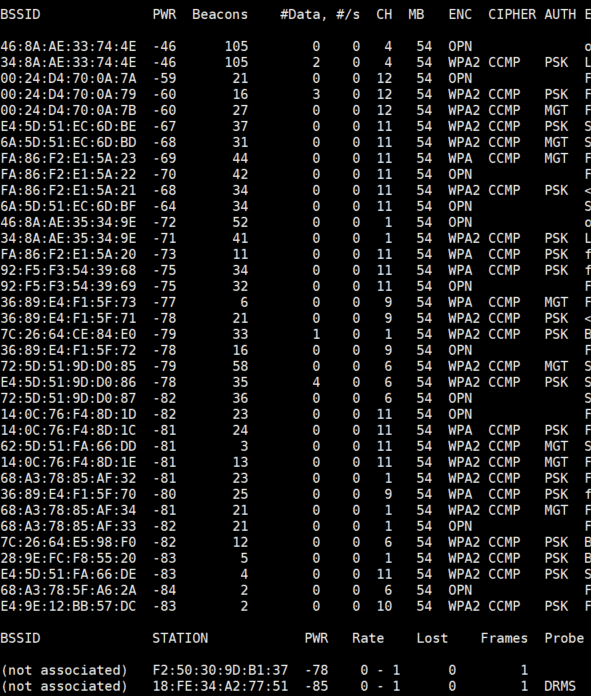
The Aircrack-NG suite, including airmon-ng and airodump-ng, is the set of tools for working with wireless networks. Its scanning side is useful for surveying the Wi-Fi environment around a site, and it's used in wireless assessments and training. The guide also mentions WPA and WPA2 key-recovery techniques. That's an area where the legal and ethical line is firm. You should only assess wireless networks you own or have explicit authorisation to test, and the hardware requirement for monitor mode means you'll often need an external adapter. If you're learning this, the practical path is a lab network you control, which gives you everything you need to understand the tooling without touching anyone else's infrastructure.
Where this leaves a Pi-based security workstation
Parrot OS on a Raspberry Pi works as a compact, headless security box, and the Pi 5 is capable enough to handle the Security Edition with patience. The areas to plan around are the Wi-Fi hardware, the storage footprint of the full edition and the fact that the device will sit on your network, so keep its credentials and remote-access settings tight. If you're deciding between Parrot and Kali for a Pi, the choice is less about raw capability and more about which community's documentation, certifications and default tooling match the work in front of you.
My suggestion: start with the Core or Security Edition on a Pi 5 with a fast card, change the default login before you do anything else, and test the monitor-mode hardware early so you don't discover a limitation halfway through a project. Then build your lab on a network you control. That's the setup that tells you quickly whether Parrot's privacy and forensics bundle earns its place on your bench.