17 Raspberry Pi Shortcuts for Faster Setup, File Access and Maintenance
- Published
- Author
- Usman Qamar
- Reads
- 427
Terminal shortcuts, desktop settings, reusable scripts and SSH habits can cut routine Raspberry Pi setup and maintenance time.
Small workflow changes can make a Raspberry Pi much quicker to manage. A few keystrokes reduce repetitive terminal work; settings in Raspberry Pi OS help you reach applications and services faster; and reusable scripts, SSH configuration and SD card images make repeated setups less tedious.
These 17 techniques suit everyday tasks such as checking a service, monitoring temperature, reaching a web interface, moving files between computers and rebuilding a project. Most require only standard Linux tools or features included in Raspberry Pi OS. The payoff comes from using them consistently: less time retyping commands and searching for device addresses means more time for the project itself.
Make Terminal Work More Direct
1. Complete commands with Tab
Typing a long command or directory path by hand is slow and invites mistakes. In the terminal, enter the first part of a command or filename, then press Tab. Bash will complete it when the match is unambiguous. This is especially useful when moving through a directory tree or working with long filenames.
If several entries could match, press Tab twice to display the available completions. Add more characters to narrow the choices, then use Tab again. It’s a small habit, but it saves keystrokes and avoids re-entering a path after a typo.
2. Find an earlier command with Ctrl+R
Bash keeps a history of commands entered in the shell. Press Ctrl+R and type a word or fragment from the command you want. The terminal searches the history and shows a matching entry. Press Enter to run the displayed command.
This works well for commands that are too long to remember exactly but are repeated during setup or debugging. If the match isn’t the one you need, continue the search with Ctrl+R or revise the search text. It’s a practical alternative to scrolling through terminal history or reconstructing each option from memory.
3. Repeat a command with sudo when needed
If a command fails because it needs elevated permissions, Bash’s !! history expansion can repeat the previous command. Prefix it with sudo:
sudo !!
Bash substitutes !! with the last command, so the shell runs that command again with sudo. This can save retyping a package operation or a command that needs privileged access. Check the expanded command before proceeding, especially if the previous command changed files or had other effects.
4. Filter command output with grep
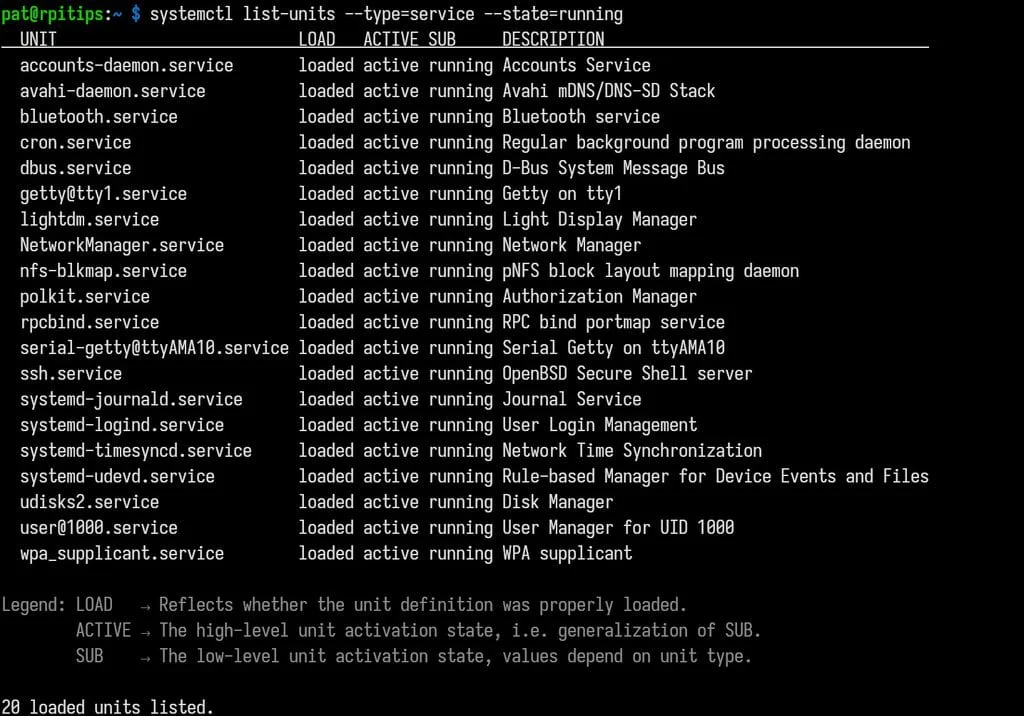
Long terminal output is easier to inspect when you search it for a relevant string. Pipe a command’s output to grep and provide a keyword. For example, to check whether a running service appears in the list:
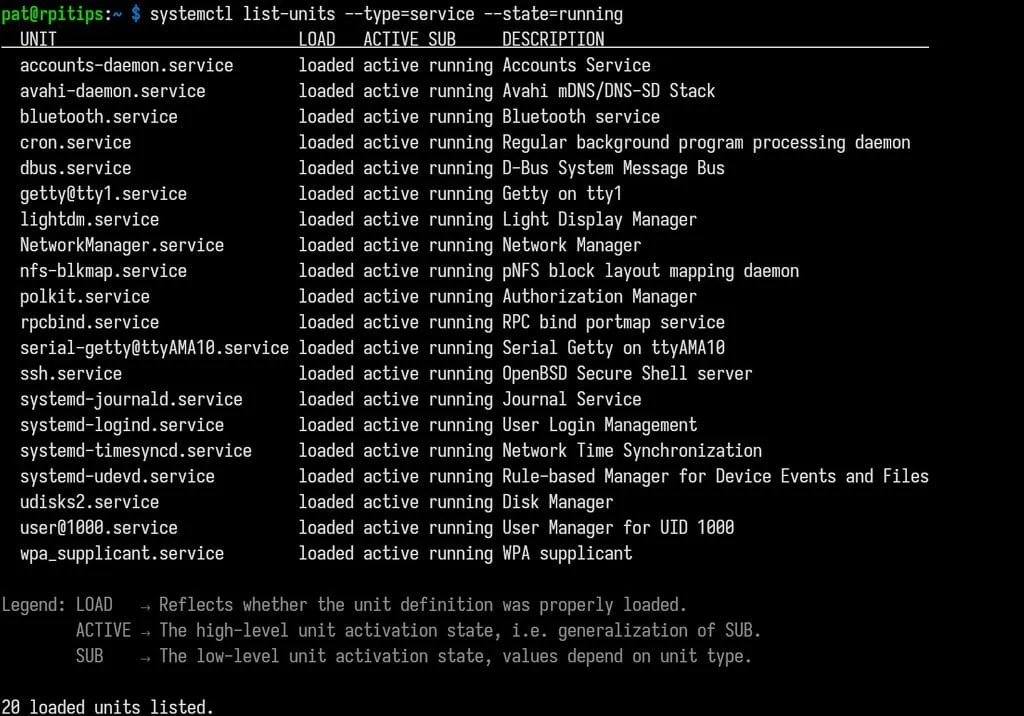
systemctl list-units --type=service --state=running | grep ssh
The pipe sends the first command’s output to grep, which prints lines containing “ssh.” Change the search term to match the service, filename or message you’re investigating. The same pattern can help narrow down logs, command results and text in scripts, without manually scanning every line.

5. Refresh a check with watch
When checking a value repeatedly, such as the board’s temperature while it’s under load, watch can rerun the command at a set interval. For a temperature reading, use:
watch -n 0.5 vcgencmd measure_temp
The -n option sets the interval in seconds; here, the command refreshes every half-second. The same approach works with other commands that report changing values, including memory or disk information. It replaces a manual loop of retyping the command and gives you an updating view in one terminal window.
Make the Raspberry Pi OS Desktop Easier to Use
Terminal tools are useful, but desktop workflows benefit from the same attention to repetition. Raspberry Pi OS includes keyboard shortcuts and launchers, while a browser can keep frequently used device interfaces close at hand.
6. Set desktop keyboard shortcuts
Common desktop shortcuts such as Alt+F4 and Alt+Tab are available in Raspberry Pi OS. One example is Win+Return, which opens a terminal. With Raspberry Pi OS Trixie, the Control Center includes a Shortcuts tab for viewing and changing shortcuts and creating new ones.
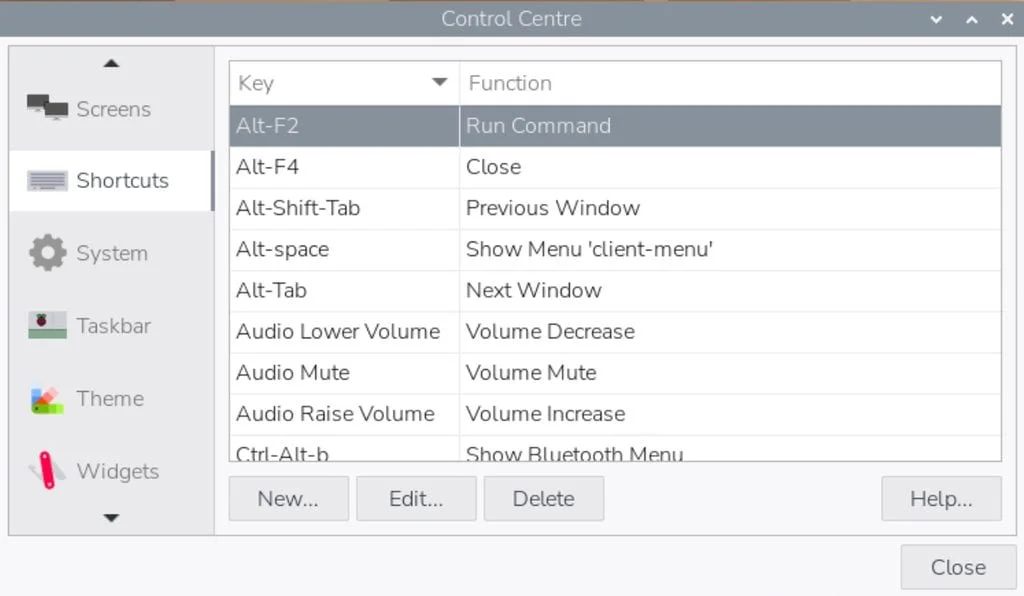
A shortcut for a browser or file manager can be more convenient than navigating through the Home menu each time. Choose applications you open often, then assign combinations that are easy for you to remember. The exact set of shortcuts can be adjusted to suit a particular desktop workflow.
7. Pin frequently used applications
If you prefer pointing and clicking, add regular applications to the taskbar. Open the Home menu, right-click an application and choose “Add to Launcher.” It will appear alongside the existing taskbar applications, ready to open directly.
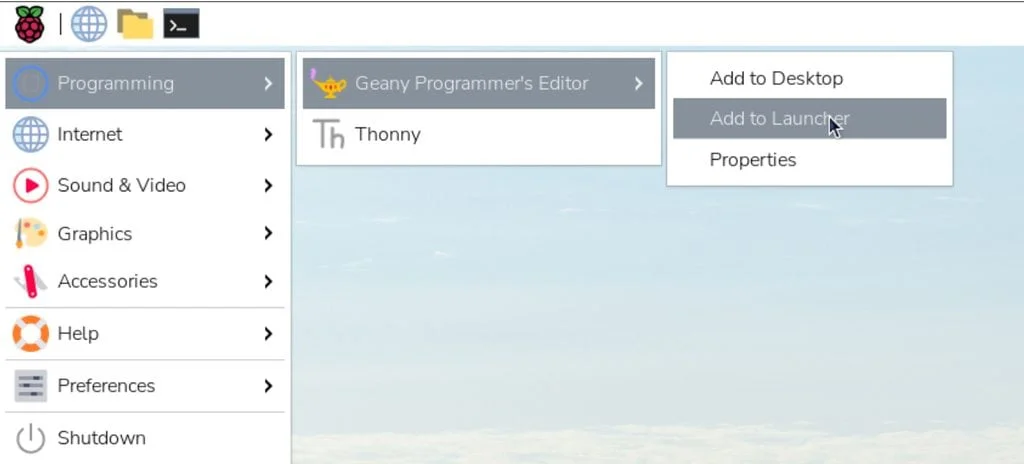
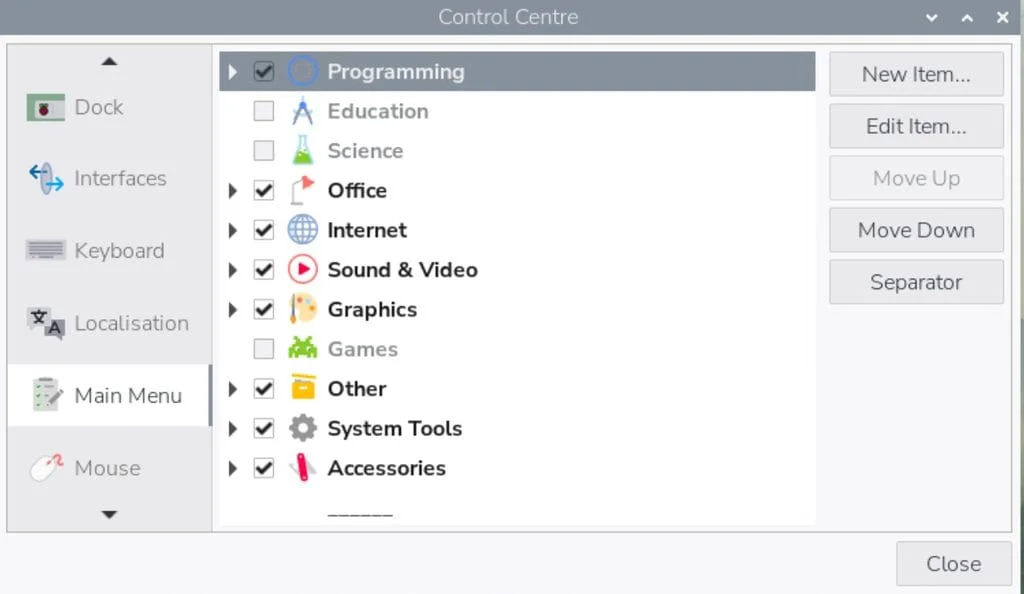
Applications installed on Raspberry Pi OS normally appear in the Home menu. If an application or a script you wrote isn’t listed, you can add an entry through the Main Menu tab in Control Center. That gives a custom tool a visible place in the desktop menu, while a launcher shortcut can keep common applications in reach.
8. Bookmark web interfaces
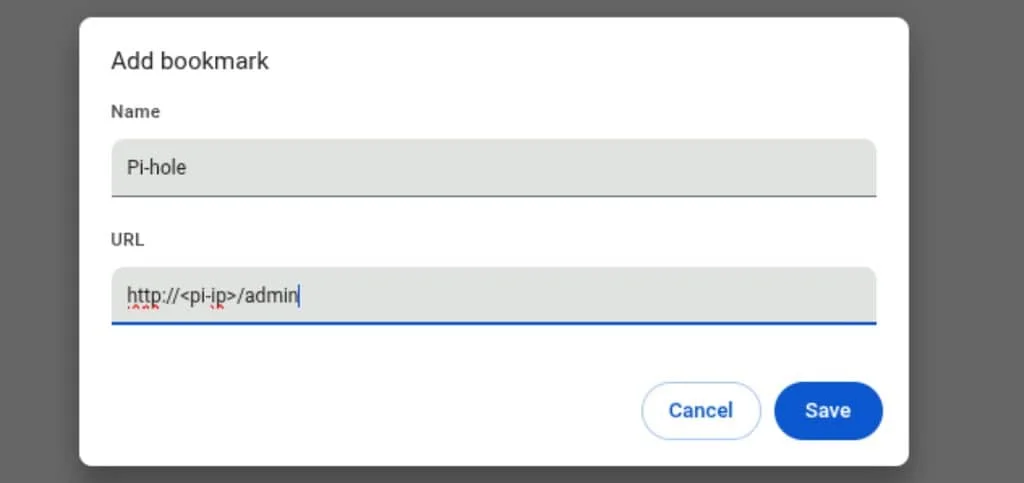
Raspberry Pi projects often expose controls or status information through a browser. When several services each have their own address and port, remembering every URL is unnecessary work. Bookmark each interface with a recognizable name.
You can open the browser’s bookmark manager with Ctrl+Shift+O and add a name and address, or navigate to the interface and select the star beside the address bar. The saved page is then available from the browser’s bookmark bar. Clear names help distinguish multiple services and boards at a glance.

9. Configure Raspberry Pi Imager before writing an OS
Raspberry Pi Imager’s customization options can move routine setup into the imaging step. They let you set a login username and password, configure Wi-Fi, assign a hostname and enable connection methods such as SSH, VNC or Raspberry Pi Connect.
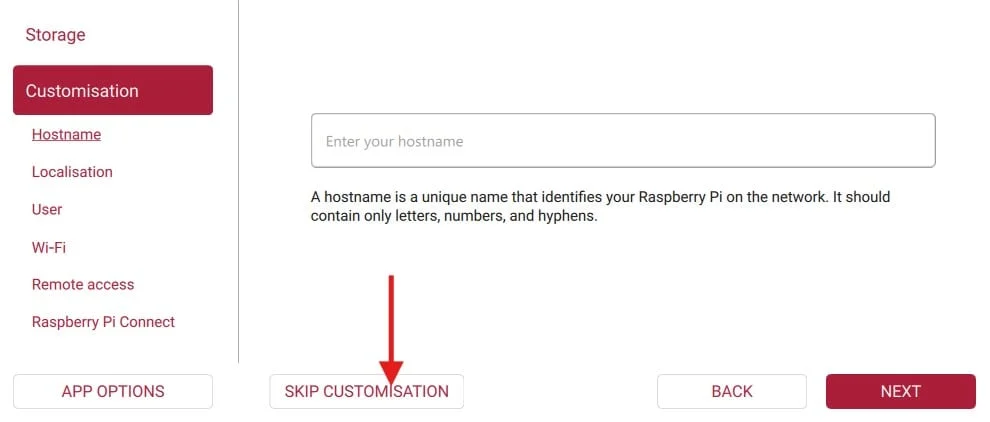
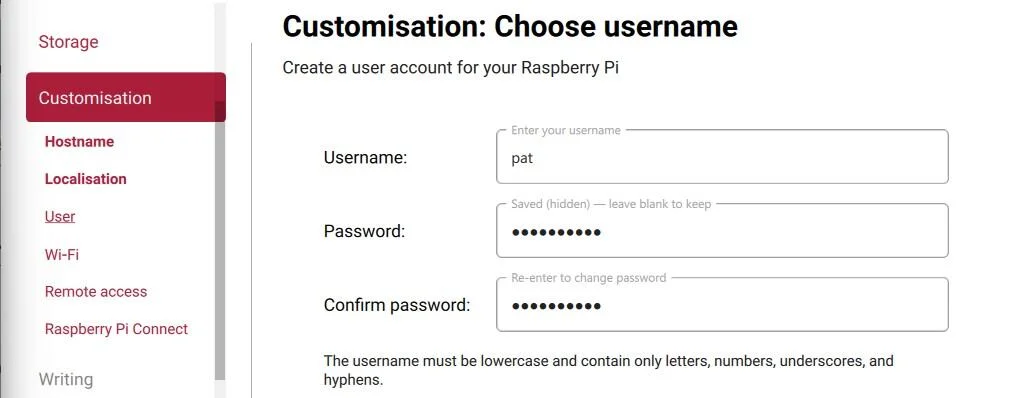
Imager can remember a configuration after the first setup, so subsequent installations can reuse those selections. That reduces the work after the first boot and can make a board ready for a remote connection without attaching a monitor and keyboard. The time required depends on the installation and connection, but setting these details up front avoids repeating them on each device.
10. Browse another computer over SFTP
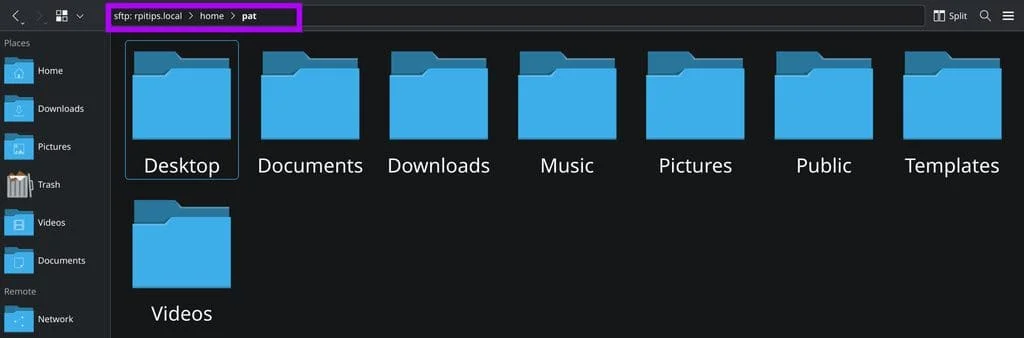
Moving files with a USB drive works, but it adds a physical step. If SSH is available on the computer you want to access, the Raspberry Pi file manager can connect to it using SFTP. Enter this form in the file manager’s address bar:
sftp://<User_Name>@<Host_Name_or_IP_Address>
Replace the placeholders with the account name and the computer’s hostname or IP address, then authenticate when prompted. The remote files appear through the file manager, making them easier to browse and copy than through an SFTP command-line session. The same method can work in the other direction when the desktop computer supports SFTP access to the Pi.
Build Habits That Carry Between Projects
One-off shortcuts help with a particular task. Reusable shell configuration, predictable names and saved system images help across many projects, especially when the same board or setup needs attention repeatedly.
11. Create aliases for frequent commands
An alias gives a short name to a command you use often or find difficult to remember. For example, ls -lah provides a detailed listing that includes hidden files and human-readable sizes. An alias can make it easier to call that command consistently.
Add aliases to the Bash configuration file in your home directory. For example:
alias updatepi='sudo apt update && sudo apt upgrade'
Once the configuration is loaded in the shell, entering updatepi runs the package list refresh followed by the upgrade command. Other examples include:
alias ll='ls -lah'alias temp='vcgencmd measure_temp'alias diskspace='df -h'alias myip='hostname -I'alias failed='systemctl --failed'
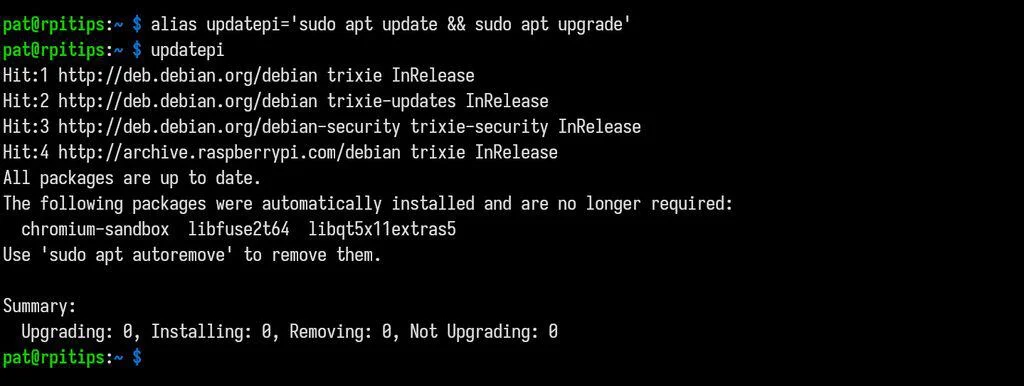
Keep aliases memorable and make sure the name describes what the command will do. This is particularly useful for commands with several options, or tasks you need to repeat during maintenance.
12. Bundle repeated tasks into shell scripts
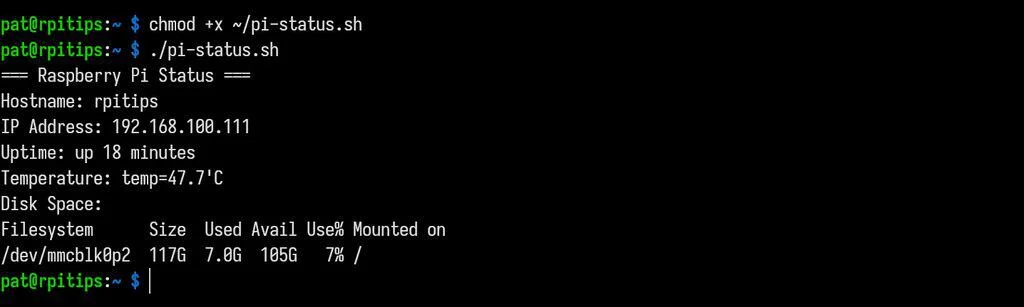
Aliases are best for shortening a single command. For a sequence of steps, a shell script can bring several commands together and can also include variables, loops or conditional logic. A basic status report can collect the hostname, network address, uptime, temperature and root filesystem space:
#!/bin/bash

echo "=== Raspberry Pi Status ==="
echo "Hostname: $(hostname)"
echo "IP Address: $(hostname -I)"
echo "Uptime: $(uptime -p)"
echo "Temperature: $(vcgencmd measure_temp)"
echo "Disk Space:"
df -h /
Save the file in the home directory as pi-status.sh, then make it executable:
chmod +x ~/pi-status.sh
Running the script will print the report in one go. Scripts can also group steps for backing up project files or preparing a project environment by installing dependencies and loading the required environment. The benefit is consistency: the same sequence runs from one saved file rather than being entered command by command.
13. Put scripts on your PATH
A useful script becomes less useful if you have to type its full path each time. The shell searches the directories listed in the PATH variable for executable commands. See the current list with:
echo "$PATH"
One option is to keep scripts in a directory that is already on the path and make each one executable. Another is to create a personal directory, such as ~/.scripts, and add it to the path in the Bash configuration file:
export PATH="$HOME/.scripts:$PATH"
After the shell loads that setting, scripts in the directory can be run by name. Keeping your own scripts in one folder also makes them easier to find, organize and include in a backup.

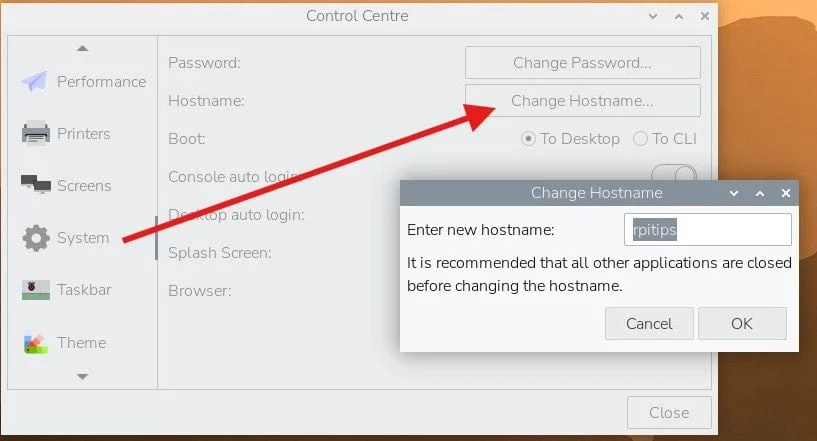
14. Give each Pi a predictable hostname
A hostname provides a memorable way to identify a computer on a network. It can spare you from finding the board’s current IP address each time you want to connect, especially when the address changes between boots.
Set a hostname in Raspberry Pi Imager during a fresh installation, or change it through Control Center on a running system. For several boards, use distinct names that follow a pattern you can recognize. That makes it easier to choose the intended device when connecting remotely.
15. Use SSH keys for repeat connections
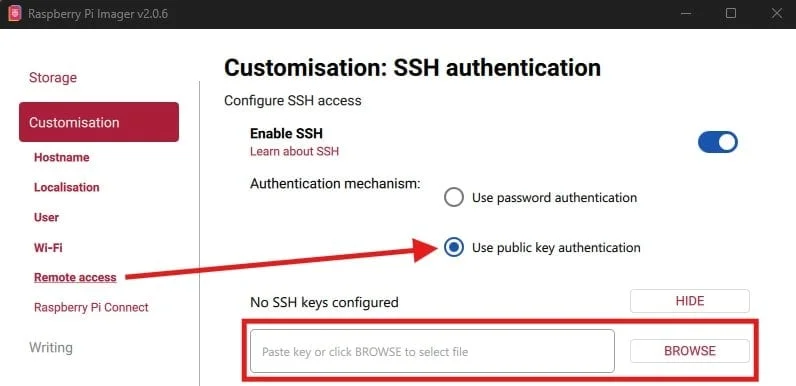
SSH keys let a client device authenticate to a server without entering the account password for every connection. The client holds a private key, while the corresponding public key is installed on the Raspberry Pi. Once the keys are configured, a connection can be authenticated using the key pair.
One approach is to create the keys on the main computer and add them to the Pi through Raspberry Pi Imager. Setup takes some initial work, but it can simplify routine access and allow scripts to connect without stopping for a password prompt. Keys are useful for frequent administration as well as automated tasks.
16. Define SSH aliases for different boards
When connecting to more than one system, an SSH configuration file can store each connection’s username, hostname and port. Instead of entering all parameters every time, create an entry in ~/.ssh/config. For example:
Host rpitips
    HostName rpitips
    User pat
    Port 222
With that entry saved, the connection command becomes:
ssh rpitips
The example uses the alias rpitips, the hostname rpitips, the user pat and port 222. Add a separate Host entry for each computer that needs different settings. The alias gives each configuration a short name, so you don’t need to keep the parameters in memory or rebuild a long command.
17. Keep a restorable SD card image
An SD card image is a file containing a copy of a card’s contents, including its installed software and configuration. It can preserve the working state of a project and provide a way back if the card or setup fails. Images can be made with command-line tools such as dd on Linux or graphical software such as Win32 Disk Imager on Windows.
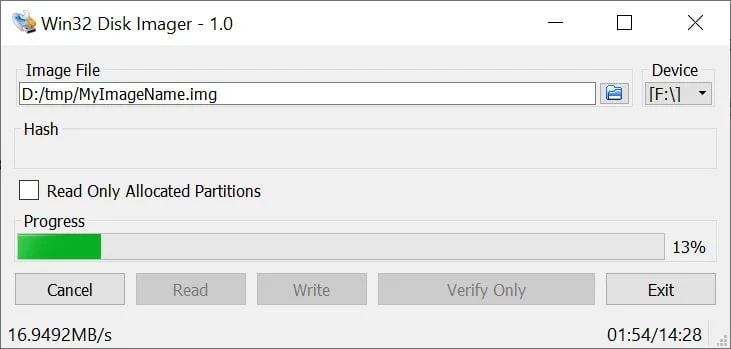
For projects that you revisit, save an image when the setup is in a useful state. When one project is finished and another begins, the same card can be reused while the earlier image is kept for restoration. Creating and restoring images takes time, and the image itself needs to be stored somewhere accessible, but this can be simpler than recreating a tuned installation from scratch.
Choose the Shortcuts That Match Your Workflow
These techniques address different sources of friction. Tab completion and command history reduce typing; grep and watch make terminal checks quicker; desktop shortcuts and bookmarks reduce navigation; and scripts, SSH settings and card images help repeat work reliably.
Start with tasks you already perform often. A useful alias or hostname is easy to adopt in a single session, while SSH keys and project images take some setup but can pay off across repeated connections or rebuilds. As your collection of projects grows, those small choices add up to a more predictable Raspberry Pi workflow.