Ubuntu MATE on Raspberry Pi: Installation, Desktop Features and Performance
- Published
- Author
- Patrick Fromaget
- Reads
- 870
Install Ubuntu MATE by adding its desktop package to Ubuntu Server; expect familiar tools, a large download and modest performance on supported Pi models.
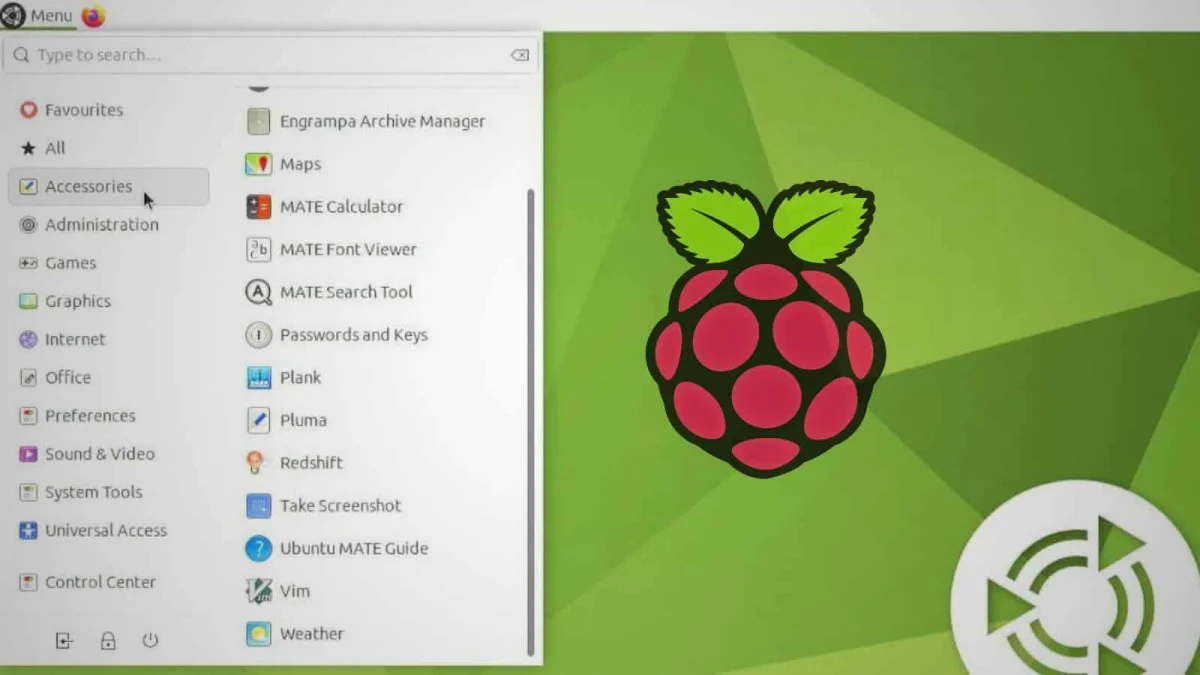
Ubuntu MATE gives Raspberry Pi users a desktop built around the traditional GNOME 2 interface, but installing it now takes an extra step: current releases are no longer offered as standalone Raspberry Pi images. The practical route is to put Ubuntu Server on the board, then install the ubuntu-mate-desktop package. That approach works, though the desktop’s sizable installation and middling speed are part of the trade-off.
MATE will feel familiar to users of Raspberry Pi OS: menus, panels and system controls follow conventions that are easy to navigate. Its appeal is a more complete Ubuntu desktop, including Ubuntu repositories and Snap support. The question is whether those features outweigh the setup time and performance limits on a small board.
Hardware and support
The recommended boards are Raspberry Pi 4, Raspberry Pi 400 and Raspberry Pi 3 models. The tested installation used a Raspberry Pi 4 with 4 GB of RAM. The stated minimum memory is 2 GB, with 4 GB recommended. Storage should be at least 8 GB; 16 GB or more is recommended.
Raspberry Pi 5 is not officially supported yet, although the same installation steps may work. Raspberry Pi 1 and Raspberry Pi Zero are unsupported. Since compatibility can change, check the Ubuntu MATE compatibility list before choosing a board.
The storage choice affects how responsive the system feels. The evaluation found Ubuntu MATE somewhat slow on Raspberry Pi, and recommends using a USB drive or a fast SD card where possible. A 64-bit installation makes performance more manageable, but it doesn’t turn the system into a particularly fast desktop.
Install Ubuntu Server first
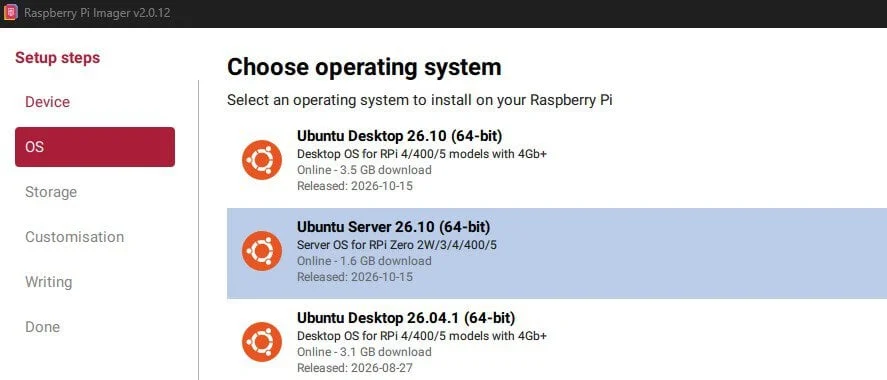
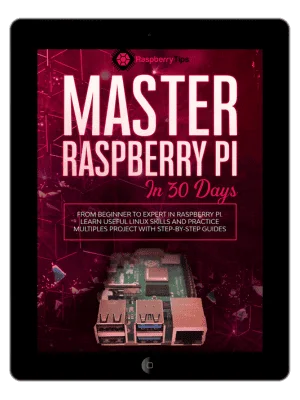
Use Raspberry Pi Imager to write Ubuntu Server to an SD card. The desktop environment will be installed after the board boots, so the first image is a terminal-only system. If you haven’t installed Imager, get it from the Raspberry Pi software page; it can also run on Raspberry Pi OS.
- Open Raspberry Pi Imager and select the Raspberry Pi model you’ll use.
- Under operating systems, choose Other general-purpose OS, then select Ubuntu and Ubuntu Server. Choose the 64-bit version if your board supports it.
- Insert the SD card and select it as the storage target.
- Set the installation options, including a username and password. You can also enable SSH. Configure these now if needed, because the initial system has no graphical setup wizard.
- Review the selections, then click WRITE to flash the card.
Imager’s customization options let you prepare account details and remote access before the first boot. That can save work later, when configuration has to happen at the terminal. The available settings are covered in the Raspberry Pi Imager guide.
Boot the server and add the desktop
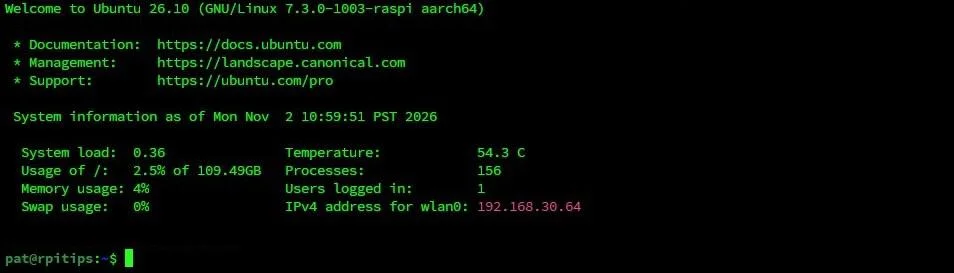
Put the prepared card, or another supported storage device, into the Raspberry Pi and power it on. The first boot may take a while before anything appears. Ubuntu Server then presents a login prompt rather than a welcome wizard. Use the account configured in Imager; if no account was configured, the default login and password are both ubuntu.
Connect the board to the Internet before installing the desktop. Once logged in, refresh the package lists and apply available upgrades:

sudo apt update
sudo apt upgrade
Then install the MATE desktop package from the default Ubuntu repository:
sudo apt install ubuntu-mate-desktopThis is a large addition to the minimal server install. The package installation brings in more than a thousand packages, so expect it to take time and require a working network connection. When it finishes, restart the board:
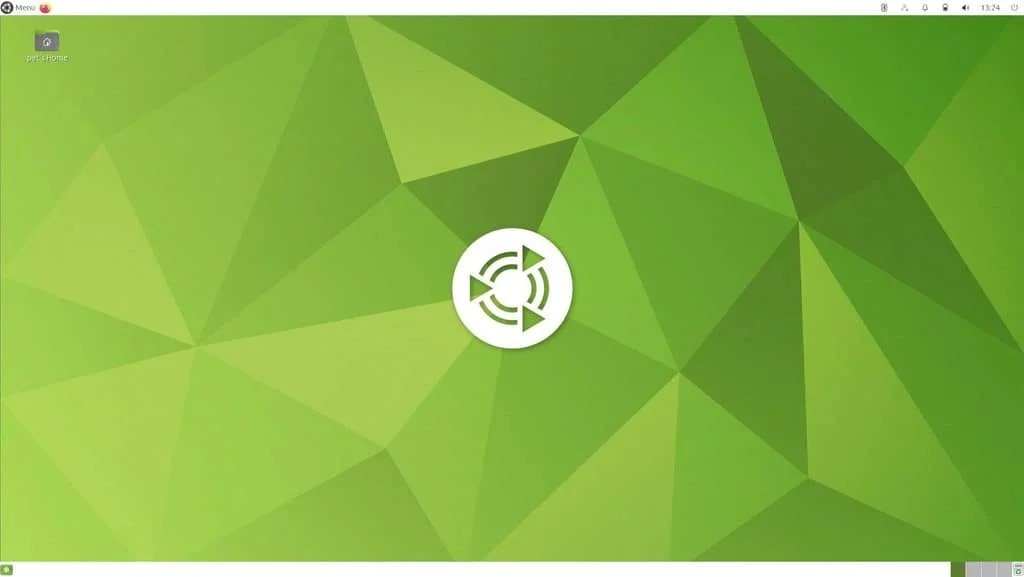
sudo rebootAfter rebooting, the system should show a graphical login screen. Sign in with the account you created to start the Ubuntu MATE desktop.
Finding your way around MATE
MATE’s layout is close enough to Raspberry Pi OS’s PIXEL desktop that most users should find their bearings quickly. The main application menu sits in the upper-left corner, with programs grouped into categories. If categories such as Accessories, System Tools and Administration aren’t immediately helpful, use the menu’s search field to locate an application such as Terminal. Favourites and All provide other ways to browse.
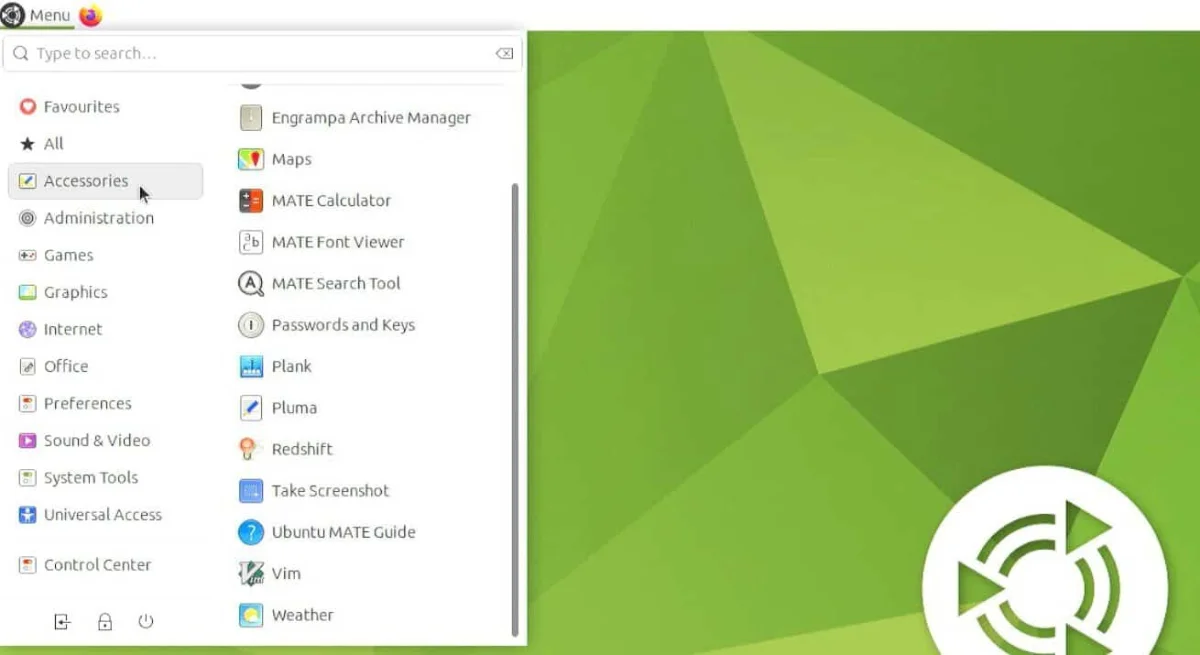
The upper-right panel holds the notification area and common controls for the clock, sound, Bluetooth and network. A lower panel lists open applications for switching between them. It also provides access to virtual desktops and the trash. These familiar controls make the transition straightforward even if you haven’t used MATE before.
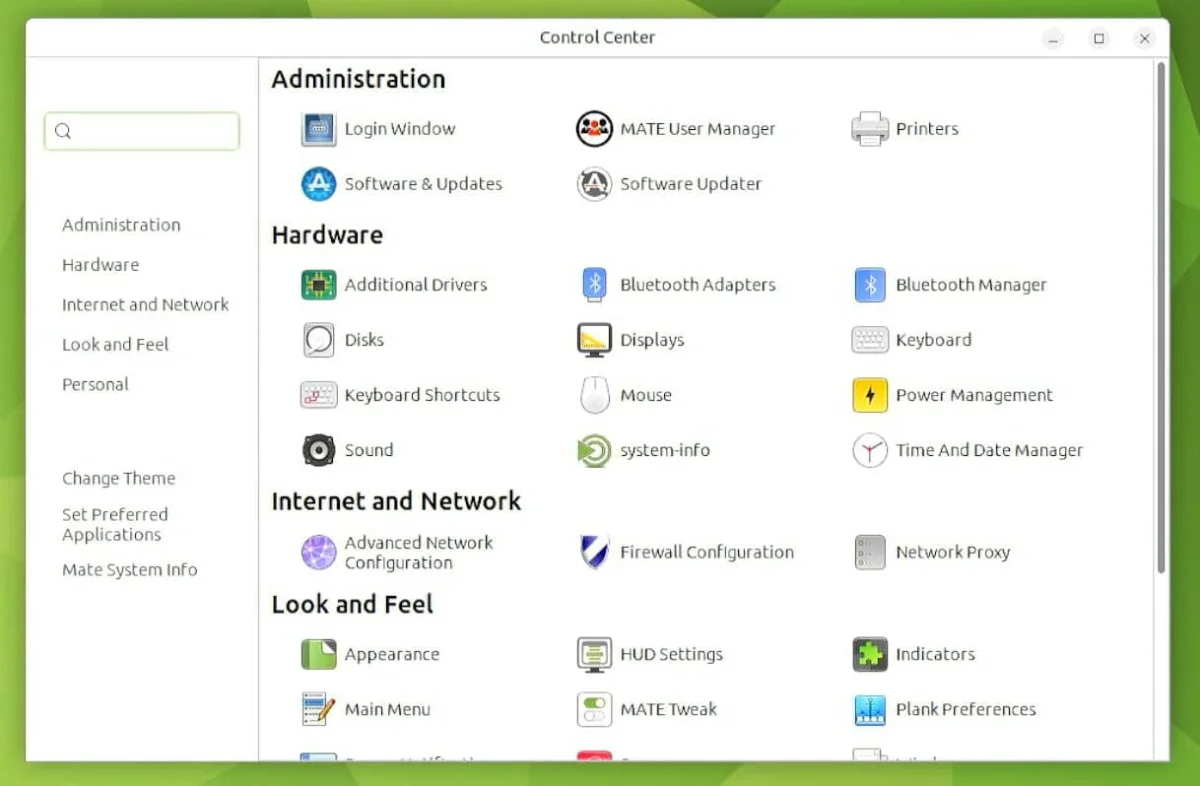
For system configuration, open Control Center from the main menu. It collects settings for desktop appearance, network connections and regional preferences in one place. After joining Wi-Fi, the system may offer updates. You can also open Software Updater from Control Center to check for them and synchronize the system clock.
Included applications and software installation
The desktop arrives with a useful set of everyday programs. Firefox is the default web browser; LibreOffice supplies word processing and spreadsheet tools. Celluloid is the preinstalled media player, and the system also includes basic accessories such as a terminal, text editor and screenshot utility. Disk usage analysis and backup tools are included as well.
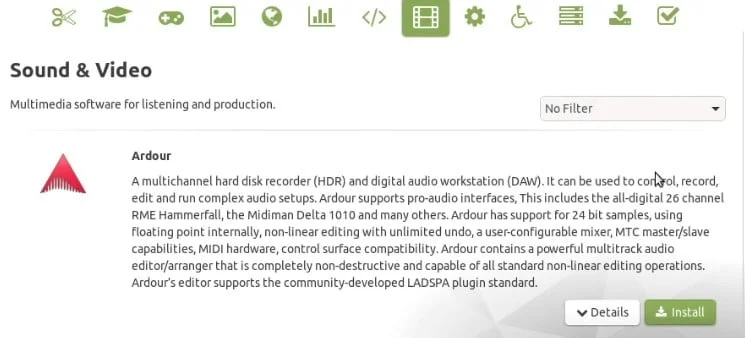
New software can be installed through Software Boutique, a graphical catalog that lets you browse categories or search by name. Each listing provides a description and an install button. For example, search for VLC or open the sound and video category to find it. This is a more approachable way to discover applications than relying on a package manager when you don’t yet know a program’s name.
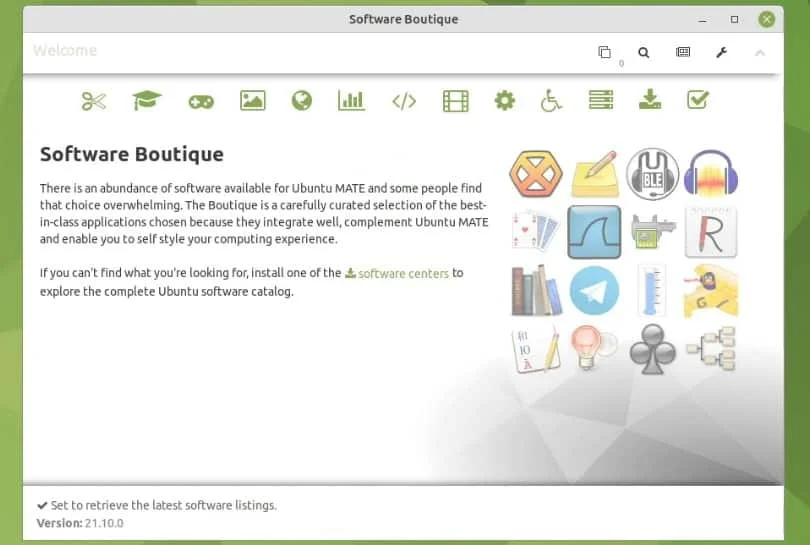
That catalog is a practical advantage for users who prefer a graphical workflow. The available programs are broadly similar to what Linux users can install elsewhere, but browsing and installing them takes less familiarity with command-line tools. More experienced users can still use Ubuntu’s repositories and Snap packages.
What the installation changes in practice
Ubuntu MATE’s strengths are its more contemporary desktop presentation, a useful Control Center and the Software Boutique. Its 64-bit system also gives it a workable foundation on the recommended hardware. For someone who wants a conventional desktop environment and access to Ubuntu software, these features make it a reasonable alternative to Raspberry Pi OS.
The cost is time and responsiveness. The initial desktop install pulls in a very large package set, and the system can feel slow, especially when running applications such as Firefox. The test did manage full-screen YouTube playback in HD without loss, suggesting that newer versions are improving, but that result doesn’t remove the broader performance limitation.
Some early issues were also encountered with networking and a black screen; they were fixed quickly during testing. The default application selection may not suit everyone either. Celluloid is included instead of VLC, for example, and users who prefer Chromium will need to install it themselves.
My read is that Ubuntu MATE is worth trying when its desktop and Ubuntu software access matter more than a quick setup or the snappiest response. It should be approachable for beginners and offers room for more advanced users, but Raspberry Pi 5 support remains unofficial, and the tested performance shouldn’t be assumed for that board. A fast storage device and a compatible model are sensible starting points; the best measure is how the desktop performs with the applications you actually use.
If MATE doesn’t suit your workload, other Raspberry Pi options include Twister OS, Manjaro and Linux Mint. For an Ubuntu-based alternative, Pop!_OS on Raspberry Pi is another option to consider.