Install and Configure MagicMirror on Raspberry Pi: Modules, Remote Access and Autostart
- Published
- Author
- Patrick Fromaget
- Reads
- 421
Set up MagicMirror on Raspberry Pi OS, edit its dashboard and weather settings, view it remotely, launch it at boot and add community modules.
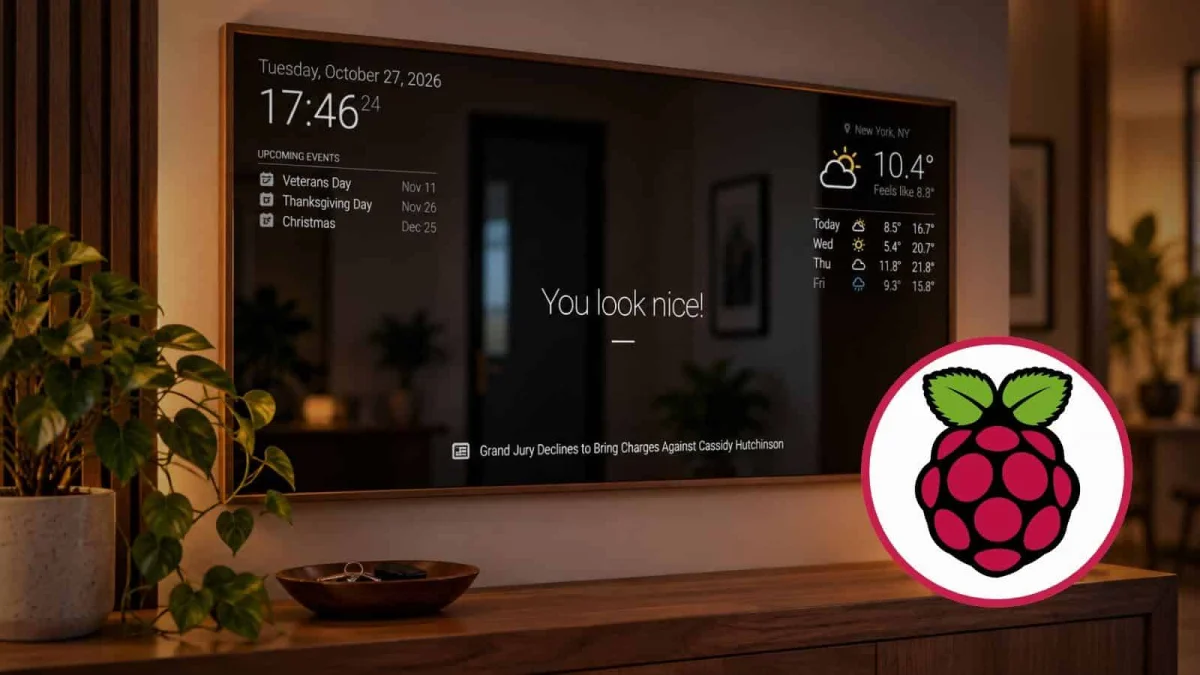
MagicMirror turns a Raspberry Pi and display into a configurable information dashboard. Behind two-way glass, it can show a clock, calendar, weather and other data while still functioning as a mirror; without the glass and frame, the same software works as a conventional screen dashboard. The project was created by Michael Teeuw, and its modular design lets users tailor the display through configuration settings and community extensions.
The software setup is the part that determines how easily the dashboard can be maintained. This guide uses Raspberry Pi OS with a desktop environment, installs MagicMirror from its GitHub repository and runs it with Node.js. It then covers the configuration file, remote viewing, weather settings, automatic startup and module management.
Choose the display format
A traditional smart mirror places a display and Raspberry Pi behind two-way glass, mounted in a frame. A spare screen can work; if you need one, the source recommends looking for a slim VESA-compatible monitor or a small TV that can fit behind the glass. The screen does not need a smart operating system, because the Raspberry Pi runs the dashboard.
Building the frame is a separate mechanical project involving the glass, display and enclosure. If that work is outside the scope of your build, MagicMirror can run as a dashboard on a regular monitor or a compact computer with a screen. The software and configuration are the same either way, so it’s possible to test the layout before committing to a frame.
Install MagicMirror on Raspberry Pi OS
MagicMirror offers several deployment options, including a dedicated operating system image, a Docker image and installation scripts. A prebuilt image can be useful for a quick trial on a particular Raspberry Pi and display. The author’s preferred approach for a system that will be maintained over time is a manual installation: install Node.js, clone the project repository, install its dependencies and create a configuration file.
The steps below assume Raspberry Pi OS with a desktop environment. The author tested that distribution; other Linux systems may work, but aren’t covered by the same test experience. Use a reliable microSD card for the operating system, since it will hold the installation and its configuration.
Install Node.js and the application
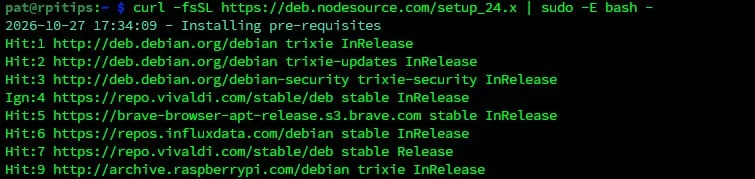
First install Node.js. The commands shown use the NodeSource setup script for the 24.x line, followed by the Raspberry Pi OS package manager:
curl -fsSL https://deb.nodesource.com/setup_24.x | sudo -E bash -
sudo apt install nodejs
Node.js requirements can change between MagicMirror releases. Check the project’s current release requirements before installing or upgrading, and make sure the selected Node.js version is supported.
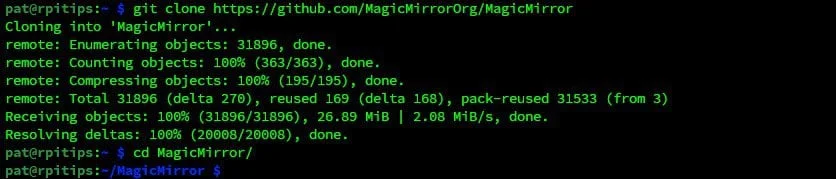
Next, clone the MagicMirror repository and enter the new directory:
git clone https://github.com/MagicMirrorOrg/MagicMirror
cd MagicMirror
Install the application dependencies with npm:
npm installThe repository includes a sample configuration. Copy it to the filename the application expects:
cp config/config.js.sample config/config.jsStart the application from the MagicMirror directory:
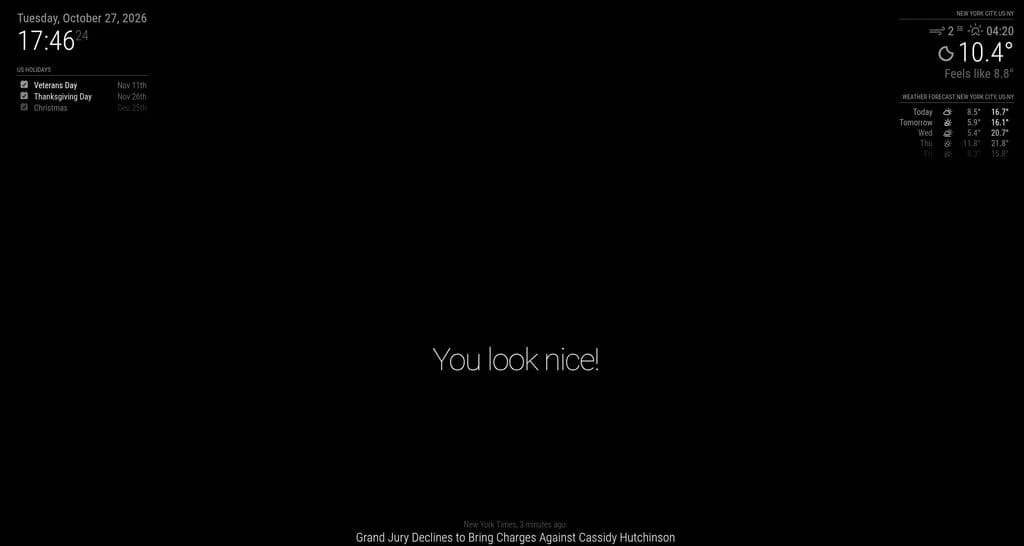
npm run startA default dashboard should appear on the display, with elements such as the date, weather, news and a rotating compliment. That gives you a working baseline before you change the layout or add modules.
Work with the configuration file
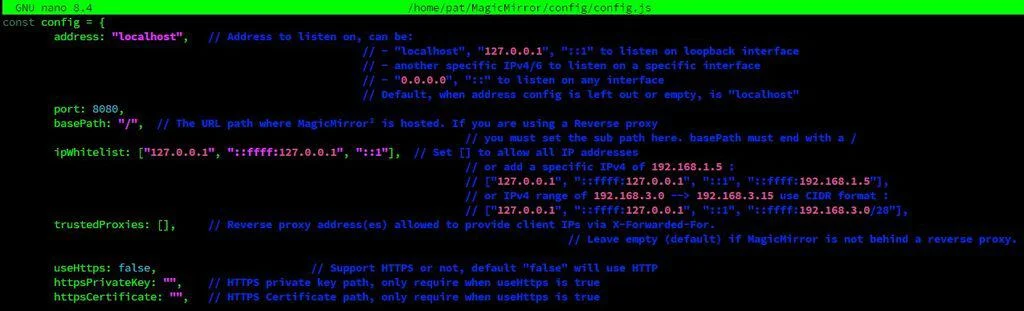
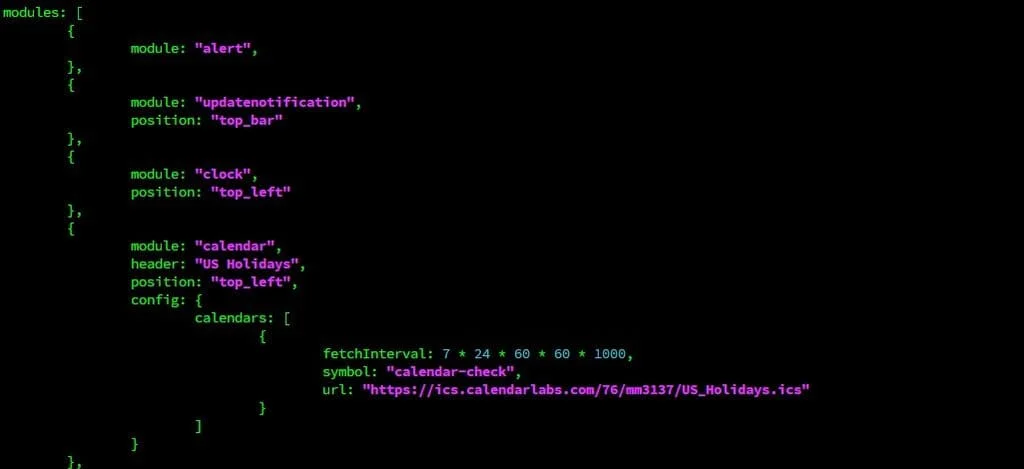
MagicMirror’s main configuration lives at /home/$USER/MagicMirror/config/config.js, where $USER represents the account used on the Raspberry Pi. The file contains general settings followed by a list of modules. General settings include the listening address, port, language, locale and time format; these values can affect several parts of the display.
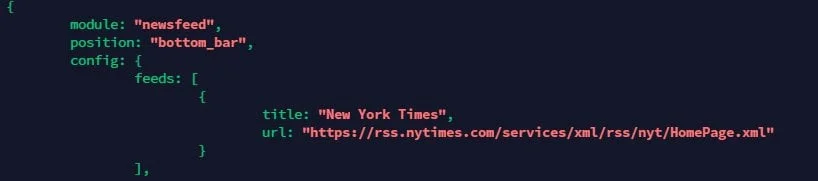
Each module has its own configuration entry. Many entries specify a module name and its screen position. Others accept additional options, such as a URL for a calendar feed. This structure makes the dashboard adaptable: you can change a feed, reposition a widget or remove a module without changing the application’s source code.
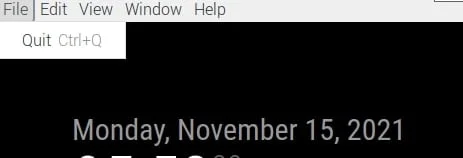
MagicMirror normally opens full screen, so close it before editing the file locally. Press Alt to reveal the desktop menu, then select File > Quit. Ctrl+Q is another option. If neither shortcut works, use the Windows key or Raspberry Pi key to bring up the desktop and close the application there.
Change the news feed
The sample configuration includes a news feed that displays article headlines and dates. To point it at a different feed, open the file in a text editor such as nano:
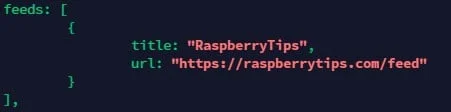
nano /home/$USER/MagicMirror/config/config.jsFind the newsfeed module and update its title and feed URL to the values you want to use. Save the configuration, then restart MagicMirror from its directory:
cd /home/$USER/MagicMirror
npm run start
Use the feed’s own documentation or settings to obtain a suitable feed URL. The configuration file is also where you can remove modules you don’t need or adjust the screen positions of the ones you keep. Making a backup copy before editing gives you a quick way to recover if a change breaks the display.

Set the weather location and units
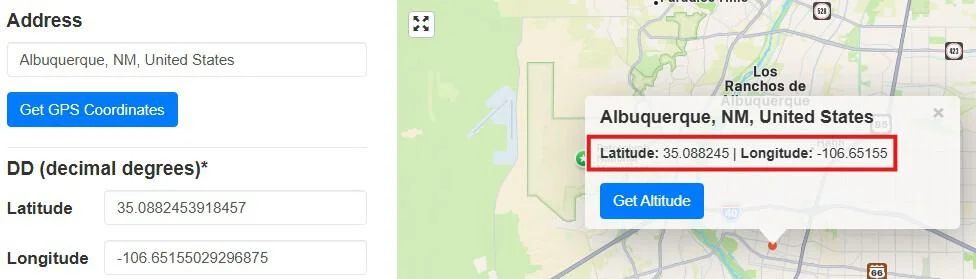
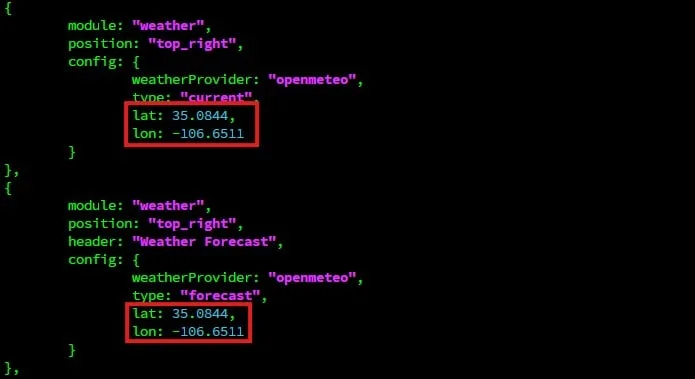
The default weather modules may remain on “Loading…” or show results for the wrong location. The configuration contains two weather entries, one for current conditions and another for the forecast. Set the latitude and longitude for your location in both entries, then restart the application.
The sample uses metric units, so temperatures are reported in Celsius. To request Fahrenheit, change the weather module’s units value from "metric" to "imperial". Confirm the change in both weather entries if each one has its own units setting.
Arrange modules on screen
Module positions use named regions. The top and bottom bars span the width of the display. Three-column regions sit below the top bar and above the bottom bar: top_left, top_center, top_right, bottom_left, bottom_center and bottom_right. The middle of the display also has upper_third, middle_center and lower_third.
Set a module’s position value to one of those names in config.js. If the region names are hard to picture, the MagicMirror forum’s [region guide](https://forum.magicmirror.builders/topic/286/regions/2) shows how they map onto the display.
View the dashboard from another computer
Remote viewing lets you edit the configuration on one computer and check the result in a browser, while the Raspberry Pi continues to drive the display. It can also help with troubleshooting: browser developer tools can expose JavaScript errors that aren’t obvious on the mirror itself.
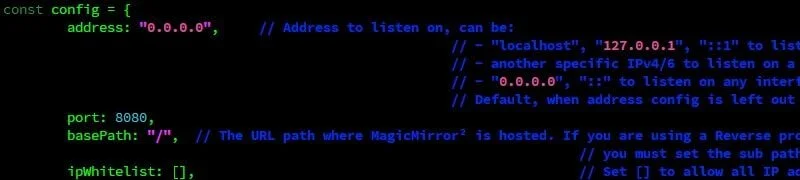
Open config.js and check the address, port and ipWhitelist settings. The default port is 8080; change it only if another service on the Raspberry Pi already uses that port. Set the address to the Pi’s current IP address, or use "0.0.0.0" to listen on all network interfaces:
address: "0.0.0.0"The whitelist controls which client addresses can connect. If the computer you’ll use has a fixed address, add it to the list alongside the local loopback addresses. The example below uses 192.168.1.10:
ipWhitelist: ["192.168.1.10", "127.0.0.1", "::ffff:127.0.0.1", "::1"]The configuration can instead allow all IP addresses by setting an empty list:

ipWhitelist: []After saving, restart MagicMirror and open http://<IP>:8080 in a browser, replacing <IP> with the Raspberry Pi’s address. HTTPS is possible with a certificate, but the guide says it isn’t necessary for viewing local configuration changes.
Start MagicMirror automatically
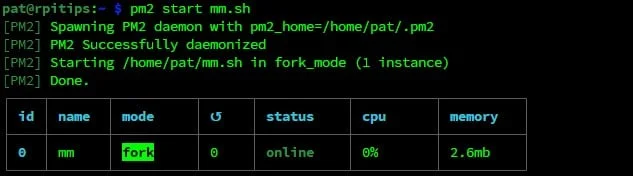
A mirror installed in a frame is more useful if the dashboard starts whenever the Raspberry Pi boots. The guide uses PM2, a process manager for Node.js applications, to launch and supervise MagicMirror.

Install PM2 globally:
sudo npm install -g pm2Ask PM2 to configure startup at boot:

pm2 startupPM2 prints a command for enabling its startup service. Run the command it provides for your account and system; the example from the guide is:
sudo env PATH=$PATH:/usr/bin /usr/lib/node_modules/pm2/bin/pm2 startup systemd -u pat --hp /home/patCreate a small script that changes to the MagicMirror directory and starts the application:
nano /home/$USER/mm.shAdd these lines, then save the file:
cd $HOME/MagicMirror
npm run start
Make the script executable and start it through PM2:
chmod +x mm.sh
pm2 start mm.sh
Save PM2’s current process list so it can restore the application after a reboot:
pm2 saveOnce PM2 manages the process, use it to restart MagicMirror after configuration changes, stop the running application or inspect its recent logs:

pm2 restart mm
pm2 stop mm
pm2 start mm.sh
pm2 logs mm
Logs are particularly useful if the screen stops updating after an edit. A configuration error may prevent the application from starting cleanly, and the process output can help identify what needs attention.
Add community modules
MagicMirror’s module system is where the dashboard becomes personal. Community modules can display items such as jokes, cryptocurrency and stock values, student timetables, or data retrieved from services with open APIs. The project maintains a list of third-party modules, and developers also publish modules in their own repositories. If a specific feature isn’t available, the project’s JavaScript-based structure also leaves room to write a module.
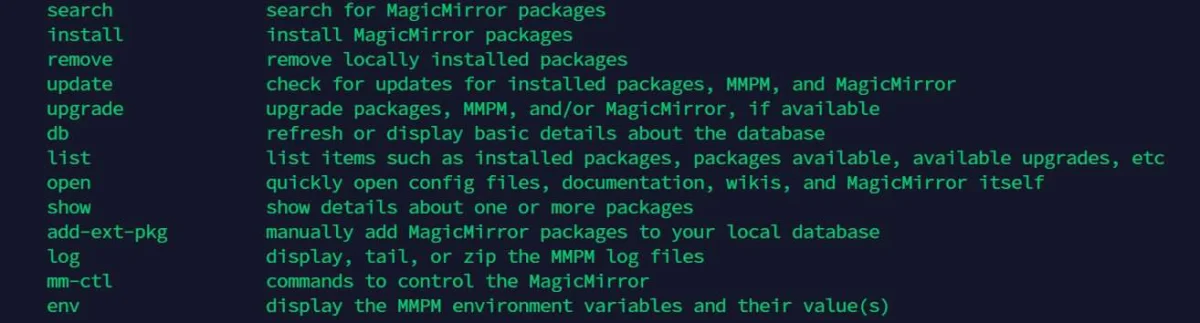
Modules can be installed one at a time by cloning each project and following its setup instructions. The guide instead recommends trying the MagicMirror Module Manager, known as mmpm, to search for and install packages from the command line.
Install and set up mmpm
Install the listed system dependencies:

sudo apt install libffi-dev nginx-fullThen install mmpm with pip:
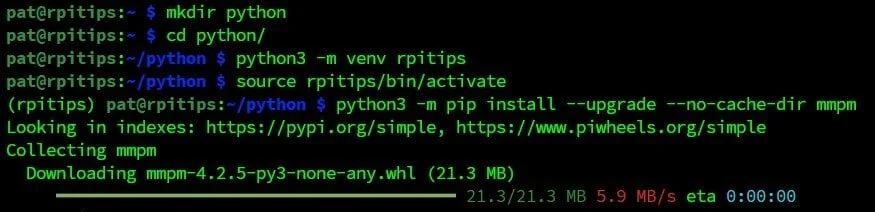
python3 -m pip install --upgrade --no-cache-dir mmpmOn Raspberry Pi OS Bookworm and Trixie, the guide says to run this installation in a Python virtual environment. After installation, start the setup wizard:

mmpm guided-setupThe wizard asks about the existing MagicMirror installation and how you plan to use the manager. Answer its questions, then run the commands it provides. To make the mmpm command available in the shell, append the local binary directory to the PATH in .bashrc:
echo 'export PATH="$PATH:$HOME/.local/bin"' >> ~/.bashrc && source ~/.bashrcUse mmpm search to look for modules, mmpm list to inspect packages and mmpm install to install one. For example:
mmpm search calendar
mmpm list -a
mmpm list -i
mmpm install random_quotes
mmpm -h
The -a option lists all packages and -i lists installed modules. Run mmpm list --help for other list options, or mmpm -h for general command help.
Install a quote module
As an example, search for a quotes module and install random_quotes:
mmpm search quotes
mmpm install random_quotes
Installation alone doesn’t add the module to the screen. Open config.js and add an entry inside the modules array:
{
    module: "random_quotes",
    position: "bottom_bar"
},
Restart the PM2-managed application to load the updated configuration:
pm2 restart mmThe module should then appear in the bottom bar. Many modules have further settings. The quote module, for example, supports options for the kinds of quotes displayed; consult the module’s documentation for its available configuration.
Build the dashboard in stages
A practical way to approach a MagicMirror build is to get the software running on a normal display first, then tune the configuration and check remote access. Once the dashboard behaves as expected, PM2 can handle startup and community modules can fill in the information you want to see. The frame and two-way glass can come later, after the screen layout is settled.
The project also provides a useful path into Node.js, Git and API-backed displays. The central configuration file controls the built-in modules, while separately installed community modules extend what the dashboard can show. Keeping a backup of the configuration and using PM2’s logs after changes makes the next round of edits easier to diagnose.