So you’re staring at a chicken breast in the fridge, wishing it would magically transform into something delicious without you doing much work, huh? Been there, done that, bought the apron (and then promptly stained it). Well, today’s your lucky day, my friend, because we’re about to whip up some Parmesan Breaded Chicken Breast that’s so good, you’ll feel like a culinary genius, even if your greatest achievement last week was microwaving popcorn without burning it.
Why This Recipe is Awesome
Let’s be real, you’re not trying to win “MasterChef” tonight. You just want something that tastes amazing, doesn’t require a culinary degree, and ideally, won’t make your kitchen look like a war zone. This Parmesan Breaded Chicken Breast? It ticks all those boxes and then some. It’s **idiot-proof**, I swear. Even I, someone who once mistook baking soda for baking powder (the cake was… memorable), can nail this. It’s quick, it’s crispy, it’s cheesy, and it’ll make your taste buds sing opera. Plus, it looks fancy enough to fool guests into thinking you actually put effort in. Score!
Ingredients You’ll Need
- **Boneless, Skinless Chicken Breasts:** 2-4 of ’em. The blank canvas for your delicious masterpiece.
- **All-Purpose Flour:** About ½ cup. For that initial dust bath.
- **Eggs:** 2 large. Our sticky glue.
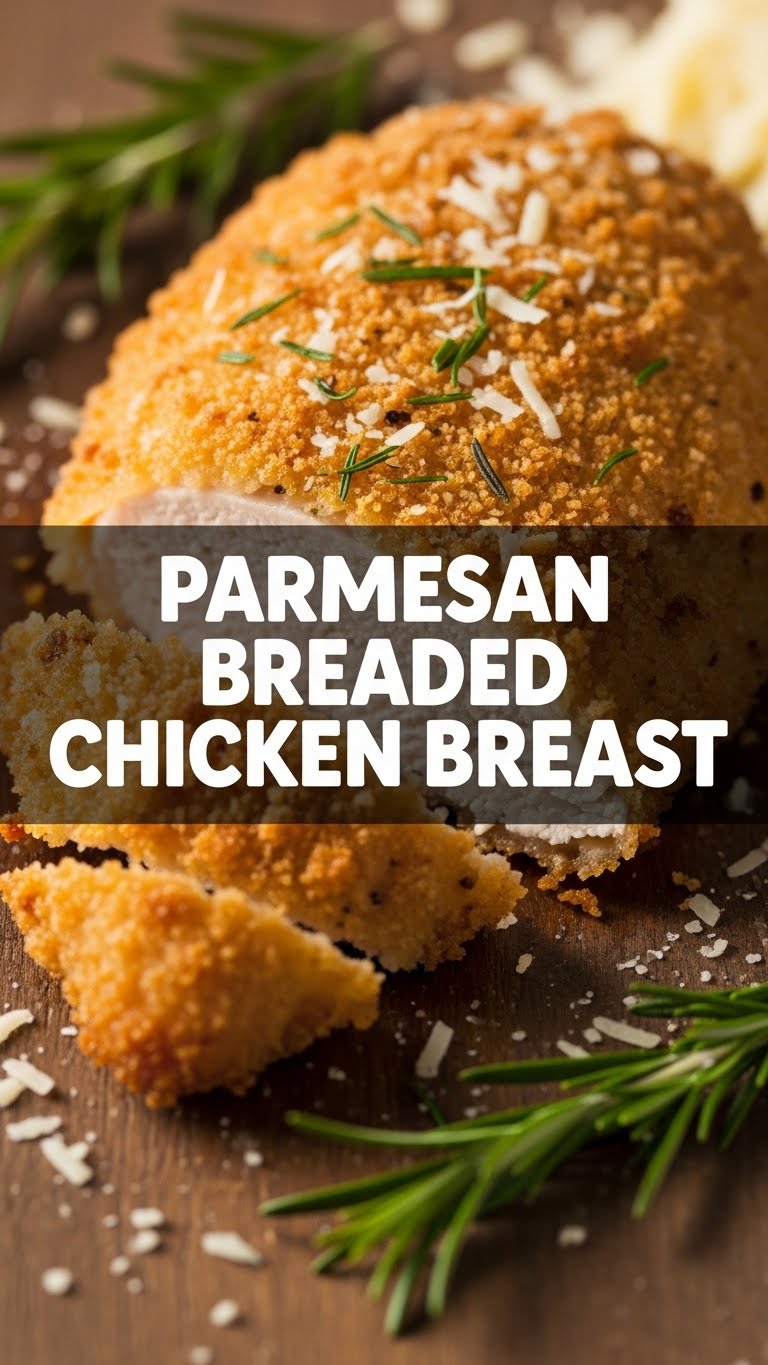
- **Parmesan Cheese:** ½ cup, grated. The good stuff, please. Not the dusty shaker kind, unless that’s all you’ve got – no judgment.
- **Panko Breadcrumbs:** 1 cup. **Key tip:** Panko makes things ridiculously crispy. Don’t skip it!
- **Garlic Powder:** 1 teaspoon. Because garlic makes everything better, fight me.
- **Dried Italian Seasoning:** 1 teaspoon. For that “Mamma Mia!” flavor.
- **Salt & Black Pepper:** To taste. Basic seasonings, but don’t underestimate their power.
- **Olive Oil (or your preferred cooking oil):** A few tablespoons, for pan-frying.
- **Optional: Fresh Parsley:** Chopped, for garnish. Makes it look like you know what you’re doing.
Step-by-Step Instructions
- **Flatten Those Fowl:** Take each chicken breast and place it between two pieces of plastic wrap (or in a Ziploc bag). Grab a rolling pin or a heavy pan and pound ’em down to about ½-inch thickness. This ensures even cooking and maximum crispiness.
- **Set Up Your Dredging Station:** Get three shallow dishes ready. In the first, put the flour. In the second, whisk the eggs. In the third, combine the Panko breadcrumbs, grated Parmesan, garlic powder, Italian seasoning, salt, and pepper. Mix it all up like you’re a mad scientist.
- **Dip, Dip, Hooray!:** Take one flattened chicken breast. First, dredge it in the flour, shaking off any excess. Then, dip it into the egg wash, letting extra drip off. Finally, press it firmly into the Panko-Parmesan mix, making sure it’s completely coated. Repeat with the remaining chicken.
- **Get Sizzling:** Heat about 2 tablespoons of olive oil in a large skillet over medium-high heat. You want it hot enough to sizzle but not smoke like a dragon.
- **Fry ‘Em Up:** Carefully place the breaded chicken breasts in the hot skillet. Don’t overcrowd the pan, or they won’t get crispy! Cook for 3-5 minutes per side, or until golden brown and cooked through (internal temp of 165°F/74°C).
- **Rest and Devour:** Transfer the cooked chicken to a plate lined with paper towels to drain any excess oil. Let it rest for a couple of minutes – it helps keep the juices in. Serve immediately, perhaps with a sprinkle of fresh parsley if you’re feeling fancy.
Common Mistakes to Avoid
- **The “Not Flattening Chicken” Fiasco:** Thinking you can skip pounding the chicken? Rookie mistake. You’ll end up with unevenly cooked, dry edges and raw centers. Nobody wants that.
- **Overcrowding the Pan:** Trying to cook all the chicken at once in a tiny skillet? You’re essentially steaming it, not frying it. Say goodbye to that crispy crust. Cook in batches, people!
- **Forgetting to Season:** Relying solely on the Parmesan for flavor? Nah. **Salt and pepper are your best friends.** Don’t be shy in the breading mixture.
- **Low Heat Blues:** Cooking on heat that’s too low will make your chicken soggy and greasy, not golden and crisp. Crank it up to medium-high, but keep an eye on it!
- **The “Too Much Flour” Trap:** Letting too much flour cling to the chicken before the egg wash. This creates a gummy layer that prevents the breading from sticking properly. Shake off that excess!
Alternatives & Substitutions
Life’s too short to stick to the exact recipe every time, right? Here are some ideas to mix things up:
- **Cheese Swap:** No Parmesan? No problem! Try Pecorino Romano for a sharper kick, or even a blend of Italian cheeses. It’ll still be delish.
- **Herb Hero:** Don’t have Italian seasoning? Use dried oregano, basil, or a mix of what you’ve got. Fresh herbs like thyme or rosemary (finely chopped) can also be amazing in the breading.
- **Spice It Up:** Want some heat? Add a pinch of red pepper flakes to the Panko mix. 🔥
- **Gluten-Free Option:** Use gluten-free flour and gluten-free Panko breadcrumbs. The world is your GF oyster.
- **Baking It:** Prefer to bake instead of fry? No sweat. After breading, place the chicken on a greased baking sheet and bake at 400°F (200°C) for 15-20 minutes, flipping halfway, until golden and cooked through. It won’t be *quite* as crispy, but it’s a solid, healthier alternative.
FAQ (Frequently Asked Questions)
- **Can I make this ahead of time?** You can bread the chicken a few hours in advance and keep it in the fridge. But for maximum crispiness, it’s best to fry right before serving. **IMO**, fresh is always best here.
- **What if I don’t have Panko? Can I use regular breadcrumbs?** Technically, yes, but why hurt your soul like that? Panko is the secret to next-level crunch. Regular breadcrumbs will work, but expect a softer texture.
- **My breading isn’t sticking! What am I doing wrong?** Ah, classic. Make sure your chicken is relatively dry before flouring, shake off excess flour, and press the breading firmly onto the chicken. Don’t be gentle!
- **How do I know when the chicken is cooked through?** The easiest way is with a meat thermometer: it should read 165°F (74°C). If you don’t have one, cut into the thickest part; if the juices run clear and there’s no pink, you’re good to go.
- **What should I serve with this masterpiece?** Oh, the possibilities! A simple side salad, some roasted asparagus, or a pile of mashed potatoes are all excellent choices. Or just eat it by itself. I won’t judge.
- **Can I use chicken thighs instead of breasts?** Absolutely! Thighs are super flavorful and forgiving. Just adjust cooking time as needed—they might take a smidge longer.
Final Thoughts
See? That wasn’t so hard, was it? You just took a humble chicken breast and transformed it into a crispy, cheesy, flavor-packed meal that’s perfect for a weeknight, a casual dinner party, or just because you deserve something ridiculously tasty. Now go impress someone—or just yourself—with your new culinary superpowers. You’ve totally earned it, and probably a nap after all that cooking (which wasn’t even that much, but let’s pretend). Enjoy!