Ever opened your pantry and thought, “What the heck am I going to make with all this random stuff?” Well, grab those mason jars, friends! Today we’re turning kitchen chaos into canned hamburger vegetable soup – aka “apocalypse-ready comfort food” that tastes way better than it has any right to. Whether you’re a prepper, a penny-pincher, or just someone who hates cooking when you’re tired (hello, that’s all of us), this recipe is about to become your new BFF.
Why This Recipe is Awesome
Let me count the ways this soup rocks your socks off. First, it’s basically survival food that doesn’t taste like survival food. When the zombies come, you’ll be eating like royalty while everyone else chokes down dry ramen. Second, it’s the ultimate kitchen flex – preserving your own food feels somehow both pioneer-woman badass and modern homesteader chic. Third, and perhaps most importantly, future-you will literally weep tears of joy on a random Tuesday when dinner is just “open jar, heat, eat.” Your future self is already thanking you.
Ingredients You’ll Need
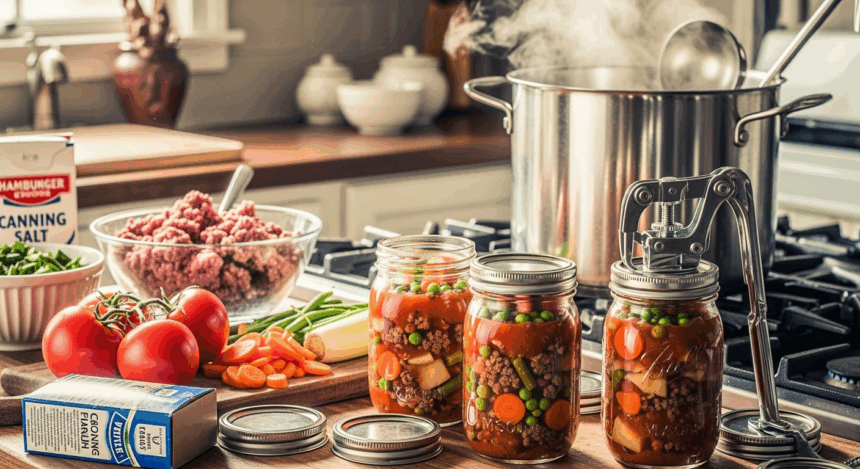
For about 7 quart jars of soupy goodness:
- 3 pounds ground beef (or whatever mystery meat was on sale)
- 2 large onions, diced (tears are part of the process, embrace them)
- 4 carrots, diced (the more crooked and ugly, the better they taste, IMO)
- 4 celery stalks, diced (including those sad limp ones from the back of your fridge)
- 2 large potatoes, cubed (russets work great, but honestly whatever you’ve got)
- 2 cups green beans, cut into 1-inch pieces (fresh or frozen, we don’t judge here)
- 2 cups corn kernels (again, fresh or frozen, you do you)
- 1 cup peas (the vegetable even picky eaters tolerate)
- 2 cans (14.5 oz each) diced tomatoes
- 8 cups beef broth (homemade if you’re feeling fancy, store-bought if you’re normal)
- 3 cloves garlic, minced (or 5-6 if you’re keeping vampires away)
- 2 bay leaves (the herb everyone owns but nobody knows why)
- 1 tablespoon Italian seasoning (the lazy cook’s best friend)
- Salt and pepper to taste (be generous, we’re not on a diet today)
- 7 quart-sized canning jars with lids and rings (clean ones, please)
Step-by-Step Instructions
- Prep your pressure canner. Read the manufacturer’s instructions, or just stare at it until it makes sense. Kidding! Seriously though, follow those instructions – we’re not trying to create kitchen explosives here.
- Brown that beef. In a large pot, cook the ground beef until no pink remains. Drain the fat unless you’re actively trying to clog your arteries. A little fat adds flavor though, so maybe keep a tablespoon.
- Add the aromatics. Toss in those diced onions and garlic. Sauté until the onions are translucent and your kitchen smells like heaven (about 5 minutes).
- Veggie party time! Add carrots, celery, potatoes, green beans, corn, and peas. Stir everything together like you’re conducting a vegetable orchestra.
- Liquid assets. Pour in the diced tomatoes with their juice and the beef broth. Add bay leaves, Italian seasoning, salt, and pepper. Bring this magnificent concoction to a boil.
- Simmer down now. Reduce heat and let simmer for about 15 minutes. Your vegetables should be slightly tender but not mushy – they’ll cook more during canning.
- Jar it up! Ladle hot soup into hot sterilized jars, leaving 1-inch headspace. Remove air bubbles by sliding a non-metallic utensil between the soup and the jar. Wipe rims, apply lids, and secure with rings finger-tight.
- Process under pressure. Place jars in your pressure canner. Process quart jars at 10 pounds pressure for 90 minutes (adjust for altitude if you’re fancy and live in the mountains).
- Cool down period. Allow pressure to return to zero naturally, then wait 10 more minutes before opening the canner. Remove jars and let cool for 24 hours without disturbing them. Listen for the satisfying “ping” of sealing lids – it’s the sound of success!
- Storage and bragging rights. Store sealed jars in a cool, dark place for up to a year. Periodically send photos to your non-canning friends to inspire both admiration and jealousy.
Common Mistakes to Avoid
Even experienced canners mess up sometimes. Here’s what not to do:
- Skipping the pressure canner. Water bath canning for meat is a no-go unless food poisoning is on your bucket list. Low-acid foods like meat and vegetables MUST be pressure canned.
- Overcooking the vegetables. They’ll continue cooking during canning, so if you turn them to mush beforehand, you’ll end up with vegetable smoothie soup.
- Adding pasta or rice. Just don’t. They’ll disintegrate into a starchy nightmare during canning. Add these when you’re ready to eat the soup.
- Getting creative with the recipe. Canning is science, not art. Save your culinary creativity for when you open the jar and add finishing touches.
- Rushing the cooling process. I know those pings are satisfying, but forcing the jars to cool faster can break the seal or even break the jar. Patience, grasshopper.
Alternatives & Substitutions
Life happens, pantries vary, and sometimes you just don’t want to go to the store. Here are some swaps that won’t ruin everything:
Meat options: Ground turkey works great for a lighter version. Ground venison is amazing if you’re friends with hunters. Even ground pork will work, though it changes the flavor profile.
Veggie flexibility: The beauty of this soup is its adaptability. No green beans? Use more carrots. Hate peas? Skip ’em. Got zucchini about to go bad? Throw it in! Just keep the total amount of vegetables roughly the same.
Broth alternatives: Chicken broth works in a pinch, though it changes the flavor. Vegetable broth also works if you’re making this for a mixed crowd of meat-eaters and vegetarians (though obviously skip the meat for a true vegetarian version).
Seasoning swaps: No Italian seasoning? Use a mix of oregano, basil, and thyme. Want it spicier? Add a pinch of red pepper flakes. Craving something different? A tablespoon of taco seasoning takes this in a whole new direction.
FAQ (Frequently Asked Questions)
How long will these jars of soup last?
Properly canned and stored in a cool, dark place, they’ll last at least a year, though many people report good quality for up to two years. After that, they’re still safe but might lose some flavor and texture. But let’s be real – soup this good isn’t sitting around that long.
Can I freeze this instead of canning it?
Absolutely! Freezing is way less fussy than canning. Just cool the soup completely, portion into freezer containers leaving room for expansion, and freeze for up to 3 months. The potatoes might get a bit weird texturally, but that’s life, folks.
Is it safe to add dairy products to this soup before canning?
Nope, nope, triple nope. Dairy and canning are mortal enemies. Add cream, milk, or cheese after opening and heating the soup. Your stomach lining will thank you.
Do I really need a pressure canner? My grandma used to water bath everything…
Yes, you absolutely do. Your grandma either had amazing luck or secretly had a pressure canner you didn’t notice. Low-acid foods (like everything in this soup) need the higher temperatures only pressure canning can achieve to kill potential botulism spores. And botulism is not a fun party guest.
How do I serve this once I open a jar?
Heat it up, obviously! But for extra credit, add a handful of cooked pasta or rice, a sprinkle of fresh herbs, or a dollop of sour cream. Serve with crusty bread for dipping and pretend you slaved over it all day.
Can I double this recipe?
You can, but you’ll need a pot the size of a small bathtub and a full day. Consider doing two regular batches instead—your sanity is worth it.
What if I hear a jar “pop” while in storage?
That’s the sound of a seal breaking, and it means trouble. Examine the jar, and if the seal is indeed broken, either refrigerate and use within a few days or toss it. When in doubt, throw it out. Food poisoning is a terrible way to save a few bucks.
Final Thoughts
Congrats! You’ve just stockpiled enough homemade soup to survive winter, a zombie apocalypse, or just those nights when cooking feels as appealing as a root canal. There’s something deeply satisfying about seeing those jars lined up on your shelf – it’s like money in the bank, but tastier.
Remember, the real magic of this soup happens on those crazy busy days when you suddenly remember “Hey, I’ve got soup I can just heat up!” Opening a jar of something you made yourself hits different than cracking open store-bought. It’s like getting a high-five from past-you.
So grab a ladle, crack open a jar, and enjoy the fruits (or vegetables) of your labor. Your future hungry self will definitely thank you. Now go forth and can with confidence – you domestic kitchen warrior, you!


