So you’re staring into the fridge, seeing that lone chicken breast, and thinking, “What fresh hell can I *actually* make with this without turning on the oven and sweating through my favorite shirt?” My friend, I’ve been there. And guess what? The air fryer is about to become your new bestie, your culinary co-pilot, your… well, you get the idea. Forget bland, dry chicken. We’re about to make some magic!
Why This Recipe is Awesome
Let’s be real, life’s too short for complicated recipes unless there’s a serious payoff (like a five-layer chocolate cake, obviously). This air fryer chicken breast? It’s the ultimate easy button. It’s:
- Ridiculously Quick: From fridge to face in under 20 minutes. No joke.
- Stupid Simple: Seriously, if you can press a button, you can nail this. It’s so foolproof, even I didn’t mess it up.
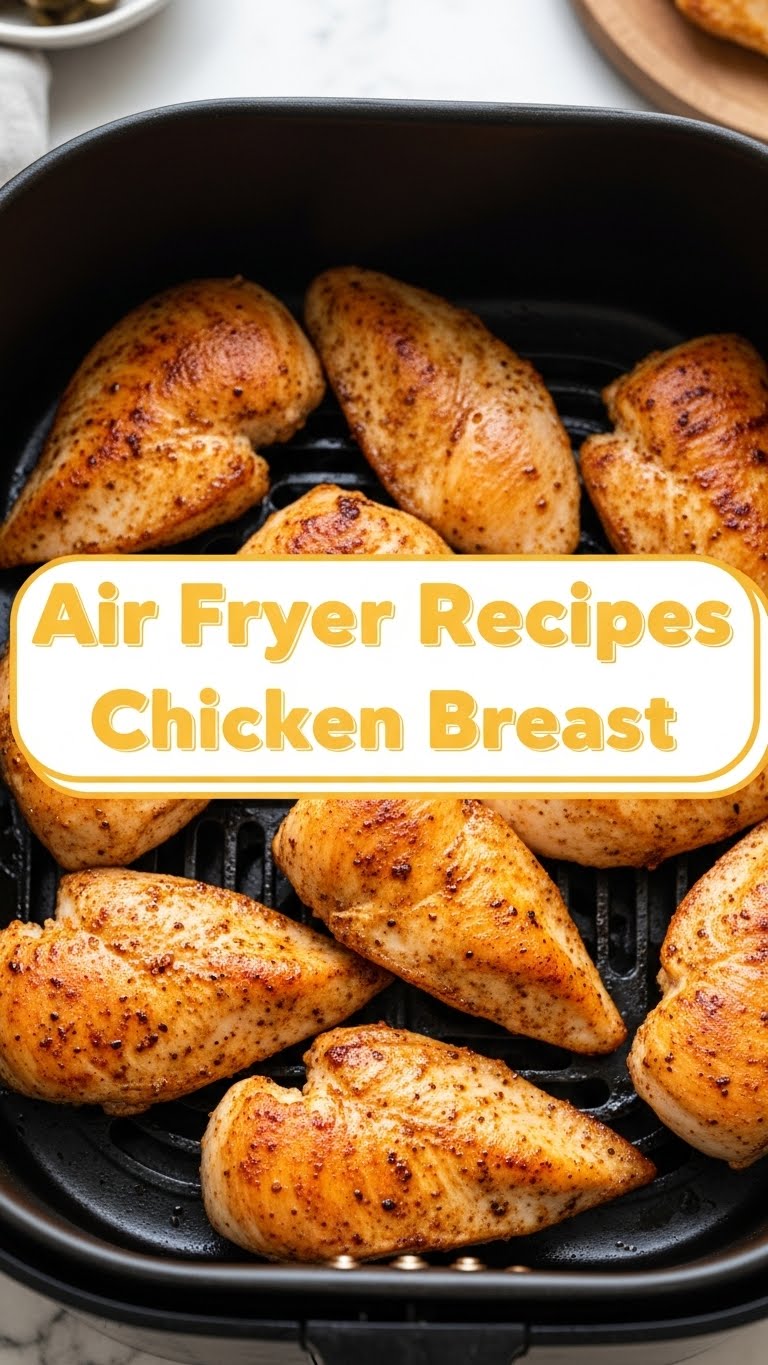
- Perfectly Juicy & Tender: Say goodbye to hockey puck chicken. The air fryer works some kind of sorcery to keep it moist on the inside with a lovely kiss of crispness on the outside.
- Minimal Cleanup: One air fryer basket. Done. Your dishwasher will thank you.
- A Blank Canvas: This isn’t just a recipe; it’s a foundation! Use it in salads, sandwiches, pasta, tacos—the possibilities are endless.
Ingredients You’ll Need
No fancy, obscure stuff here. Just the good ol’ basics you probably already have lurking in your pantry.
- 1-2 Boneless, Skinless Chicken Breasts: The star of our show. Aim for similar thickness for even cooking.
- 1 Tablespoon Olive Oil: Your greasy little helper, helps the spices stick and keeps things moist.
- ½ teaspoon Salt: The OG flavor enhancer. Don’t skimp!
- ¼ teaspoon Black Pepper: Salt’s trusty sidekick.
- 1 teaspoon Garlic Powder: Because garlic makes everything better, fight me.
- ½ teaspoon Paprika: For that “I tried” color and a hint of smoky goodness. (Smoked paprika if you’re feeling fancy!)
- Optional Spice Upgrades: A pinch of onion powder, chili powder, dried oregano, or a dash of cayenne if you like a little kick. Get creative!
Step-by-Step Instructions
Alright, apron on (or not, we’re friends here), let’s get cooking!
- Prep Your Protein: First things first, pat those chicken breasts dry with a paper towel. This is crucial for getting that nice exterior. If your chicken breasts are super thick, consider slicing them in half horizontally to create two thinner cutlets, or gently pounding them to an even thickness (about ¾ inch). This helps them cook faster and more evenly.
- Seasoning Time: Drizzle the chicken with olive oil and rub it all over. Now, sprinkle generously with salt, pepper, garlic powder, and paprika (plus any other spices you’re feeling). Get in there, give it some love, make sure every inch is covered.
- Preheat Your Magic Box: Preheat your air fryer to 375°F (190°C) for about 5 minutes. **Seriously, don’t skip this step!** It’s like warming up before a workout, just for your food. It ensures even cooking and that lovely golden crust.
- Air Fryer Tetris: Place the seasoned chicken breasts in a single layer in the air fryer basket. **Don’t overcrowd it,** unless you want steamed chicken, which is NOT what we’re going for. Air needs to circulate for that crispy goodness. Cook in batches if needed.
- Cook ‘Em Up: Air fry for 10-15 minutes, flipping the chicken halfway through. Cooking time will vary depending on the thickness of your chicken. Thinner cutlets might be done in 8-10, thicker ones closer to 15-18.
- Check for Doneness: The internal temperature should be 165°F (74°C). Use a meat thermometer, because nobody wants dry chicken OR raw chicken. Nobody. Pull it out as soon as it hits temp.
- Rest, You Deserve It (And So Does the Chicken): Transfer your perfectly cooked chicken to a cutting board, tent it loosely with foil, and let it rest for 5 minutes. This locks in all those beautiful juices, making your chicken super tender. Patience, grasshopper!
Common Mistakes to Avoid
Even the pros make mistakes, but we can minimize them, right?
- No Preheat, No Party: Thinking you don’t need to preheat the air fryer—rookie mistake. It’s like baking cookies in a cold oven; results will be sad and uneven.
- Overcrowding the Basket: Your chicken needs personal space to get crispy and cook evenly. If you stuff the basket, you’re essentially steaming it, not air frying.
- Eyeballing Doneness: Guessing if chicken is done is a recipe for either shoe leather or food poisoning. Invest in an instant-read meat thermometer. **FYI**, it’s your best friend in the kitchen.
- Skipping the Rest: Cutting into the chicken right away lets all those precious juices escape, leaving you with dry meat. Give it a few minutes to chill.
- Forgetting to Pat Dry: Moisture is the enemy of crispiness. Always, always pat your chicken dry before seasoning!
Alternatives & Substitutions
Feeling adventurous or just out of paprika? No problem!
- Spice Blends: Don’t want to measure out individual spices? Grab your favorite pre-made seasoning blend! Cajun, lemon-pepper, BBQ rub, taco seasoning—they all work wonders. Just adjust the salt, as some blends are quite salty.
- Different Oils: Avocado oil, grapeseed oil, or even a spritz of cooking spray can totally stand in for olive oil. Just avoid oils with a super low smoke point.
- Thighs vs. Breasts: Air fryer chicken thighs are also glorious and often come out even juicier. Just adjust the cooking time—they usually need a few more minutes, and their safe internal temp is 175°F (80°C). **IMO**, thighs are a bit more forgiving.
- Marinades: Instead of a dry rub, you can totally marinate your chicken breasts for an hour or two (or overnight!). Just pat off excess marinade before air frying to avoid steaming.
FAQ (Frequently Asked Questions)
Got questions? I’ve got (casual and hopefully helpful) answers!
- Do I *really* need to preheat my air fryer? Yes, friend, you really do. It helps things cook evenly and get that lovely golden crust. Think of it as setting the stage for culinary success!
- My chicken looks dry, what did I do wrong? You probably overcooked it, boo! Or didn’t let it rest. **Internal temperature is key!** Pull it out right at 165°F and let it chill.
- Can I use frozen chicken breast? You *can*, but it’s not ideal. Thaw it first for the best results, even cooking, and food safety. Frozen chicken will cook unevenly and take much longer, usually resulting in a less-than-stellar texture.
- How long does air fryer chicken last in the fridge? About 3-4 days in an airtight container. Perfect for meal prep, right?
- Can I make a whole batch for meal prep? Absolutely! Cook a few at a time, then slice ’em up for salads, sandwiches, wraps, or just to snack on. It’s a meal prep dream come true!
- Can I add a sauce? Oh, heck yes! After the chicken is cooked and rested, drizzle it with your favorite BBQ sauce, buffalo sauce, a squeeze of lemon juice, or even a quick homemade herb sauce.
Final Thoughts
See? That wasn’t so hard, was it? You just conquered the chicken breast, the air fryer way. You’ve unlocked a super-speedy, super-tasty weeknight dinner solution. Go on, pat yourself on the back. You’re basically a culinary wizard now! Now go impress someone—or yourself—with your new culinary skills. You’ve earned it! And remember, cooking should be fun, not a chore. Happy air frying!