So you’re craving something crispy, satisfying, but *also* don’t feel like turning your kitchen into a deep-fryer disaster zone, huh? And you’re definitely not trying to spend all day slaving over a hot stove when there’s binge-watching to be done. My friend, you’ve come to the right place. We’re about to make Air Fryer Panko Chicken Breast, and it’s going to be glorious. Think crispy, juicy, and ridiculously easy. No fuss, maximum deliciousness. Let’s get this party started!
Why This Recipe is Awesome
Okay, let’s be real. This isn’t just *another* chicken recipe. This is **THE** chicken recipe for when you want to feel like a gourmet chef without, you know, actually being one. Why is it awesome? Let me count the ways:
- It’s ridiculously **fast**. We’re talking weeknight dinner hero material.
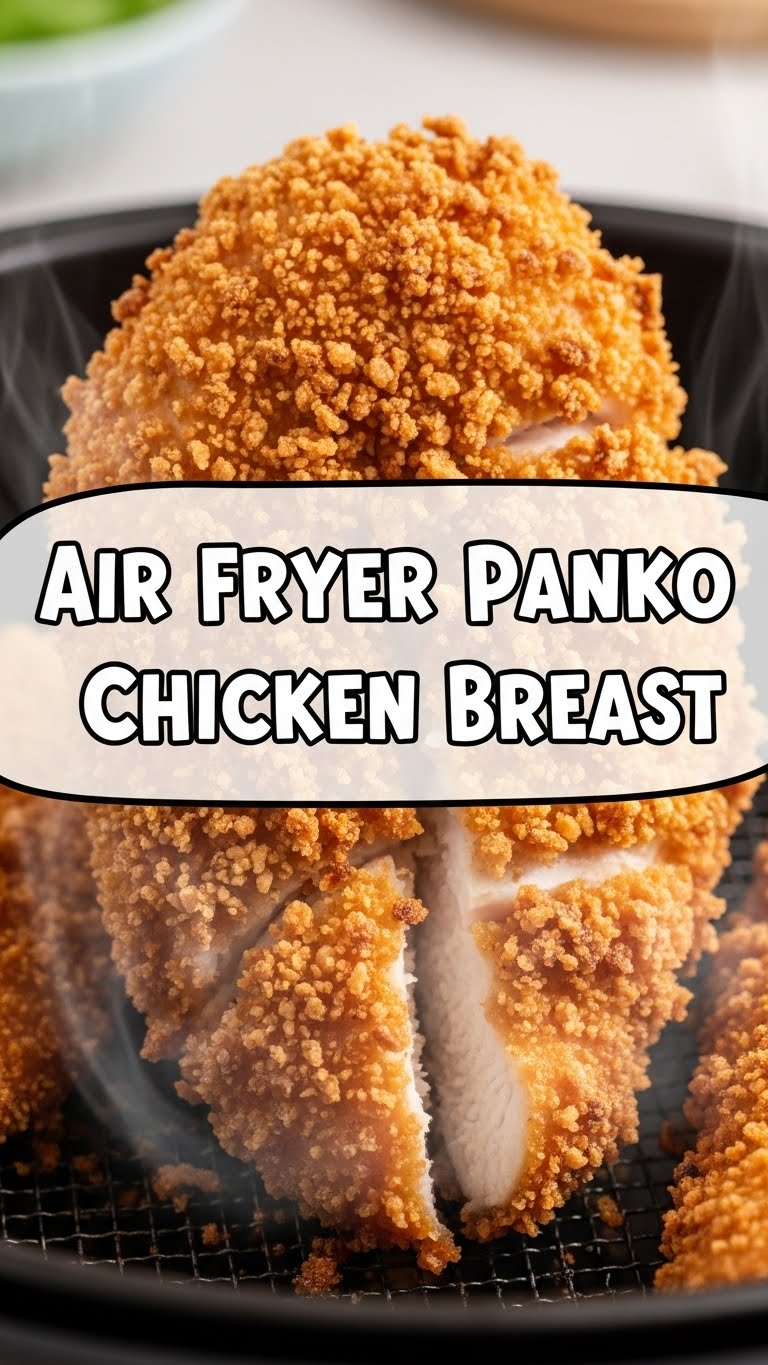
- **Crispy AF.** Thanks to the Panko and the magic of the air fryer, you’re getting that satisfying crunch without all the oil.
- **Minimal cleanup.** Seriously, a few bowls and your air fryer basket. Your dishwashing future self will thank you.
- It’s practically **idiot-proof.** If I can make it without setting off the smoke alarm (a rare feat, believe me), you absolutely can too.
- **Healthy-ish.** It’s chicken breast, not deep-fried. So you can totally justify that extra scoop of mashed potatoes. You’re welcome.
Ingredients You’ll Need
Gather your troops, folks! These are the simple heroes of our culinary adventure:
- **2 Boneless, Skinless Chicken Breasts:** The star of our show. Aim for similar sizes for even cooking, unless you enjoy some chicken more cooked than others (no judgment).
- **1/2 cup All-Purpose Flour:** Or whatever flour you have lurking in your pantry. It’s our trusty base coat.
- **1 Large Egg:** Whisked. This is our sticky glue that makes the Panko adhere like it’s in a committed relationship.
- **1 cup Panko Breadcrumbs:** **Don’t skimp on the Panko!** Regular breadcrumbs just don’t give you that same next-level crunch. It’s like comparing a regular hug to a super squishy, heartwarming hug.
- **1 teaspoon Garlic Powder:** Because garlic makes everything better. It’s science.
- **1/2 teaspoon Onion Powder:** Garlic’s best friend. They work wonders together.
- **1/2 teaspoon Paprika:** For a little color and a hint of smoky sweetness. Fancy, right?
- **Salt and Black Pepper to taste:** The non-negotiables. Season generously!
- **Olive Oil Spray (or other cooking spray):** Crucial for that golden crisp, without drowning it in oil.
Step-by-Step Instructions
Alright, apron on (or just wear a shirt you don’t mind getting messy, IMO), let’s do this!
- **Prep the Chicken:** Pat your chicken breasts super dry with paper towels. This helps the coating stick. If they’re really thick, slice them horizontally to make two thinner cutlets, or gently pound them to an even 3/4-inch thickness. Thin chicken cooks faster and more evenly!
- **Set Up Your Dredging Station:** Grab three shallow bowls. In the first, put the flour. In the second, whisk the egg. In the third, mix the Panko, garlic powder, onion powder, paprika, salt, and pepper. This is your assembly line to crispy heaven.
- **Coat the Chicken:** Take one chicken breast. First, dredge it in the flour, shaking off any excess. Then dip it into the whisked egg, letting extra drip off. Finally, press it firmly into the Panko mixture, making sure it’s **fully coated** on all sides. Repeat with the second chicken breast.
- **Preheat Your Air Fryer:** Set your air fryer to 375°F (190°C) and let it preheat for 3-5 minutes. **Don’t skip this step!** A hot air fryer means instant crisping.
- **Air Fry Time!** Lightly spray the bottom of your air fryer basket with olive oil spray. Carefully place the coated chicken breasts in a **single layer**, making sure they aren’t touching. You might need to cook them in batches if your air fryer is smaller. Lightly spray the tops of the chicken breasts with oil too.
- **Flip and Finish:** Cook for 8-10 minutes, then **flip the chicken** and spray the other side. Cook for another 5-8 minutes, or until the chicken is golden brown, crispy, and cooked through to an internal temperature of 165°F (74°C).
- **Rest and Serve:** Let the chicken rest for a couple of minutes before slicing or serving. This locks in all those delicious juices. Enjoy your masterpiece!
Common Mistakes to Avoid
We’ve all been there, staring at a culinary mishap. Learn from my past errors, dear friend:
- **Not Preheating the Air Fryer:** Rookie mistake! This leads to sad, soggy coating instead of glorious crispness. Treat your air fryer like a tiny oven—it needs to get hot.
- **Overcrowding the Basket:** I get it, you’re hungry. But cramming too many pieces in means uneven cooking and steaming instead of frying. **Air needs to circulate**, people! Cook in batches if you must.
- **Forgetting to Spray with Oil:** That light mist of oil is key for that beautiful golden-brown color and extra crunch. Don’t be shy with the spray.
- **Not Pounding/Slicing Thick Chicken:** If your chicken is super thick, the outside will burn before the inside cooks. Unless you like charcoal-y exteriors and raw centers, size matters here.
- **Using Wet Chicken:** Pat it dry! Seriously, a wet surface is the enemy of a good coating. Your Panko will just slide right off.
Alternatives & Substitutions
Feeling adventurous? Or just missing an ingredient? No stress, we’ve got options:
- **No Panko?** You *can* use regular breadcrumbs, but I’m warning you, it won’t be quite as crispy. It’s like going from HD to standard definition. Still watchable, just… different.
- **Spice It Up:** Add a pinch of cayenne pepper or chili powder to your Panko mix for a little kick. Or go full Italian with dried oregano, basil, and a touch of Parmesan.
- **Gluten-Free Option:** Use gluten-free flour and gluten-free Panko breadcrumbs. The method remains the same, and it’s equally delicious!
- **Other Proteins:** This method works wonderfully for pork cutlets or even firm tofu slices. Just adjust cooking times accordingly.
- **Marinade Magic:** For extra flavor and tenderness, marinate your chicken for 30 minutes (or up to a few hours) in a bit of buttermilk or a lemon-herb mixture before dredging. Just make sure to pat it very dry afterward!
FAQ (Frequently Asked Questions)
Got questions? I’ve got answers, delivered with a side of sass.
- **Can I use chicken thighs instead of breasts?** Absolutely! Thighs are generally more forgiving and flavorful. Just adjust the cooking time—they might need an extra 5-7 minutes.
- **How do I know when the chicken is cooked through?** The easiest way? A meat thermometer! It should read 165°F (74°C) at the thickest part. Or, if you’re living dangerously, cut into it—no pink allowed!
- **My coating isn’t sticking. What gives?** Did you pat the chicken dry? Did you press the Panko on firmly? These are critical steps. Think of it as a crucial bonding moment for your chicken and its crunchy jacket.
- **Can I make this ahead of time?** You *can*, but for optimal crispiness, I highly recommend cooking it fresh. Reheating might make it a little less crunchy, though a quick zap in the air fryer can revive some of its former glory.
- **What if I don’t have an air fryer?** Gasp! Just kidding (mostly). You can bake it in a conventional oven at 400°F (200°C) for 20-25 minutes, flipping halfway. It’ll still be good, but that air fryer crisp is hard to beat!
- **Can I use frozen chicken?** Thaw it completely first! Trying to bread and air fry frozen chicken is a recipe for disaster and uneven cooking. Patience, young padawan.
Final Thoughts
See? I told you it was easy! You just whipped up a restaurant-worthy meal in your air fryer, and probably barely broke a sweat. Now go impress someone—or just yourself, honestly, that’s what truly matters—with your new culinary skills. You’ve earned it! Grab a plate, maybe a little dipping sauce, and bask in the glory of your crispy, juicy creation. You rock, chef!