So, you’re staring into the fridge, pondering dinner, and the idea of “plain chicken breast” makes you want to crawl back into bed? Been there, done that, bought the T-shirt. But what if I told you there’s a ridiculously simple trick to transform those bland birds into something moist, flavorful, and genuinely exciting? Enter: pickle brined chicken breast. Yeah, you heard me. It’s time to put that leftover pickle juice to work!
Why This Recipe is Awesome
Let’s be real, who needs complicated? This recipe is the culinary equivalent of finding a twenty in your old jeans. It’s **idiot-proof**, I swear. I’ve messed up boiling water, and even *I* managed to nail this. The pickle brine acts like a magic tenderizer and flavor infuser, turning what could be a dry, sad piece of poultry into a juicy, tangy masterpiece.
Think of it as your secret weapon against boring weeknight dinners. Plus, it’s a fantastic way to **reduce food waste** by using up that glorious pickle juice. You’re basically a kitchen superhero, saving chicken and the planet, one brine at a time. High fives all around!
Ingredients You’ll Need
- Boneless, Skinless Chicken Breasts: 2-4 of ’em. The stars of our show. Don’t get the tiny, shriveled ones; aim for something respectable.
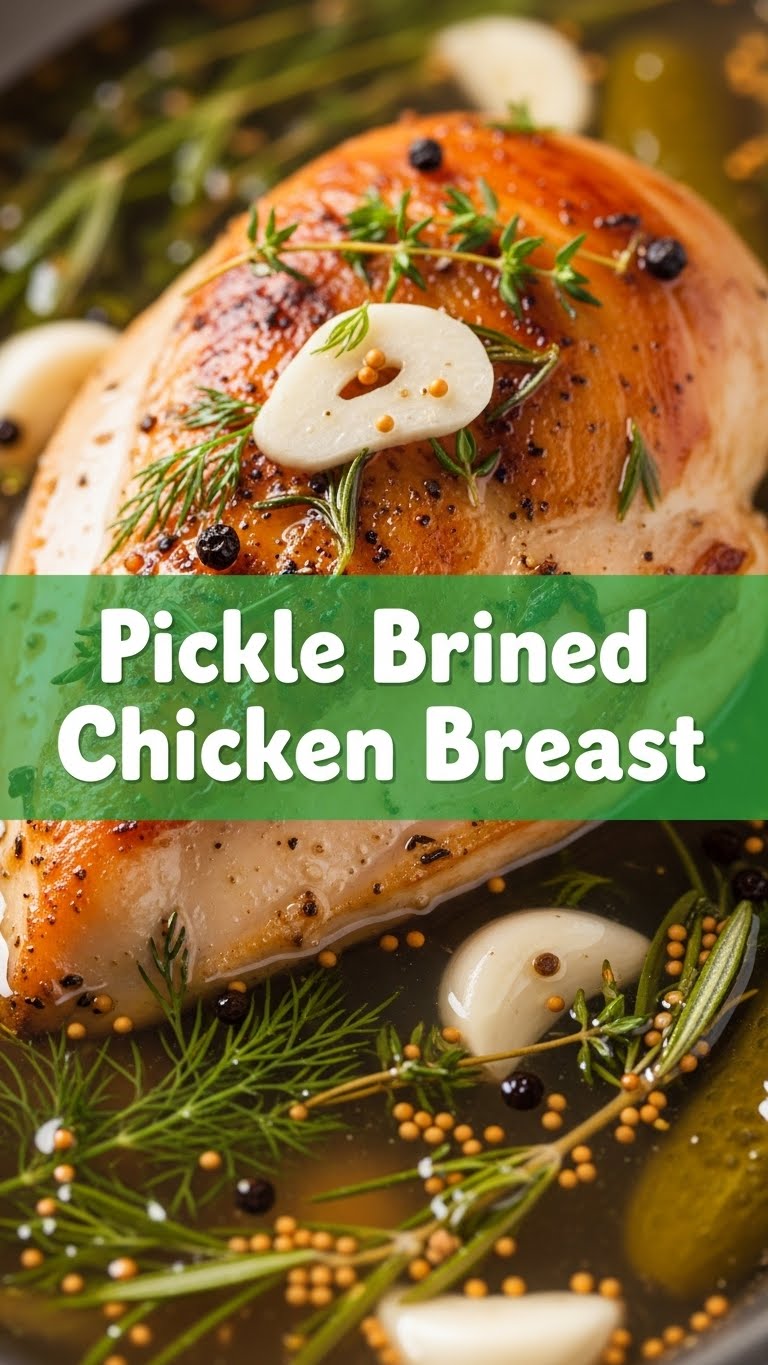
- Pickle Brine: About 2 cups, or enough to fully submerge your chicken. This is the MVP, the unsung hero, the reason we’re all here. **Dill pickle brine works best**, IMO!
- Olive Oil: A tablespoon or two. For that perfect sear, baby!
- Salt & Freshly Ground Black Pepper: To taste. Even with the brine, a little extra seasoning on the outside makes a difference.
- Optional Seasonings: Garlic powder, paprika, onion powder, a pinch of cayenne if you’re feeling spicy. Go wild, or keep it simple. Your kitchen, your rules.
Step-by-Step Instructions
- Brine Those Birds: Grab a bowl or a resealable bag. Place your chicken breasts inside and pour enough pickle brine over them to completely submerge. Cover and pop it in the fridge. **Aim for 2-4 hours of brining.** You can go up to 8 hours for maximum flavor, but don’t go much longer, or your chicken might get too salty/mushy.
- Get Ready to Cook: When you’re ready to cook, preheat your oven to **400°F (200°C)**. While it’s heating, take your brined chicken out of the fridge and drain off all that delicious brine.
- Pat ‘Em Dry: This step is crucial, my friend. Use paper towels to **pat the chicken breasts thoroughly dry**. Like, super dry. This helps create that gorgeous, crispy sear we all crave.
- Season It Up: Drizzle the chicken with a little olive oil, then sprinkle generously with salt, pepper, and any other optional seasonings you’re using. Rub it in. Give it some love.
- Sear for Sizzle: Heat an oven-safe skillet (cast iron is amazing here!) over medium-high heat with a tablespoon of olive oil until it’s shimmering. Place the seasoned chicken breasts in the hot skillet and **sear for 2-3 minutes per side**, until golden brown. We’re building flavor here, not cooking them all the way through yet!
- Finish in the Oven: Transfer the skillet to your preheated oven. Let them roast for **10-15 minutes**, depending on thickness, or until an internal temperature of **165°F (74°C)** is reached. Use a meat thermometer, seriously, it’s a game-changer.
- Rest and Relish: Remove the skillet from the oven. Don’t be a monster and cut into them right away! Let the chicken **rest on a cutting board for 5-10 minutes** before slicing. This allows the juices to redistribute, ensuring every bite is moist and tender.
Common Mistakes to Avoid
- Not Brining Long Enough (or Too Long): Rushing the brine means less flavor and tenderness. But over-brining can make your chicken overly salty or give it a weird texture. Stick to that 2-8 hour sweet spot!
- Skipping the “Pat Dry” Step: Seriously, don’t. Wet chicken = no sear. No sear = sad chicken. **Dry chicken is happy chicken!**
- Overcooking the Chicken: This is the cardinal sin of chicken cookery. Dry chicken is universally despised. Invest in a good meat thermometer; it takes out all the guesswork.
- Forgetting to Rest: Patience, young padawan! Cutting into hot chicken immediately lets all those glorious juices run out. Let it chill for a few minutes; it’ll be worth it.
Alternatives & Substitutions
Feeling adventurous? Here are some ways to switch things up:
- Chicken Thighs: Absolutely! Chicken thighs are more forgiving and equally delicious with this brining method. Just adjust cooking time slightly (they might need a few more minutes).
- Other Brines: While dill pickle brine is king, you could try bread and butter pickle brine for a sweeter tang, or even a spicy pickle brine if you like a kick. Experimentation is fun!
- Different Cooking Methods: No oven? No problem! After brining and searing, you can finish the chicken entirely on the stovetop over medium-low heat with a lid, flipping occasionally until cooked through. Or, if it’s grilling season, go ahead and grill those brined beauties!
- Spice Blends: Don’t limit yourself to just salt and pepper. A smoky paprika, a hint of cumin, or an Italian herb blend can all add fantastic layers of flavor.
FAQ (Frequently Asked Questions)
Can I reuse the pickle brine? Absolutely not, my friend. Once raw chicken has been in it, it’s a one-and-done deal for food safety reasons. Don’t be that person. Trash it!
Will my chicken taste *too* much like pickles? Surprisingly, no! The brine infuses a lovely tang and keeps the chicken super moist, but it’s more of a background note than an overpowering pickle attack. It’s subtle, in a good way.
What if I don’t have enough pickle brine? If you’re a cup or so short, you can top it off with water and add a tablespoon of salt and a splash of vinegar. It won’t be *quite* the same, but it’ll do in a pinch.
Can I freeze brined chicken? You totally can! After brining and before cooking, pat them dry, then wrap them individually and freeze. Just thaw them completely before cooking.
Is this recipe healthy? FYI, it’s definitely a lean protein powerhouse! Since you’re not breading or deep-frying, it’s a much healthier option than many other chicken preparations. So, yeah, you can feel good about this one.
What should I serve with it? Roasted veggies, a simple salad, some mashed potatoes, or even on top of a grain bowl. It’s super versatile!
Final Thoughts
Boom! You just leveled up your chicken game without breaking a sweat. See? I told you it was easy. This pickle-brined chicken breast is seriously a keeper, and your taste buds (and your friends, if you decide to share) will thank you. Now go forth and conquer your dinner with confidence. You’ve earned those bragging rights!