So you’re craving something tasty but too lazy to spend forever in the kitchen, huh? Same, friend, same. We’ve all been there: staring into the abyss of an empty fridge, knowing you *should* cook, but also knowing your couch and Netflix are calling. Good news! I’ve got a recipe that’s about to make you feel like a culinary wizard with minimal effort. Meet your new weeknight hero: Instant Pot Honey Garlic Chicken Breast!
Why This Recipe is Awesome
Okay, let’s be real. This isn’t just *another* chicken recipe. This is ‘I want to eat something delicious without breaking a sweat or dirtying every single pan I own’ level of awesome. It’s so idiot-proof, even I didn’t mess it up, and my track record with complicated recipes is… well, let’s just say ‘colorful.’ It’s fast, flavorful, and uses that fancy kitchen gadget you probably bought during a Prime Day sale and now mostly use for making hard-boiled eggs. Plus, honey garlic? It’s like a flavor hug for your taste buds. You’re welcome.
Ingredients You’ll Need
- Chicken breasts: About 1.5 lbs, boneless, skinless. The healthier canvas for our masterpiece.
- Soy Sauce: 1/2 cup. The umami MVP. Don’t skip it unless you’re truly adventurous (and maybe a little wild).
- Honey: 1/4 cup. The sweet talker. Makes everything better, obviously.
- Garlic: 4-5 cloves, minced. More is more, IMO. Don’t be shy; garlic is your friend.
- Rice Vinegar: 2 tbsp. Adds that little zing and cuts through the sweetness like a tiny, tangy superhero.
- Sesame Oil: 1 tsp. Just a hint for that authentic, nutty vibe.
- Cornstarch: 1 tbsp + 2 tbsp water (for a slurry). Our secret thickening agent for that perfect sauce.
- Water or Chicken Broth: 1/2 cup. Helps the Instant Pot do its magic and keep things from burning.
- Optional Garnish: Sesame seeds, chopped green onions. For when you’re feeling fancy and want to impress your cat.
Step-by-Step Instructions
- Prep Time! First things first, pat your chicken breasts dry. This helps them get a better sear (if you choose to sear, which is highly recommended for extra flavor, but not strictly necessary for success).
- Sauce It Up. In a bowl, whisk together the soy sauce, honey, minced garlic, rice vinegar, sesame oil, and water (or broth). Set aside about a quarter cup of this magic potion for later.
- Chicken In. Place your chicken breasts directly into the Instant Pot. Pour the majority of your honey garlic sauce over the chicken, making sure it’s nicely coated.
- Seal the Deal. Close the Instant Pot lid, turn the vent to the “Sealing” position. Set it to Manual/Pressure Cook for 8-10 minutes (8 for thinner breasts, 10 for thicker ones).
- Release the Pressure. Once cooking is complete, do a Natural Pressure Release (NPR) for 5 minutes, then manually quick release the remaining pressure. Careful of the steam!
- Sauce Thickening Magic. Remove the cooked chicken and set it aside to rest (or shred it, if that’s your vibe). Turn the Instant Pot to the “Sauté” setting. In a small separate bowl, whisk together the cornstarch and 2 tablespoons of cold water to form a slurry.
- Whisk Away! Pour the slurry into the bubbling sauce in the Instant Pot, whisking constantly until it thickens to your desired consistency. Add that reserved sauce from Step 2 now if you want an extra flavor boost!
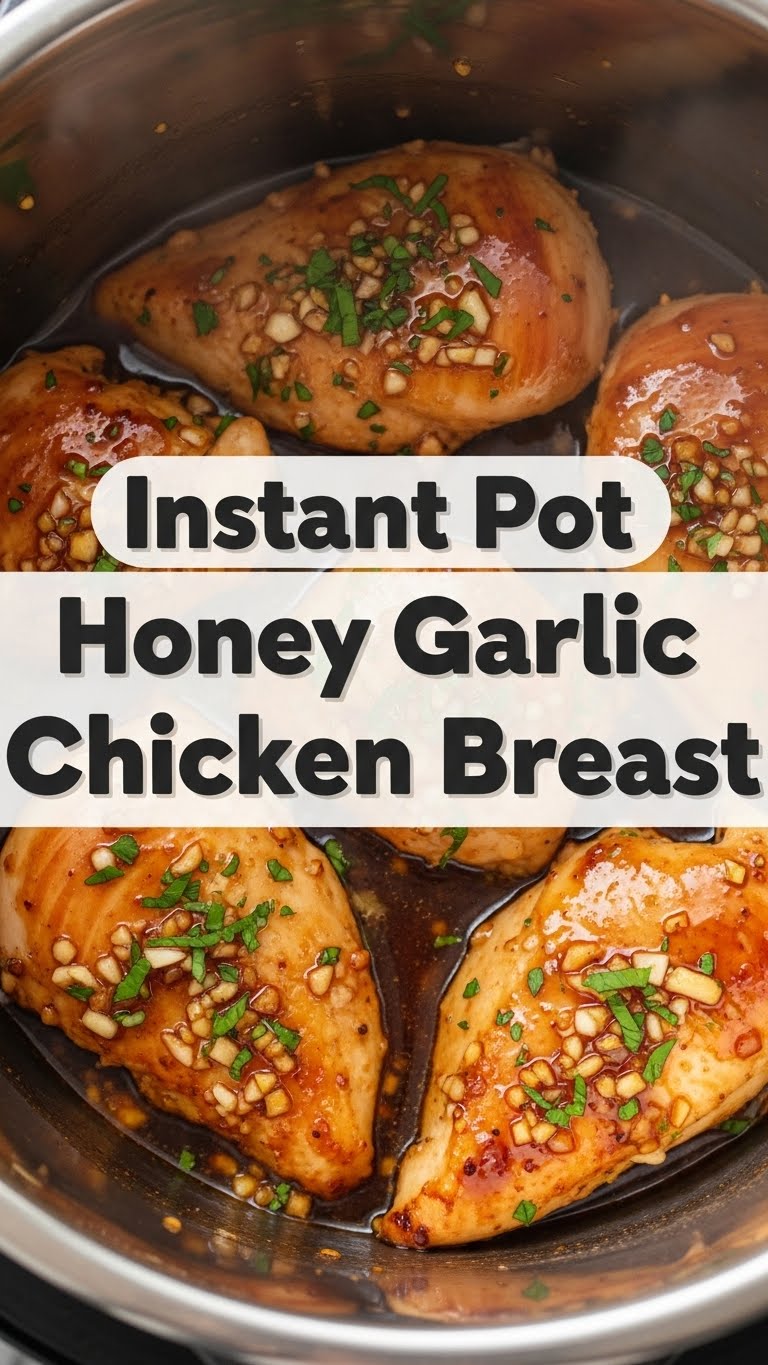
- Serve it Up! Slice or shred your chicken, add it back to the thickened sauce, or pour the sauce generously over the chicken. Garnish with sesame seeds and green onions if you’re feeling extra. Serve over rice, noodles, or with a side of veggies. Boom! Dinner is served.
Common Mistakes to Avoid
- Forgetting to Seal the Vent: Seriously, we’ve all done it. You’ll just have angry steam escaping and uncooked chicken. Double-check that “Sealing” position, my friend.
- Overcooking the Chicken: Instant Pots are powerful. Don’t go past 10 minutes for chicken breasts, even if they’re thick. Dry chicken is sad chicken.
- Skipping the Cornstarch Slurry: If you just dump cornstarch directly into hot liquid, you’ll get lumps. Lumps are not delicious. Always mix it with cold water first.
- Using Too Little Garlic: Is there such a thing? 😉 Just make sure you’re using fresh garlic for the best flavor; the pre-minced stuff in a jar is okay, but fresh is king.
- Not Resting the Chicken: Even a few minutes of rest allows the juices to redistribute, leading to much more tender chicken. Patience, young padawan!
Alternatives & Substitutions
- Chicken Thighs: If you’re team dark meat, go for boneless, skinless chicken thighs! They’re usually more forgiving if you accidentally overcook them slightly. Cook for about 10-12 minutes with a 5-minute NPR.
- Sweetness Swap: No honey? Maple syrup or brown sugar can totally step in, but the flavor profile will shift slightly. Still delicious, just a different vibe.
- Spice it Up: Want a kick? Add a pinch of red pepper flakes to the sauce. Sriracha works too!
- Gluten-Free: Super easy! Just swap the soy sauce for tamari or a gluten-free soy sauce alternative.
- Veggie Boost: Throw in some broccoli florets or sliced bell peppers during the last minute or two of sautéing the sauce, or steam them separately and add them at the end.
FAQ (Frequently Asked Questions)
- “Can I use frozen chicken breasts?” You betcha! Just add a few extra minutes to the cooking time (usually 12-15 minutes instead of 8-10), and make sure the breasts aren’t completely frozen together. You might also want to do a full NPR to ensure they cook through.
- “My sauce isn’t thickening. What gives?” Did you make a slurry? Did you let it simmer on Sauté for a few minutes? Sometimes it just needs a little more heat and time to work its magic. If it’s still too thin after a couple of minutes, add another small cornstarch slurry.
- “Is this recipe kid-friendly?” Absolutely! The honey garlic flavor is generally a big hit with the little ones. If they’re sensitive to strong flavors, maybe dial back the garlic a tiny bit, but usually, it’s a winner.
- “Can I prepare the sauce ahead of time?” Yes, please do! This is a total meal prep hack. Mix your sauce ingredients and store them in an airtight container in the fridge for up to 3-4 days. Then, it’s just dump and cook.
- “How long does the cooked chicken last in the fridge?” Properly stored in an airtight container, it’s good for about 3-4 days. Perfect for packed lunches or quick dinners!
Final Thoughts
And there you have it, folks! Your new favorite, super-easy, ridiculously delicious Instant Pot Honey Garlic Chicken Breast recipe. Seriously, pat yourself on the back. You just whipped up something amazing with hardly any fuss. Now go impress someone—or yourself—with your new culinary skills. You’ve earned it! Maybe even post a pic; it’s practically social media gold. Happy cooking!