So, you’re staring at that chicken breast again, wondering if it’ll ever be more than ‘just chicken’ or if it’s doomed to a life of blandness? Me too, friend, me too. But fear not, because today we’re turning that humble chicken into a crispy, juicy, breaded masterpiece that’ll make your taste buds do a happy dance. And no, you don’t need a chef’s hat or a culinary degree. Just a can-do attitude and maybe a glass of wine while you cook. Let’s get clucking!
Why This Recipe is Awesome
Okay, let’s be real. This isn’t just a recipe; it’s a game-changer. It’s the culinary equivalent of putting on sweatpants but looking effortlessly chic. Seriously. This isn’t just chicken; it’s crispy, juicy, flavor-packed chicken that’ll have everyone asking for seconds. And yes, you can totally make it. If I can master this without burning down the kitchen, so can you. (Don’t tell my mom I said that.) It’s versatile, relatively quick, and makes your kitchen smell like a fancy bistro without the fancy bistro price tag or awkward small talk.
Ingredients You’ll Need
- Chicken Breasts: Two to four boneless, skinless bad boys. They’re looking a bit lost in your fridge; let’s give them purpose!
- All-Purpose Flour: About half a cup. Your basic kitchen MVP. Don’t worry, we’re not baking a cake (yet).
- Eggs: Two large ones. The glue of our operation. Crack ’em with confidence.
- Breadcrumbs: About a cup. Panko if you’re feeling fancy for extra crunch, but any will do. Your call, boss.
- Parmesan Cheese: Half a cup, grated. Optional, but why *wouldn’t* you? Adds that salty, cheesy ‘oomph’.
- Spices: A teaspoon each of garlic powder, onion powder, and paprika. Plus, salt and freshly ground black pepper to taste. The usual suspects for making bland exciting.
- Cooking Oil: Enough for shallow frying. Olive, vegetable, canola – whatever makes your heart sing (and not smoke too much).
Step-by-Step Instructions
- Pound it Out: Place chicken breasts between two pieces of plastic wrap. Using a mallet (or a heavy pan), pound them to an even half-inch thickness. This ensures even cooking and tenderness. Seriously, aggression therapy right here.
- Set Up Your Dredging Stations: Grab three shallow bowls. In the first, put the flour. In the second, whisk the eggs. In the third, combine the breadcrumbs, grated Parmesan (if using), garlic powder, onion powder, paprika, a good pinch of salt, and pepper. Mix ’em well!
- Season the Chicken: Lightly season both sides of your pounded chicken breasts with a little salt and pepper. Don’t be shy; bland chicken is sad chicken.
- The Coating Process: Take one chicken breast. First, dredge it in the flour, shaking off any excess. Then, dip it into the egg wash, letting any extra drip off. Finally, press it firmly into the breadcrumb mixture, ensuring it’s fully coated. **Press it on firmly!** Repeat with the remaining chicken.
- Heat the Oil: Pour about half an inch of oil into a large skillet over medium-high heat. A drop of water should sizzle nicely when it’s hot enough.
- Fry ‘Em Up: Carefully place the breaded chicken breasts into the hot oil. Don’t overcrowd the pan; cook in batches if needed. Fry for 3-5 minutes per side, until golden brown and cooked through. **Look for that beautiful, crispy, golden-brown crust!**
- Rest and Serve: Transfer the cooked chicken to a plate lined with paper towels to drain any excess oil. Let them chill for a minute or two. Patience, grasshopper.
Common Mistakes to Avoid
- Not Pounding the Chicken Thin Enough: You’ll end up with a hockey puck or, even worse, a raw center. No thanks! Even thickness is key for even cooking.
- Not Seasoning the Breading (or Anything!): Bland chicken is sad chicken. Remember to season the flour, the breadcrumbs, and the chicken itself. Flavor layers, people!
- Overcrowding the Pan: Your chicken will steam instead of crisp. Give them space, they’re introverts. Cook in batches, trust me.
- Heat Too High (or Too Low): Too high, and you’ll burn the outside before the inside cooks. Too low, and your chicken will soak up oil and be greasy. Medium-high is usually just right.
- Flipping Too Soon: Let that crust form, people! Don’t peek every ten seconds. A good crust takes a few minutes.
Alternatives & Substitutions
Feeling adventurous or got dietary quirks? No prob, Bob!
- Gluten-Free Goodness: Swap the all-purpose flour for a GF flour blend and use your favorite gluten-free breadcrumbs. Easy peasy, still crispy!
- Dairy-Free Delight: Just skip the Parmesan. Your chicken will still be fantastic, I promise. Maybe add a pinch more nutritional yeast to the breadcrumbs for a cheesy flavor.
- Spice It Up: Go wild with your seasoning! Italian seasoning, smoked paprika, a pinch of cayenne for a kick, or even some dried herbs like oregano or thyme. Your kitchen, your rules!
- Baking Instead of Frying: For a lighter option, you can bake these beauties. Mist them generously with cooking spray or brush with oil and bake at 400°F (200°C) for 15-20 minutes, flipping halfway, until golden and cooked through. **FYI**, it won’t be *quite* as crispy as pan-frying, but still delish!
- Air Fryer Magic: This is a personal fave! Spray the breaded chicken with oil, then air fry at 375°F (190°C) for 10-15 minutes, flipping halfway, until golden and crispy. Seriously, it’s a revelation.
FAQ (Frequently Asked Questions)
Got questions? I got answers!
- Can I prep these ahead of time? You bet! You can bread the chicken a few hours in advance, then chill them uncovered (or loosely covered with plastic wrap) on a baking sheet in the fridge. This actually helps the breading adhere better.
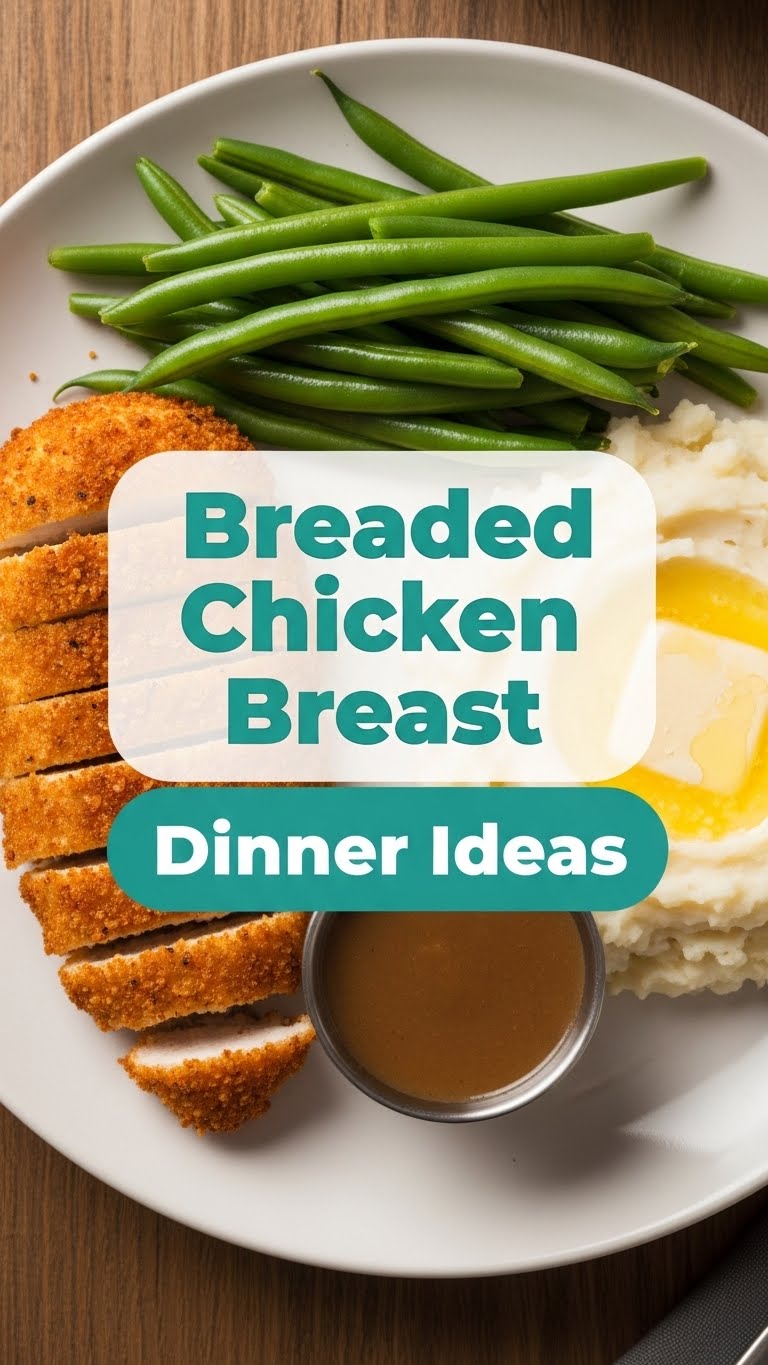
- What do I serve with it? Anything and everything! A simple side salad, creamy mashed potatoes, some buttered pasta, roasted asparagus, or even just some good old French fries. It’s like a blank canvas of deliciousness.
- My breading keeps falling off! What gives? Usually, this means your chicken wasn’t dry enough before the flour, or you didn’t press the breadcrumbs on firmly enough. **Pat that chicken dry before you even think about flour!**
- Can I use chicken thighs instead of breasts? Absolutely! Chicken thighs are generally more forgiving and fattier, which can lead to even juicier results. Just adjust your cooking time as needed.
- How do I know if it’s cooked through? The best way, my friend, is with a meat thermometer. **The internal temperature should reach 165°F (74°C).** No thermometer? The juices should run clear when you cut into the thickest part.
- What about leftovers? They’re great! Reheat them gently in an air fryer or oven (around 350°F/175°C) to regain some crispness. Microwaving makes them sad and a bit rubbery, IMO, but if you’re desperate, go for it.
Final Thoughts
See? I told you it was easy! And now you’ve got a seriously impressive, incredibly delicious meal on your hands that proves chicken doesn’t have to be boring. So go on, bask in the glory of your culinary genius. You’ve earned it! Now go forth and conquer those dinner plans, impress someone (or just yourself), and maybe even take a picture before you devour it all. You’re a rockstar!